Mind the Gap

Bridging the Gap between Wanting to be a Leader and Getting There.
A Practical Guide for Women in Anesthesia.
If you attended the ASA Virtual Meeting presentation on October 3rd, or are watching the recording, here are the recommended readings about Sponsorship, with links to the articles. Each will open in a new window.
- Forbes: How to Turn a Mentor Into a Sponsor
- HBR: A Lack of Sponsorship Is Keeping Women from Advancing into Leadership
- HBR: Sponsors Need to Stop Acting Like Mentors
- HBR: What Men Can Do to Be Better Mentors and Sponsors to Women
- HBR: Women are Over-Mentored (but Under-Sponsored) *podcast episode
- NYT: Mentors Are Good. Sponsors Are Better.
- The Muse: 3 Smart Ways to Upgrade Your Elevator Pitch
- The Muse: The People Who Can Open More Career Doors Than You Ever Thought Possible
Of note, the most useful references on this topic, as well as the others in our SnapTalk presentations, do not come from typical medical references, but from the various business and tech sites that talk about professional development.
I may have periodic updates, but will note which items are new.
Masks, Masks, and More Masks
With the pandemic continuing worldwide, most communities require masks if you’re outside of your home. What are the different types of masks, and which one should you be wearing?
What is the purpose of a mask (or gloves, or cover gowns)? It depends a bit on context. Masks can be used to protect you, or can be used to protect others, or both.
Personal Protective Equipment (PPE) can be rated depending on the context. Are you looking for protection from fire/burns/electrical? Or protection from biohazards? It totally changes what recommendations are made.
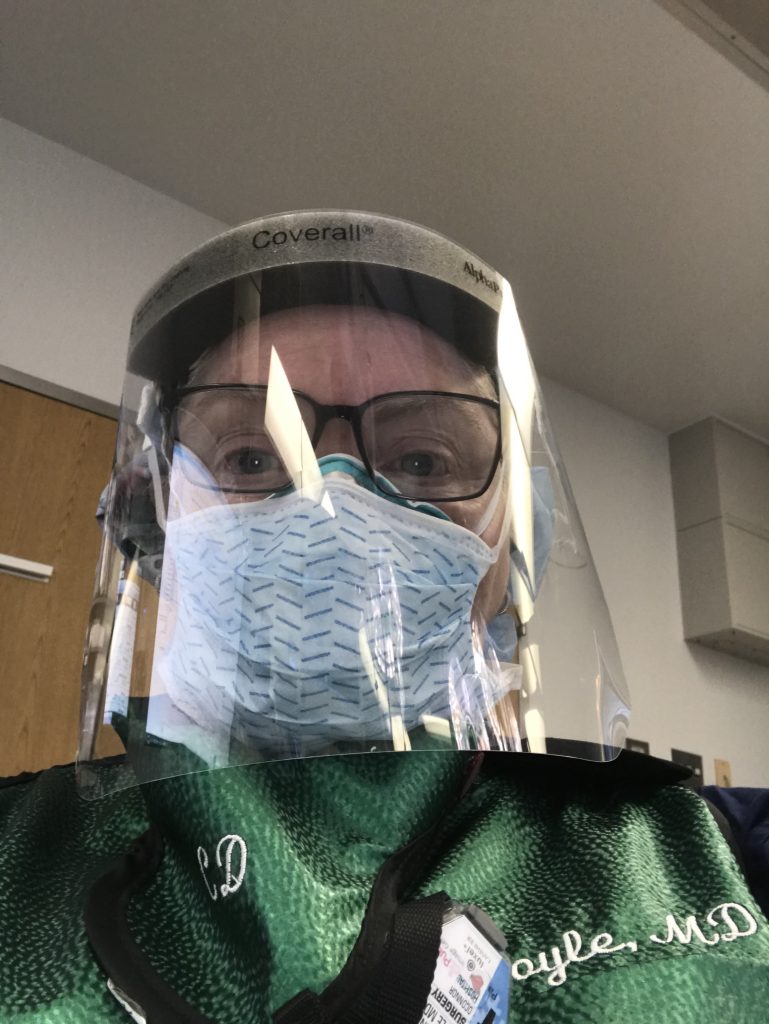
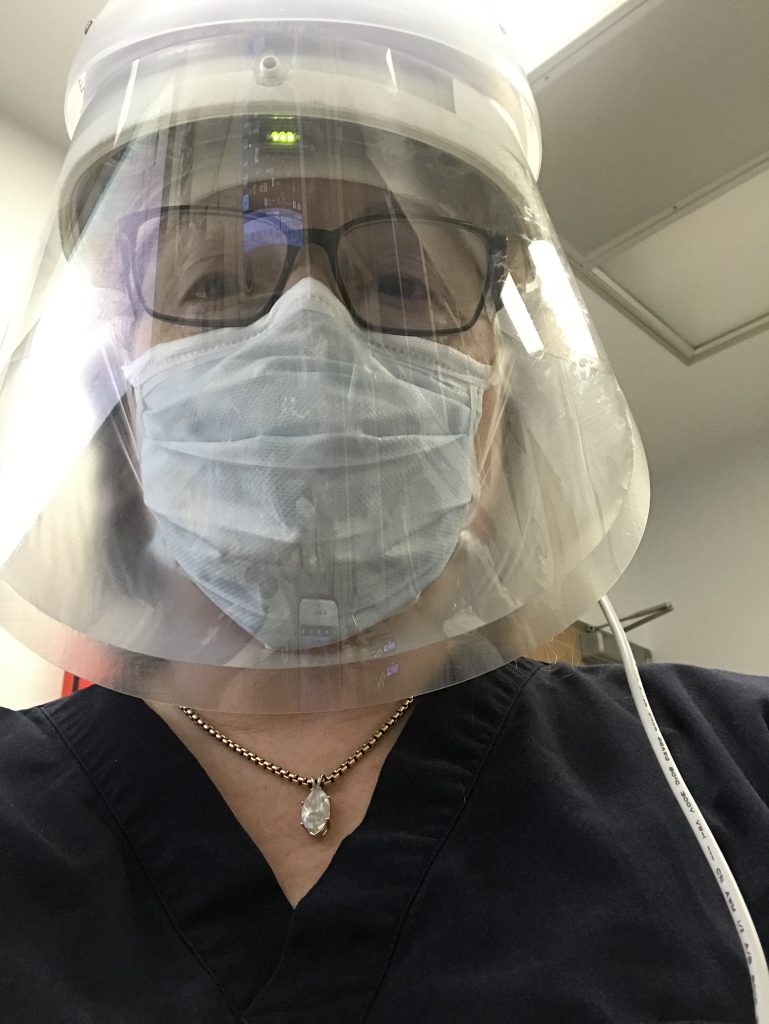
PPE for biohazards typically includes respiratory protection (a variety of masks and respirators), eye protection (goggles and face shields), and skin/hand protection (gloves and gowns).
plus a lead apron for x-ray protection.
Masks also have different levels of protection, based on how fine they are and what can get in (or out). Any mask made of fabric or a paper-type product will freely allow oxygen and carbon dioxide to pass; hard plastic masks like scuba or others require a source of fresh air.
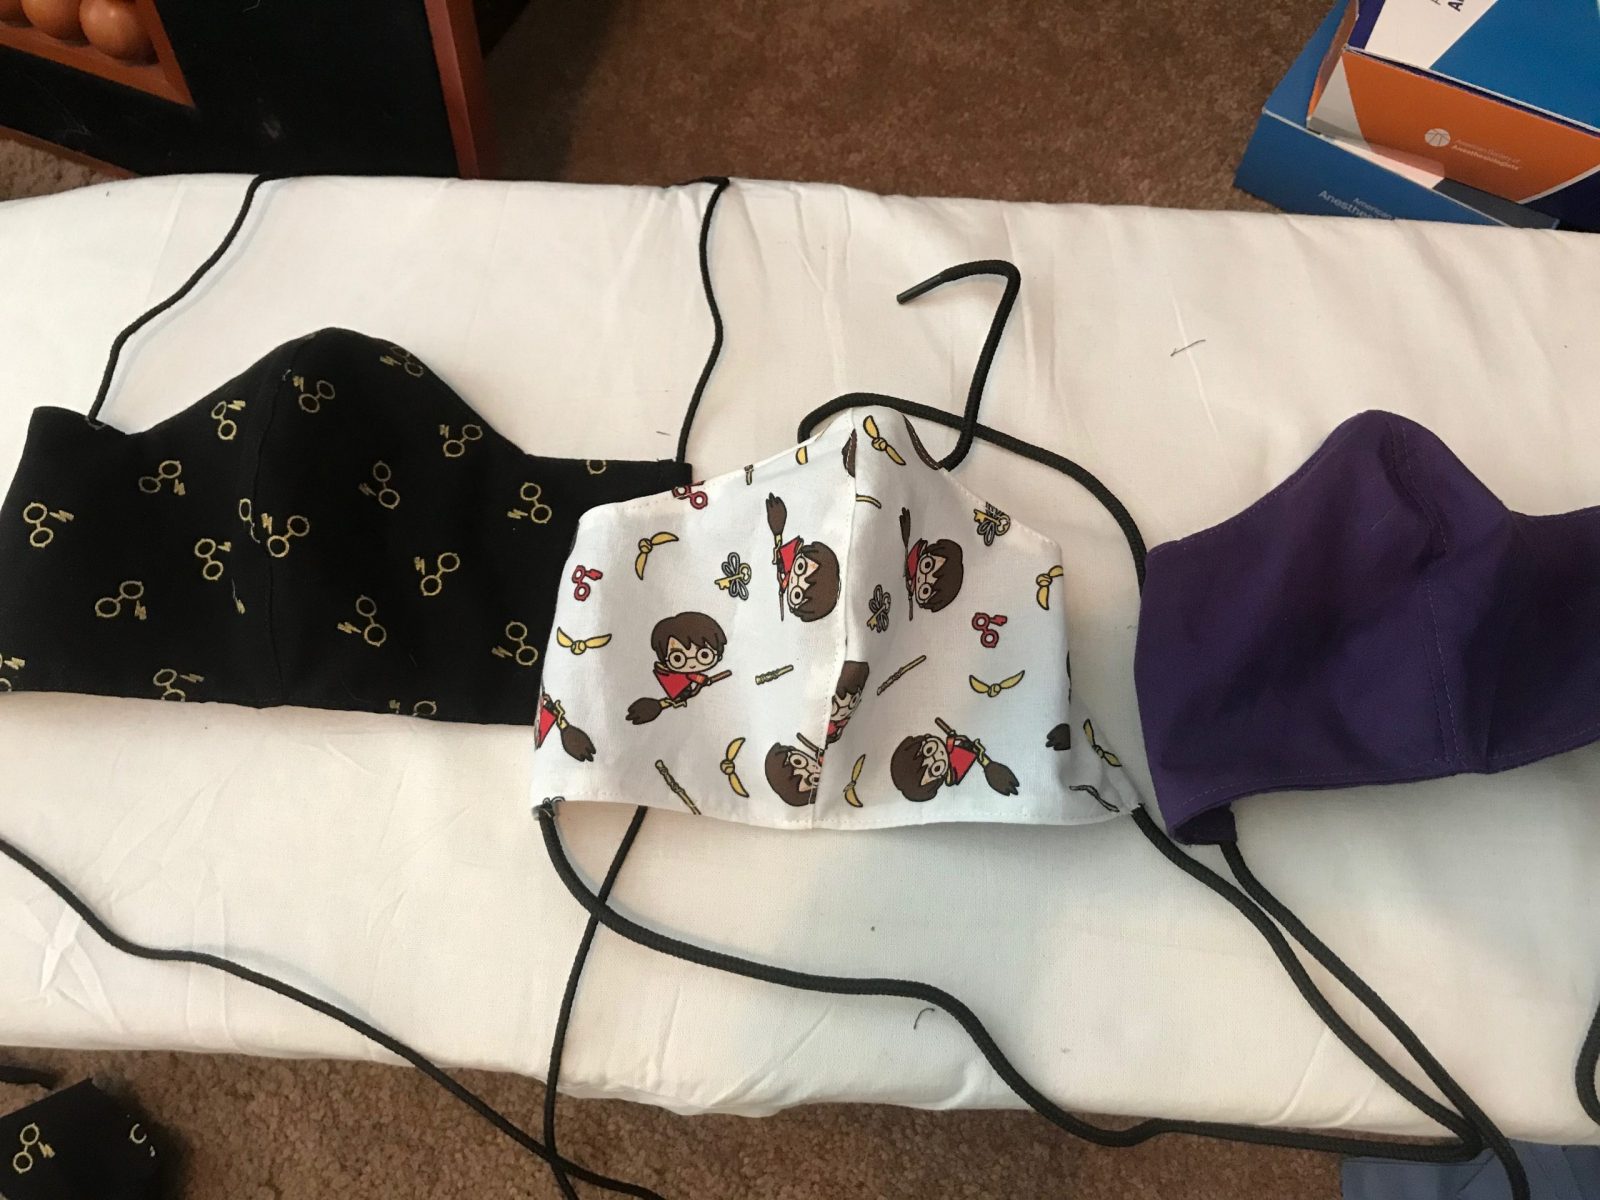
The shape of the mask and the way it’s secured also has a role to play in how effective the mask is. Masks can be pleated, cone-shaped, duck-bill, or contoured. They can have an ear loop, an elastic strap, or ties. Each has issues related to fit and efficacy.
I strongly suggest you view this video from Sewstine (also an anesthesiologist), as she makes 4 different types of masks and formally fit tests them. And provides the research behind it all.
Mask Ratings:
Masks are rated by either NIOSH (in the US) or the European Safety Federation (ESF). They will be rated for Particle Filtration Efficiency (PFE) and may also be rated for Bacterial Filtration Efficiency (BFE). They are considered Air-Purifying Respirators because they protect by filtering particles out of the air you breathe.
Both ratings organizations classify masks based on the percentage of airborne particles that are filtered. For NIOSH, the number of the mask is approximately the percentage of the PFE. NIOSH approved masks also have a letter, which has to do with how the mask deals with oil.
- N – solid and liquid aerosols that do not contain oil (Non-oil)
- R – solid and liquid aerosols that may contain oil (Resistant to oil)
- P – solid and liquid aerosols that may contain oil (Protective to oil)
The European P2 mask or FFP2 filter is equivalent to the NIOSH N95. The P3 or FFP3 is equivalent to the NIOSH P99.

Dust Masks aka “nuisance” masks, that you might get at the hardware store, are good for things like gardening, and some tasks like painting or light sanding, but are not adequate for pandemic protection, particularly not in close or indoor situations.
Gaiters will depend on the fabric that was used to make them. Fleece as a whole provides warmth but no filtration efficacy. Many performance fabrics are designed to “breathe” and may protect you, but not protect others.
What about Powered devices?
Powered Air-Purifying Respirators (PAPRs) are types of hoods which have a battery-operated blower that sends purified (filtered) air from a device on a belt or backpack up to the hood so you are breathing clean air. Controlled Air-Purifying Respirators (CAPRs) are a proprietary variant, where the filtration all happens in the helmet portion of the hood. Ortho-hoods, used to protect surgeons during orthopedic surgery, are not filtering the air, so are inadequate alone (but may be used in conjunction with an N-95 mask).
Closing Thoughts
If your goal is a secure fit to prevent aerosol transmission, the mask or other device will need to be very tight to the face. And it will probably be uncomfortable in some way because of that fit. But it will *not* adversely affect your ability to breathe in oxygen or exhale carbon dioxide.
Other resources & reading:
- https://www.sciencealert.com/simple-low-cost-experiment-reveals-which-face-masks-are-best-at-blocking-droplets The way they did the testing is actually more useful than the actual masks they were using.
- I sewed and fit tested four different masks…
Making Drapes

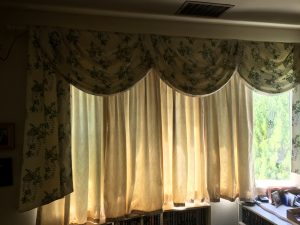
It’s been years since I last made drapes, but the back-light in my office has become a problem as we do more video conferences. So, I need drapes that will help balance the lighting in the afternoon.
I ordered some inexpensive backdrop drapes from Amazon. When they arrived, they were still too light-weight, and I would need more of them to get enough fullness to get any sort of light-blocking effect. Most of the drapes you can get at any retail store are really designed to just be hanging on the edge of the window — they are in no way designed to be drawn across the window, even when they are advertised as black-out drapes. The panels aren’t full enough, and if you need 2 (or more) sets, then you have the gap between panels.
Time to design drapes. In this case, I wanted something full enough that it would give good coverage when drawn, but be able to be tied back most of the time, so I could easily adjust the blinds.
The last time I made drapes, I did balloon shades for my room at parents house, over 25 years ago. Balloon shades can be raised to various degrees or left down. They should be long enough to puff at the bottom when fully down. In this case, I also put a swag and jabots at the top. Because it was a bow window, I ended up doing 5 separate drapes, one for each window, and put the pulls into two batches. These replaced the classic pinch pleat drapes and sheers, which had finally fallen apart from the heavy sun exposure. My mother was concerned that they would “look like a sheet” from the outside, but you can put in enough gather that it looks just fine.
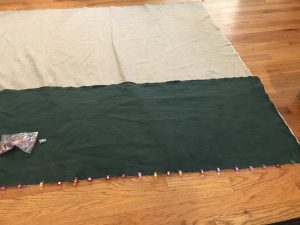
Given the size of the window and the length I wanted, and a deadline for an event, I took a look at what I had in my stash. Natural linen was an easy choice, but would need a lining to get me adequate light blocking. I could use the cheap drapes as the lining. But I would need a bit more length. Color block patterns seemed like a good way to go, and I picked a green that would work well with the walls.
A brief digression into terminology.
– Stack: how wide the fabric is when the drapes are fully open
– Fullness: the width of the fabric in relation to the curtain rod. Usually should be 2-3x.
– Railroading: using the fabric “sideways” or cross-grain. This minimizes the number of seams
See also this nice post: https://www.dwfcontract.com/Drapery–Window-Covering-Blog/bid/34627/Glossary-of-Drapery-Terminology
Fabric ordered, should have been easy. FedEx sent the package from LA to Texas, instead of to Northern California. And then lost it. Deadline blown. They found it a week later, and got it to me nearly 2 weeks after the date I was aiming for having these done. Oh well.
Wash fabric. Iron fabric. Re-iron fabric using steamer. Cut panels of the natural linen. I thought about using it cross-grain, but the natural creases would then have been horizontal, and I didn’t think that would look all that great. On the other hand, the green didn’t drape quite the same way, and was perfect for railroading the contrast bands. Find enough floor space to lay everything out (the hardest part).
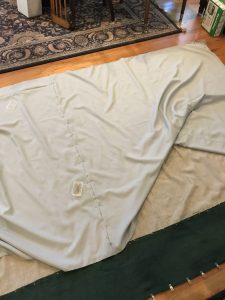
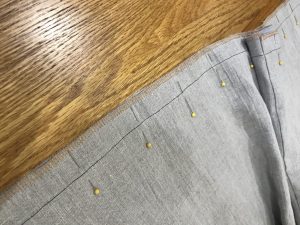
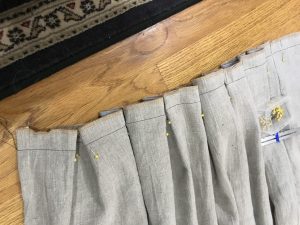
I opted to use a series of inverted pleats. This is what you will see in theater scrims (the drapes on the sides and back of the stage). It provides a lot of volume but isn’t that fussy to do — certainly not like pinch pleats. But I didn’t want a lot of volume at the top on the rod, so added the header block after the pleats were finished. And then finally added the tie-backs to hold them back when I don’t want them down.
Coronavirus, COVID-19 and resources

We’re all overwhelmed with the information out there. This is an attempt to bring some of the best pieces together into one location. I have divided things into Peer-Reviewed articles (i.e., the medical journals), News articles, Websites/Blog posts, and some of the California county health department sites and recommendations. Not all of these are new, but bringing it all together is.
Peer-Reviewed articles
News articles
Websites/Blog posts
California Counties
The Biggies:
CDC: https://www.cdc.gov/coronavirus/2019-ncov/index.html
WHO: https://www.who.int/emergencies/diseases/novel-coronavirus-2019
ASA: https://www.asahq.org/in-the-spotlight/coronavirus-covid-19-information
ASPF: https://www.apsf.org/news-updates/perioperative-considerations-for-the-2019-novel-coronavirus-covid-19/
CDPH: https://www.cdph.ca.gov/Programs/CID/DCDC/Pages/Immunization/ncov2019.aspx
SCCM: https://www.sccm.org/disaster?utm_source=3%2F12%20-%20NEWS&utm_medium=Link&utm_campaign=eNewsletter&_zs=0hMjd1&_zl=b6db6
Peer-Reviewed articles:
- NEJM Coronavirus Summary
a collection of articles and other resources - Practical recommendations for critical care and anesthesiology teams caring for novel coronavirus (2019-nCoV) patients
good review of the PPE requirements - The Internet Book of Critical Care
great review including the primary clinical characteristics of both strains - Care for Critically Ill Patients with COVID-19
resources if you need to care for these patients in a critical care setting - Critical Care Utilization for the COVID-19 Outbreak in Lombardy, Italy
Early experience and some forecasting of needs - Clinical Characteristics of Coronavirus Disease 2019 in China
published 2/28/2020, with an associated editorial from the head of NIAID, NIH, and CDC — by which time we were already seeing it far beyond China - First Case of 2019 Novel Coronavirus in the United States
e-pub before print on 3/5/2020 — when we had >1000 cases in the US - Contamination: a comparison of 2 personal protective systems
where folks are likely to get contaminated if they aren’t careful with their PPE - Public health interventions and epidemic intensity during the 1918 influenza pandemic
fascinating study of how different public health responses changed the infection and death rates - An interactive web-based dashboard to track COVID-19 in real time
this is the group who put together the dashboard by the Johns Hopkins team
News Articles:
- I Lived Through SARS and Reported on Ebola. These are the Questions We Should be Asking About Coronavirus
A reporter talks about the way we ask questions… how many people can we test (not how many tests can we run), etc. - How Bad Is the Coronavirus? And What You Can Do to Curb Its Spread
The author consolidates information from many different sources into a great overview. - The Extraordinary Decisions Facing Italian Doctors
Triage on a scale most of us have never considered. - The Korean Clusters
How one person can expose over 1000 to the virus - These Common Household Products Can Destroy the Novel Coronavirus
What works and why, and why you don’t need to stockpile toilet paper - How Epidemics like Covid-19 End (and how to end them faster)
Great article about how diseases spread and epidemics stop. Some of the same stuff I’ve talked about in my Understanding Risk & Uncertainty presentation, but with interactive graphics!
Websites & Blogs
- The Coronavirus Dashboard
Created by a 17 year old student - Epigenetic testing to track mutations and spread of virus
Fascinating “genealogy” of the fast-spreading virus - Cryptic Transmission of Novel Coronavirus
Easy to understand explanation of mutations and how to track spread - Hopkins Dashboard
From the ID team and engineering group at Johns Hopkins - Flatten The Curve
This MPH has a background in vaccines and infections diseases.
California County Info
I’m focusing on the Bay Area, since that’s where I live and work.
Holiday Lights – LEDs Part 1

After we remodeled the house, we put up the old holiday lights that had been used at my parents. You can see them in the photo on the remodel pages.
But we were interested in having other options, like orange/purple for halloween, or pastels for spring. Programmable LEDs seemed to be the way to go.
After some research, we settled on the Alitove lights, which are available via lots of on-line retailers. We got the first set last year, and never did anything with them. Finally this year, we put them up and were able to program them with the free app they include, doing a red/green chase. Two strands were enough to do the front porch (about 20-21 linear feet).
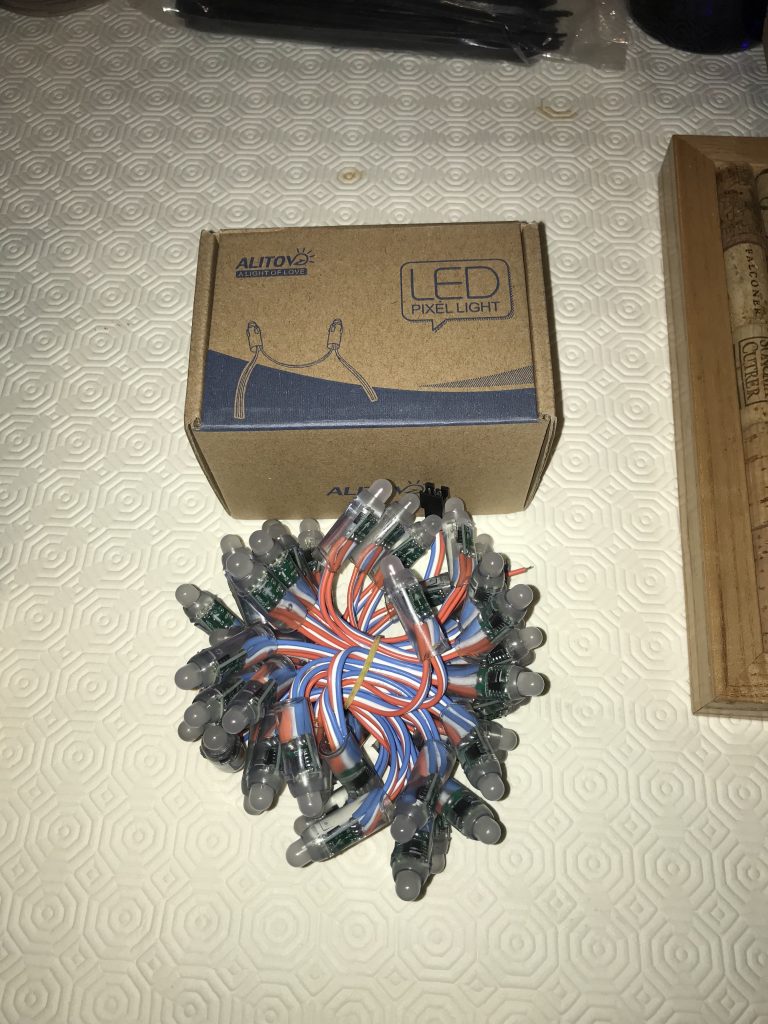
the bundle of lights 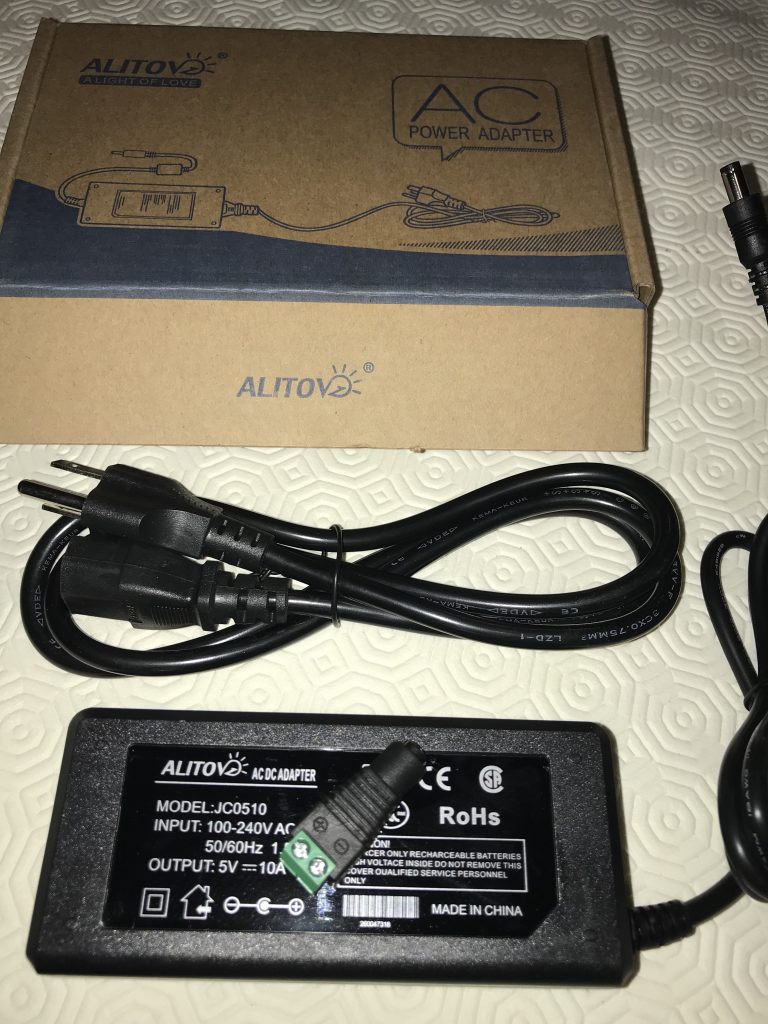
the standard power supply 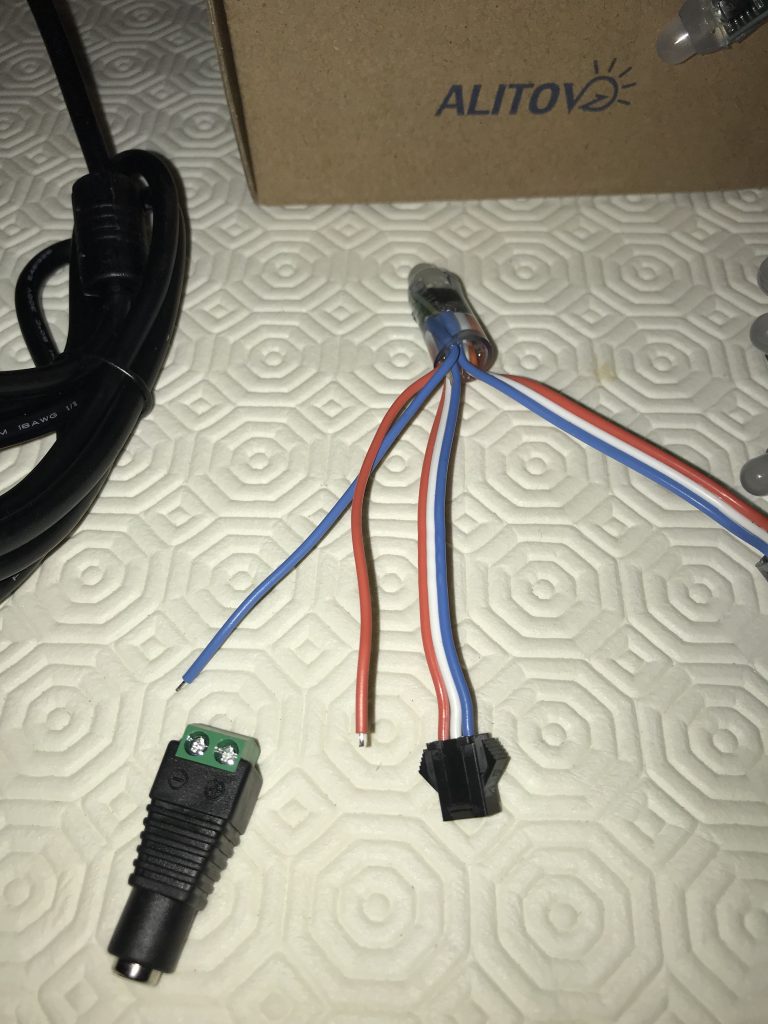
the end of the strand has two free wires
to attach to the power supply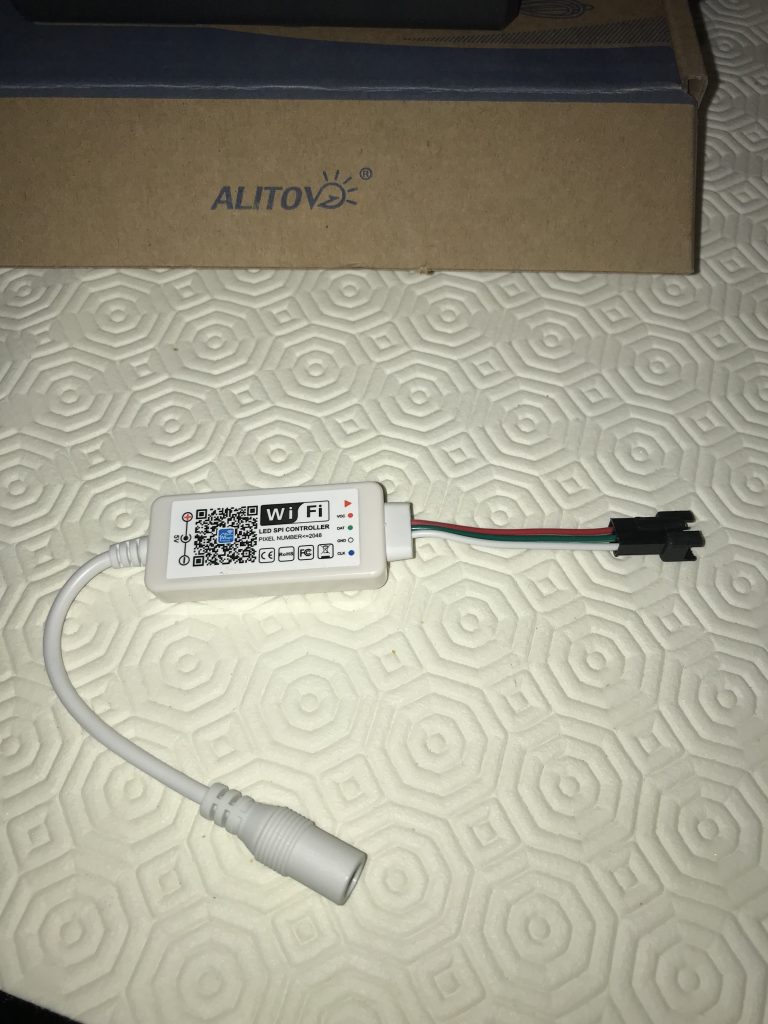
the adaptor to connect to the app 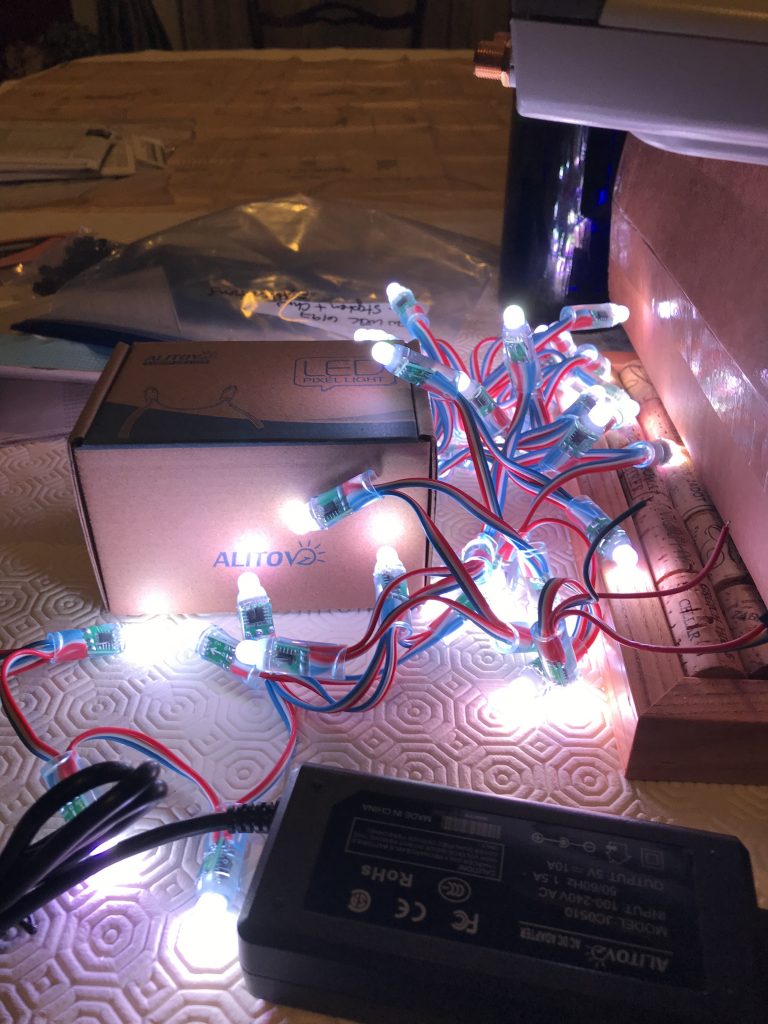
basic white during testing
We used zip/cable tie adhesive mounts with small/short cable ties to mount the lights on the inside of the eaves, so that the lights showed just below the edge.
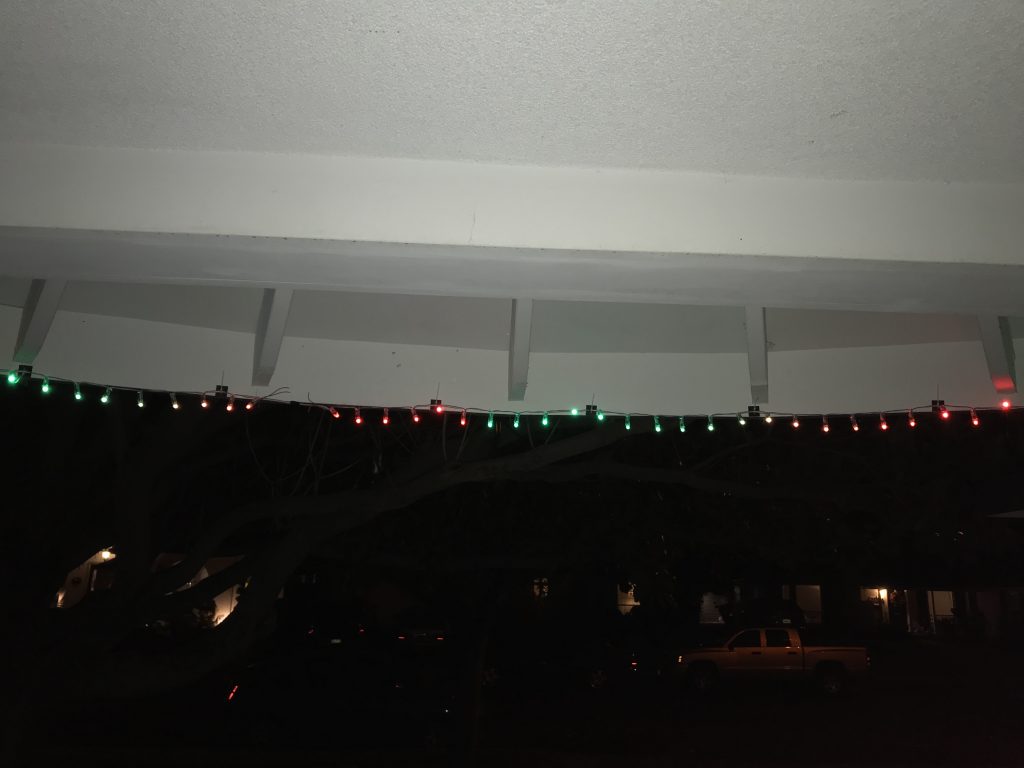
lights from inside the porch 
lights as seen from the walkway
The real question was how many lights could be put onto a single power source before we saw fade. The Alitove website doesn’t really say (although they show some impressive displays); the Amazon website description says 3 or 4 strands. Each strand has extra wires for additional power — but what happens if you add power to the middle of a long strand? or do you need to have multiple controllers? (and how do you keep them in sync?) The controller we bought this year does not use the same app as the one we bought in 2018. Now what?
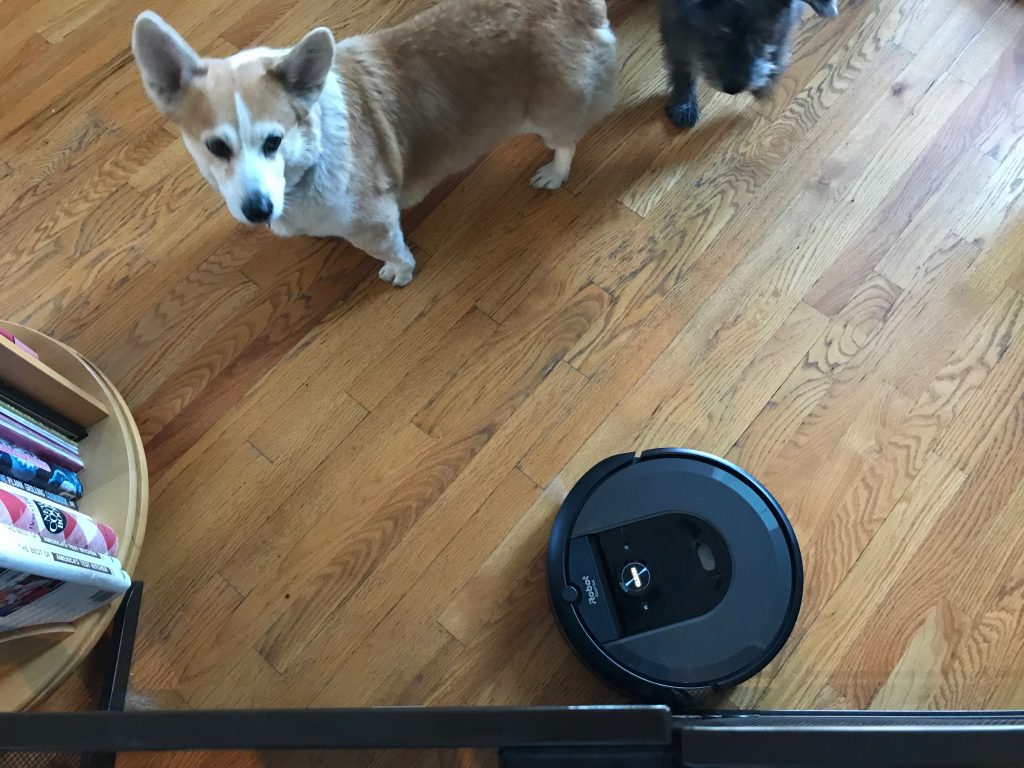
3-Roomba Household
We got my mom a Roomba years ago, and it has sat in the corner gathering dust. We subsequently got ourselves a new one when the WiFi/App versions first came out. And it sat in the corner gathering dust for the most part. Fast Forward to the end of 2019.
After our cleaning service moved out of the area, we realized that the sheer amount of fur the dogs shed each day was going to bury us alive pretty quickly. We resurrected the Roomba 980 and got it running on a schedule in the family room and kitchen. But it always seemed to have problems finding its dock and recharging. And not surprisingly, the collection bin was full every time it ran. Now what?
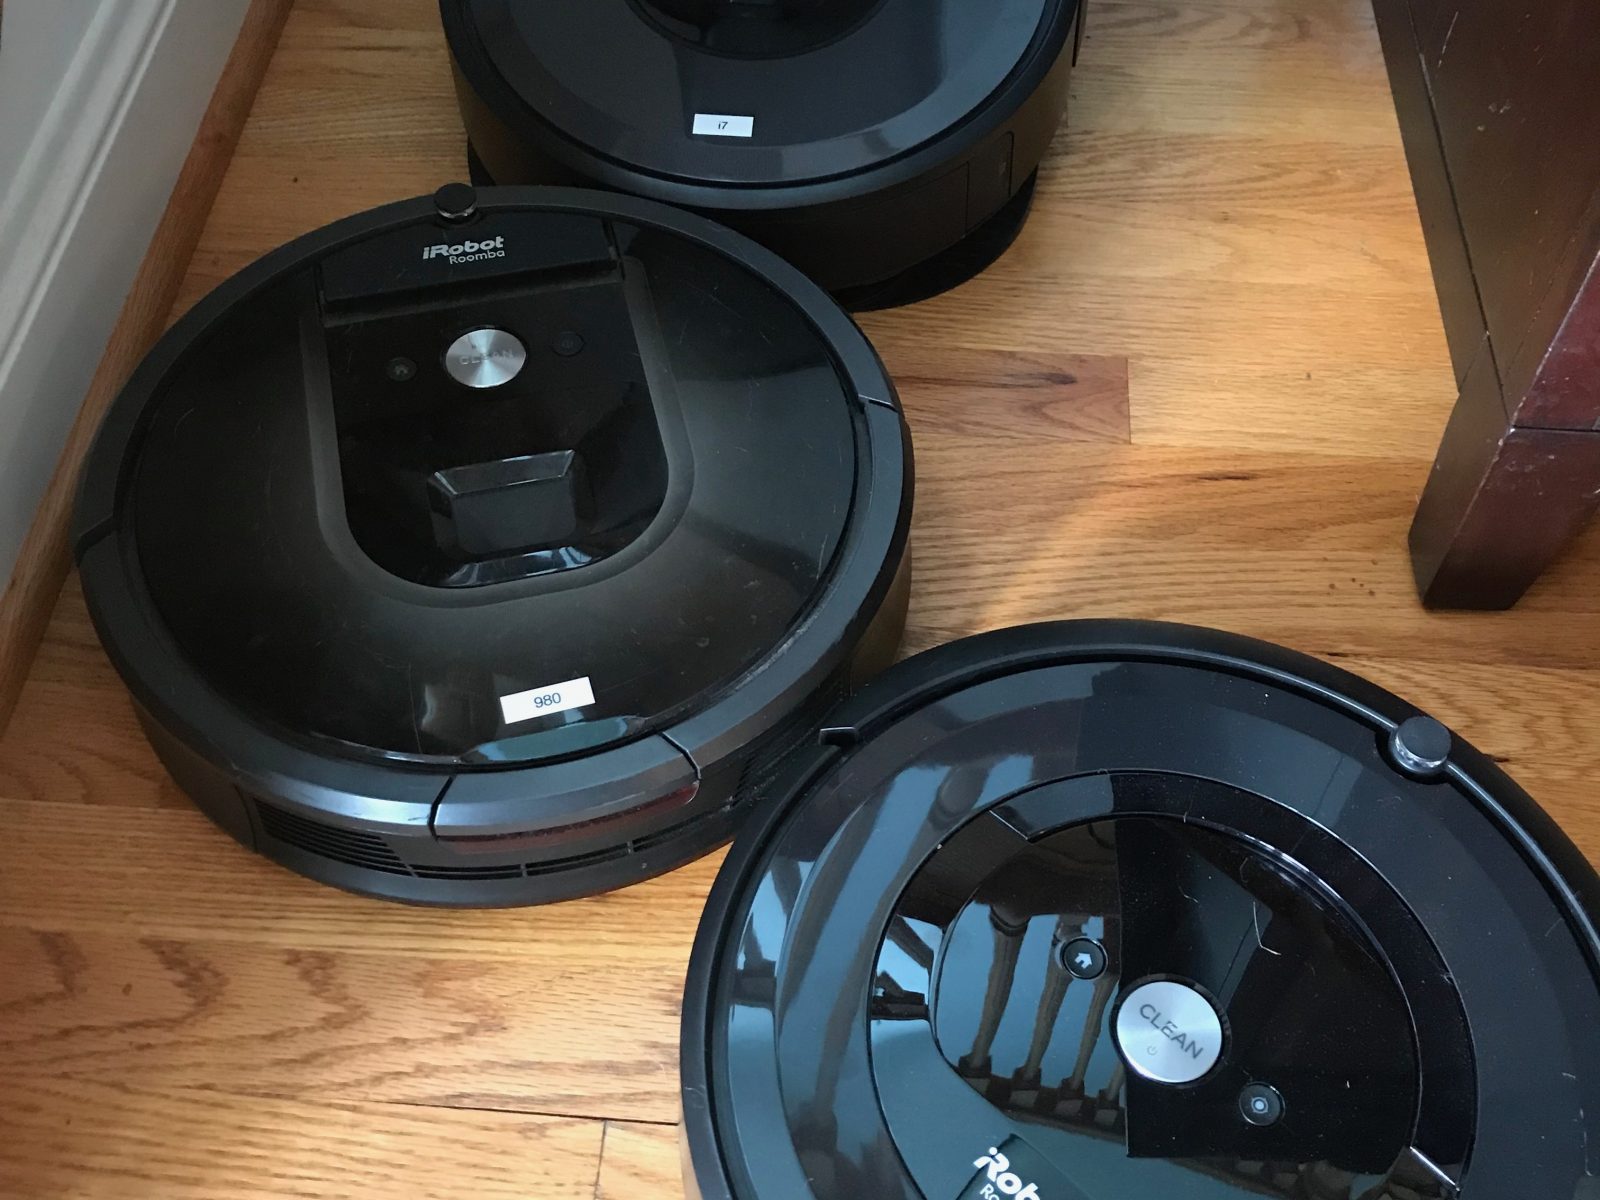
One of the Facebook groups I belong to had a discussion about the various cleaning robots, including the new Roomba that automatically empties its own bin. This i7 model is not cheap, but as one person put it, it paid for itself in less than 3 months given the cost of a cleaning service. And it encouraged their family members to keep things picked up better.
By the second week of January, we had expanded our repertoire to include the 980, an i7, and an e5 model, each with a designated area of the house.
The Devices
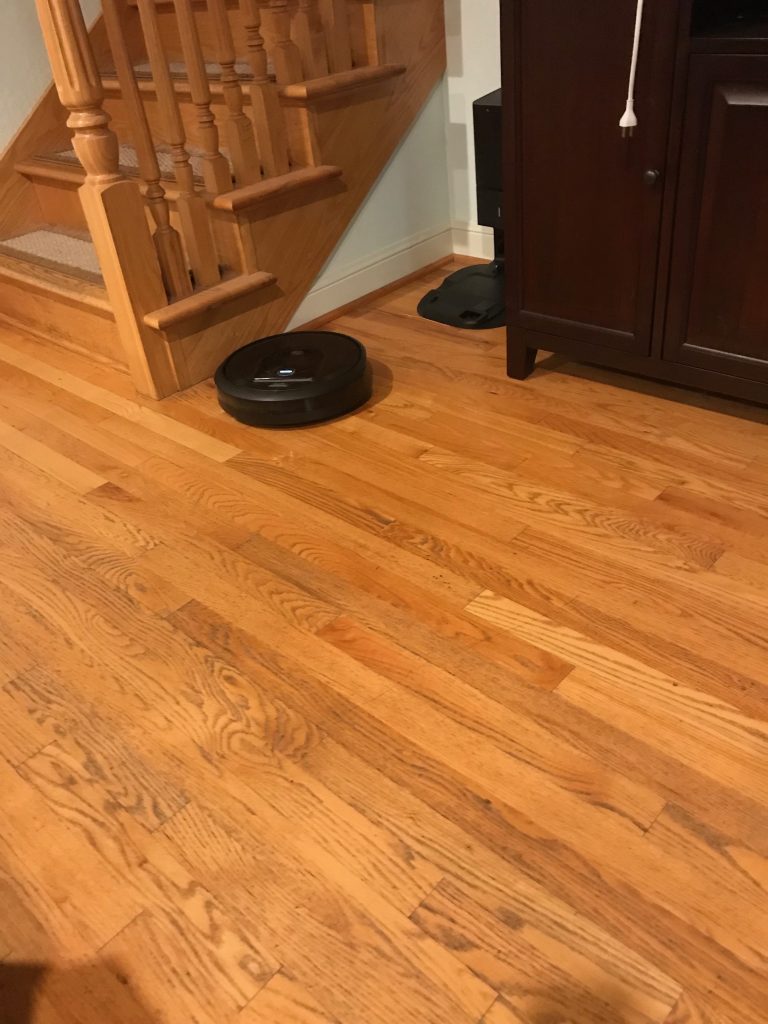
The i7 will create a smartmap of the house, and you can designate specific areas by name. Once done, you can have the i7 clean the entire area, or a specific room. It will tell you what it cleaned on any of your prior 30 cycles, and show you areas that were particularly dirty (like near the kitchen trash can and the dog’s food bowls). It’s far quieter than the 980, and seems to be more efficient, running for about 45 minutes or so to do the primary downstairs areas, which are all hardwood or tile.
The e5 does not have the mapping capabilities of either the i7 or 980. We put it in the living room/dining room area, which sees much less traffic than the rest of the house. Because of that, you can’t see where there are particularly dirty areas that might warrent some direct attention. It also seems a bit more prone to getting stuck. We moved a couple of items to provide a wider pathway and will see what happens as we continue to use it.
The 980 has turned out to be a workhorse once properly located. The device homes in on the charging base much better now that it’s on a long wall, instead of under a corner table. It’s still noisier than the i7, and is taking longer for a smaller area, but it’s working on carpet, and it’s catching up on long-term dust under furniture like beds.
The App
The iRobot app is pretty straight forward. You can download it from the Apple Store or Google Play. The only limitation is that you can only have one login for the household. You can add multiple robots and give them custom names.
The app allows you to control the robots: start, pause, stop a job. It allows you to review what’s been done in terms of time running, “dirt events,” and will show you a map of where it cleaned if it’s the 980 or i7.

You can also now link with Amazon Alexa, and other smart home tools. You will need to turn on the association from within the iRobot app. And then you will need to discover the devices in the Alexa app. The biggest problem is getting Alexa to actually activate the devices. You also need to come up with a unique name that you can say that is recognized by the smart device. And then figuring out the correct phrase to tell Alexa what to do.
Of course… I’m still waiting for a robot that will clean the stairs!
The best camp shirt pattern
Stephen loves his hawaiian shirts, and we have a couple of friends who wear them a lot as well. I thought, since we had a couple of trips to Hawaii this year with CSA, that I would try to make us some matching/related and geekish shirts. Off to figure out a pattern to use and fabric to buy.

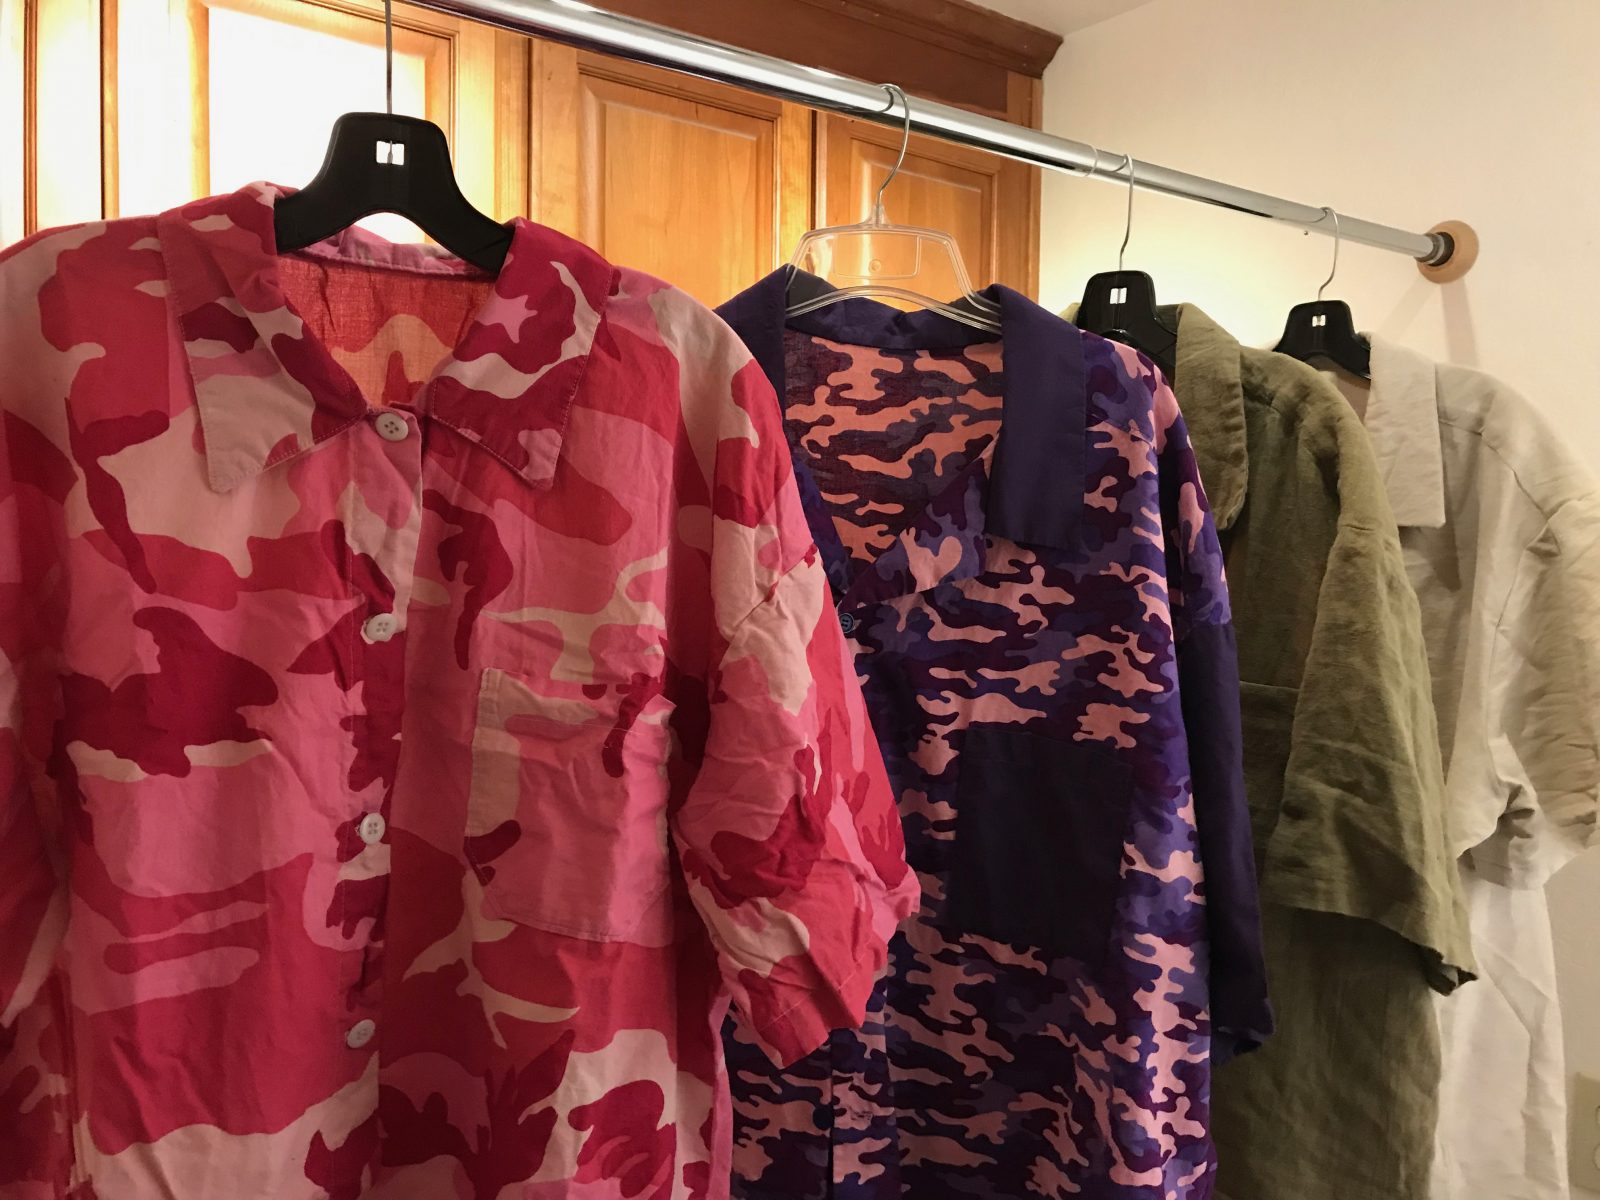
I started with a pattern that had been used for the Single Pattern competition at Costume-Con. McCalls 2233 is a set of pieces designed for kitchen staff — chef’s jacket, shirt, pants, apron, and toque. While the folks using this for the Single Pattern competition were very creative (klingon chef anyone?!), only one person actually made the shirt. It looked awfully big on her, with sleeves at least to her elbows. I decided to make it using some leftover fabric from the stash — the pink camo.
The pattern is actually pretty straight forward, but it’s not a true camp shirt, as the collar is not designed for the open and flat spread. It has an interesting trick of double-folding the front facing and not needing interfacing. And the shoulders are dropped *significantly* — 3″ on me — which is part of why the sleeves end up so long. And it’s really long.

Next up: McCalls 2149. This is a men’s shirt set, with collar options (camp vs band, but no stand collar style) and sleeve options (short vs long). It was interesting to see how this men’s pattern differed from the women’s patterns. It was “old-fashioned” one-size only, instead of the multi-size patterns that have become the norm for most women’s patterns. One of our friends used this for her husband’s geek shirts.
This one used the leftover purple camo, although I was short fabric for the sleeves. I got some plain purple to use for the sleeves, collar, and pocket. The assembly was interesting, as they had you attach the collar, then attach the facing, then clip deep into the collar seam to be able to close it off. It worked far better than I expected. The shoulder seam is forward of center by about an inch (which I top-stitched). The finished sleeves are still nearly elbow length.

Third time: New Look 6197. This one has both men’s and women’s multisized patterns in the same packet. The difference is in the fit of the body (with darts or not) and hem (straight vs curved). This has a back yoke in addition to the camp-style collar. Both the yoke and collar are cut cross-grain.
I grabbed some fabric from the stash – a green linen that I had picked up for Faire years ago and never used. After assembling the yoke and lower back piece, the assembly is fairly typical. This also used the collar construction as in the McCalls pattern above. However, if you want to have the yoke with two layers (as in most commercial shirts), better to cut a second yoke piece, and attach the inner yoke layer to the front facings at the shoulder seams, and then sew the entire collar down in a single seam – no clip specifically to be able to put in a hem as in the instructions (but you still will need to clip the seam so it lies flat). Then close the shoulder seams and the bottom of the yoke with a fine top-stitch just off of the seamline.
The only problem with this pattern is that there is no indication for where the pocket should be set. I used one of the other patterns for the basic location.
Total time was about 4 hours, from layout/cutting to buttonholes. And the only thing done by hand was the actual buttons.
I had gotten a 4th pattern to try, but the New Look pattern was definitely the winner. So far I’ve done 4 shirts and have 2 more on the list.
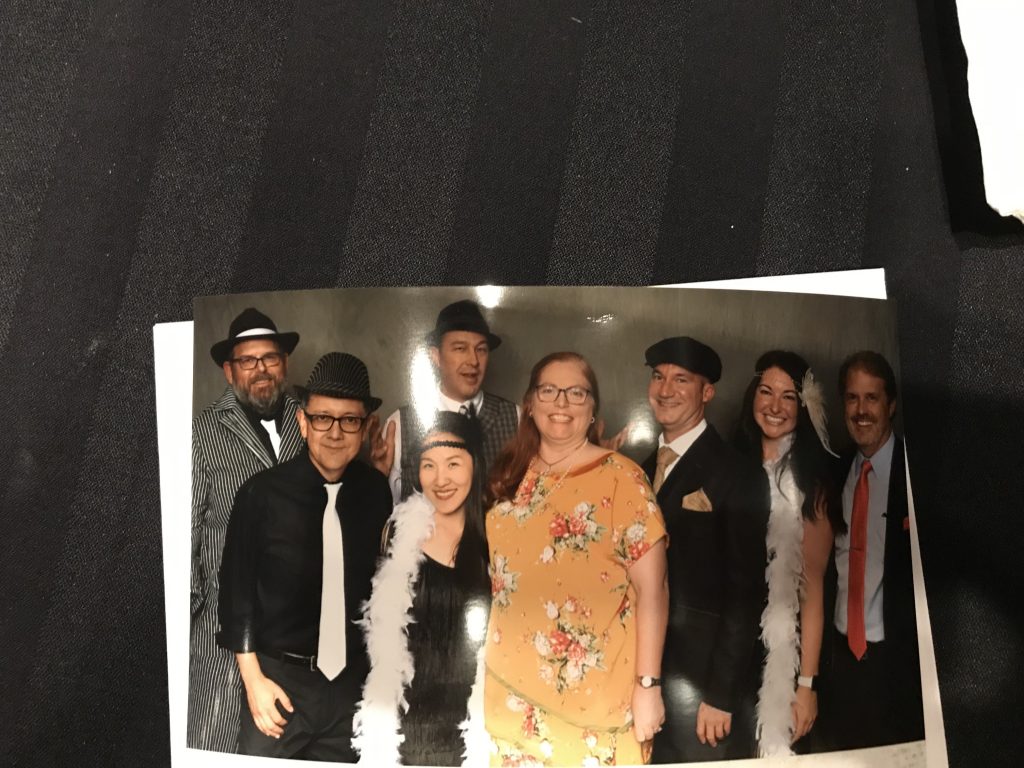
1920s Tier-rific Ensemble

I picked up this Decades of Style pattern a few years ago, and never got around to making it. But this year’s Partnership meeting event theme is Chicago Mafia/Roaring 20s.

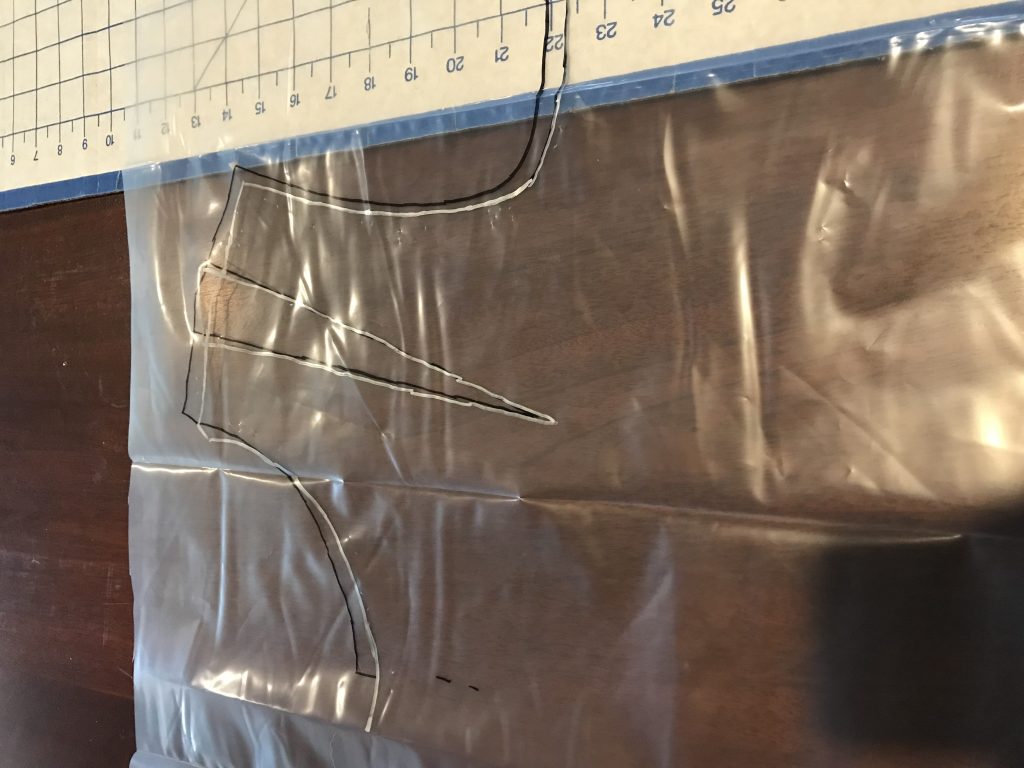
As is usually the case, I needed to alter the pattern. The kicker is that the waist and skirt are not symmetrical, so you can’t just add something to both sides and have it work. Plastic sheeting to the rescue. (Admittedly, I “copy” nearly every pattern this way, and leave the original intact.)
All of the alternations needed to be on the right-side of the dress, because the angle on the left was critical for the look, with the tiers “falling” off a specific point.
The skirt pieces were easy — just add extend the pattern lines the necessary width/length. But the tops (the under dress and the blouse) required a bit more attention. I started by tracing the existing bottom line and left side lines (side seam, arm scye, shoulder, neckline to the center front). Then I shifted the pattern over and started to do the same thing on the right, just with the alteration. But I forgot that I had to use the seam marking diamond to match up the height where it would be on the new seam, not where it was on the original. This totally changed how the upper part of the pattern needed to be traced. See the silver vs black lines in the image.
I cut the test from an old sheet, tried it on, and it fit right the first time. Whew. Time to do the adjustments on the blouse and on the tiers. Calculated the angle (28º), then calculated how much I needed to add to the tier. This was easy as the pattern actually comes in two pieces that you need to tape together. The tiers are identical, but because you have to cut two with the same orientation, and everything else is on a single layer (unfolded) fabric, there are two pattern pieces.
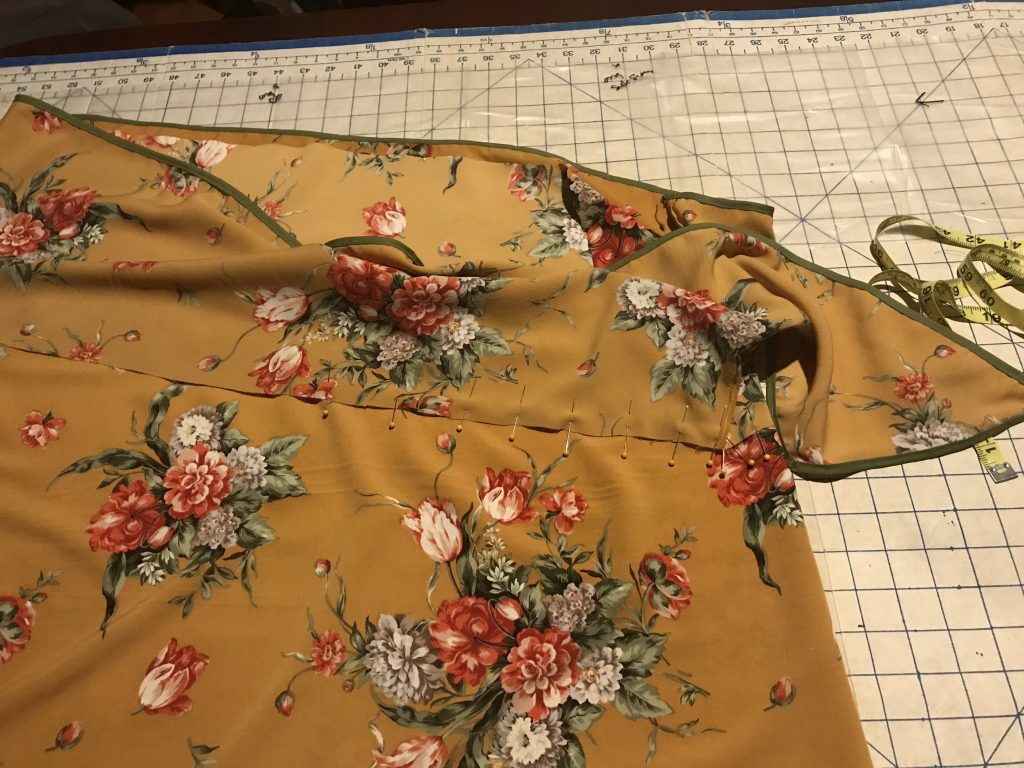
I considered cutting the pattern cross-grain, but the tiers are well over 60″ so this would work only if you wanted to have a seam at the side. You need to have a large flat work surface to layout all of the fabric and the pattern pieces. And you need a fashion fabric that is not too one-sided (the back will show on the tiers)… so off to the store I went again…
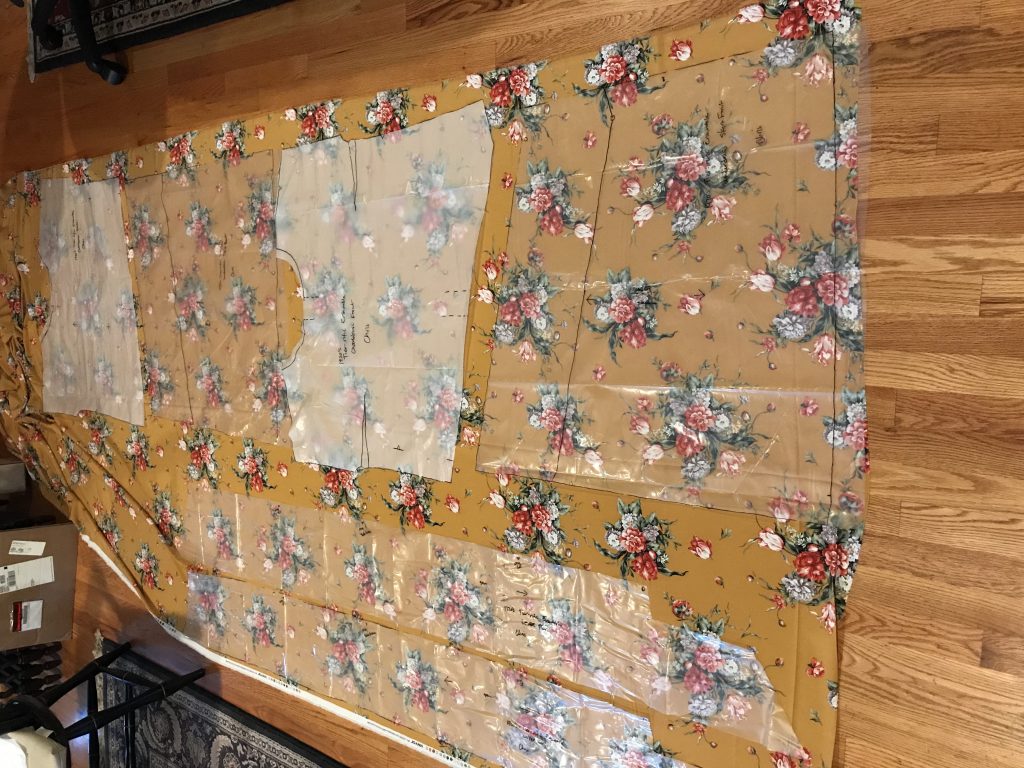
The one that that wasn’t really clear on the initial read of the instructions was that there are two different types of bias used — one is the fashion fabric, and one is a contrasting fabric. The necklines and armholes are all fashion fabric bias. If you lay out your pattern pieces correctly, you will have a rectangular remnant to use to make the bias. I was able to just cut 4 pieces and used the two longer ones (about 42″) for the necklines and the two shorter (about 34″) for the arms with plenty leftover for the overlap seam. For the contrast bias you can either make some or buy it. If you purchase it, you will need 3 packs of double-fold wide bias.
Otherwise, the instructions are quite easy to follow. I tried to sew everything that didn’t involve the contrast bias first, just so I didn’t have to keep switching my threads. The one thing I did differently was put the lower tier on with top-stitching. I did it as instructed, and found it extremely difficult to accurately place the tier upside down. I also found that my tier was a bit short (thanks to the alterations). The drop on the tiers seems like a lot until you get all of the pieces together, and then it aligns perfectly.
First attempt to correctly place the lower tier. 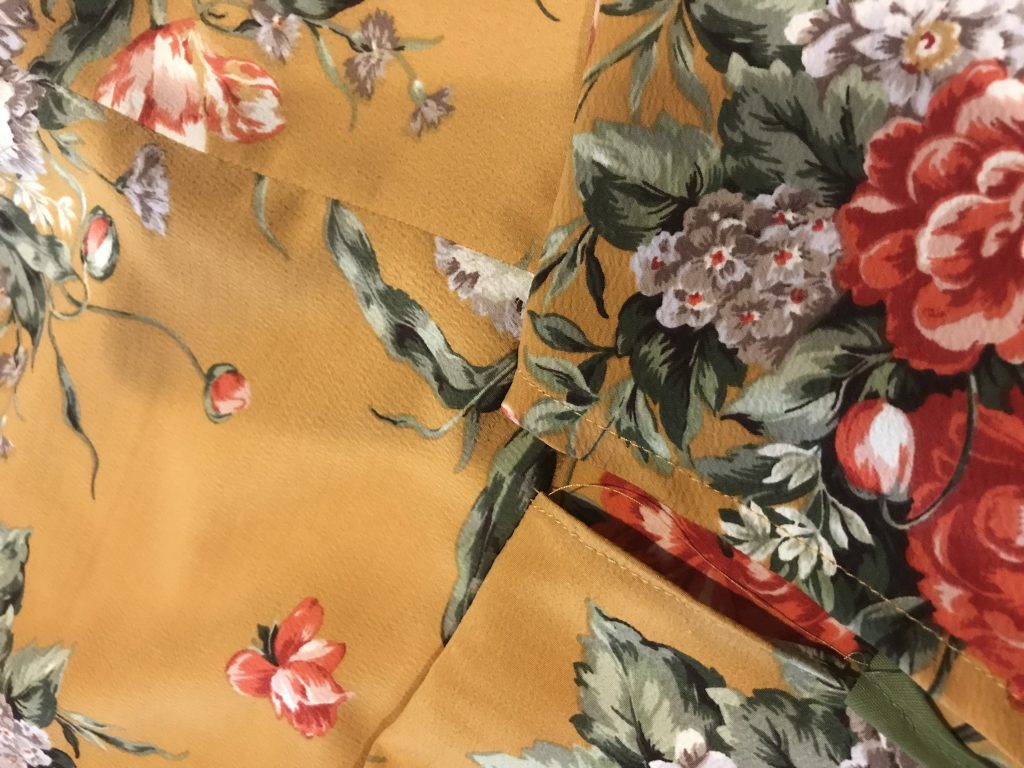
The resulting mismatch. 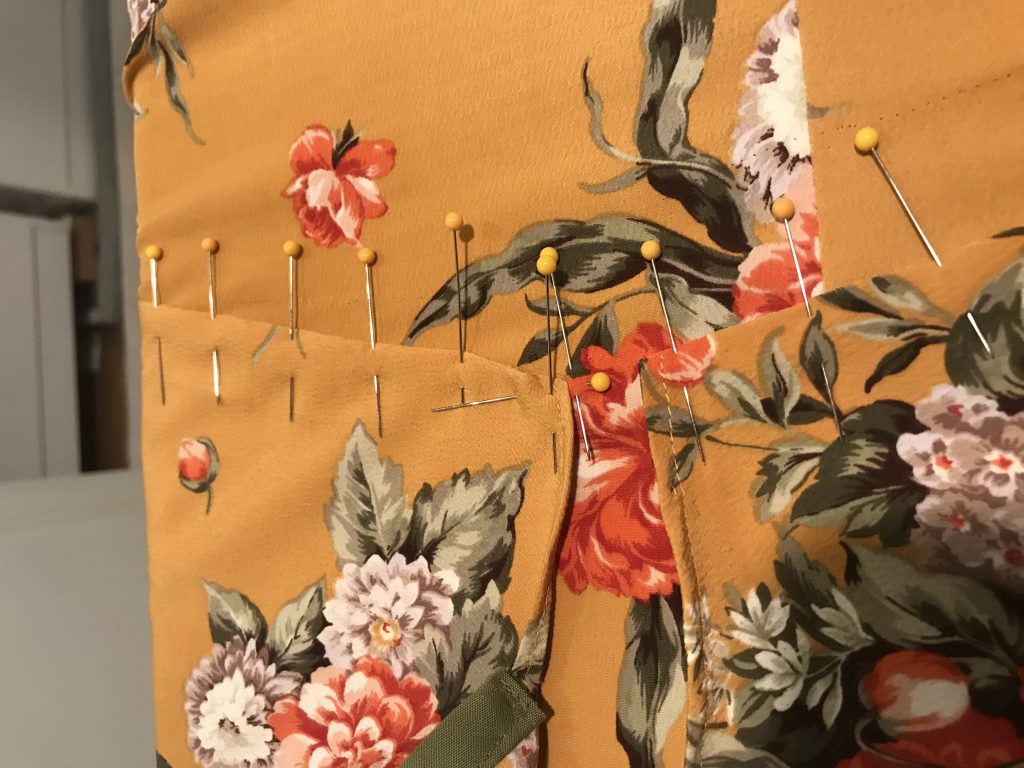
Take 2 on attaching the lower tier. 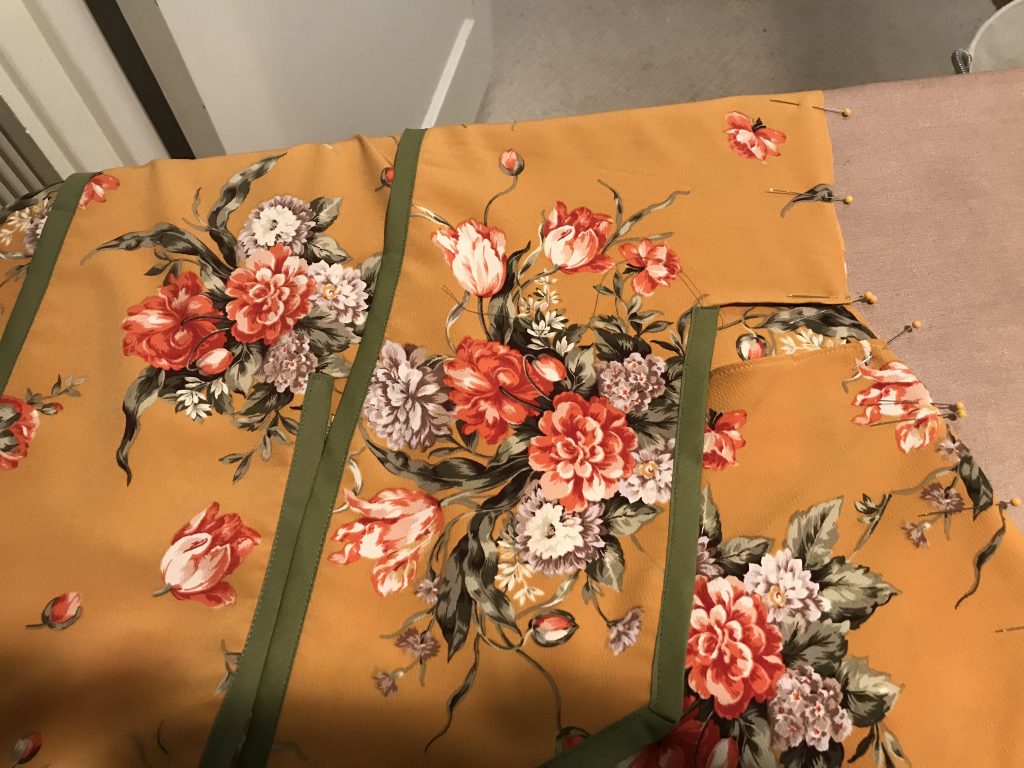
The two tiers now attached.
After finishing all of the hand work (hems and tacking down the facings on the top), while sitting at the airport and in a hotel room, I made it to the event.
Visiting PRONI

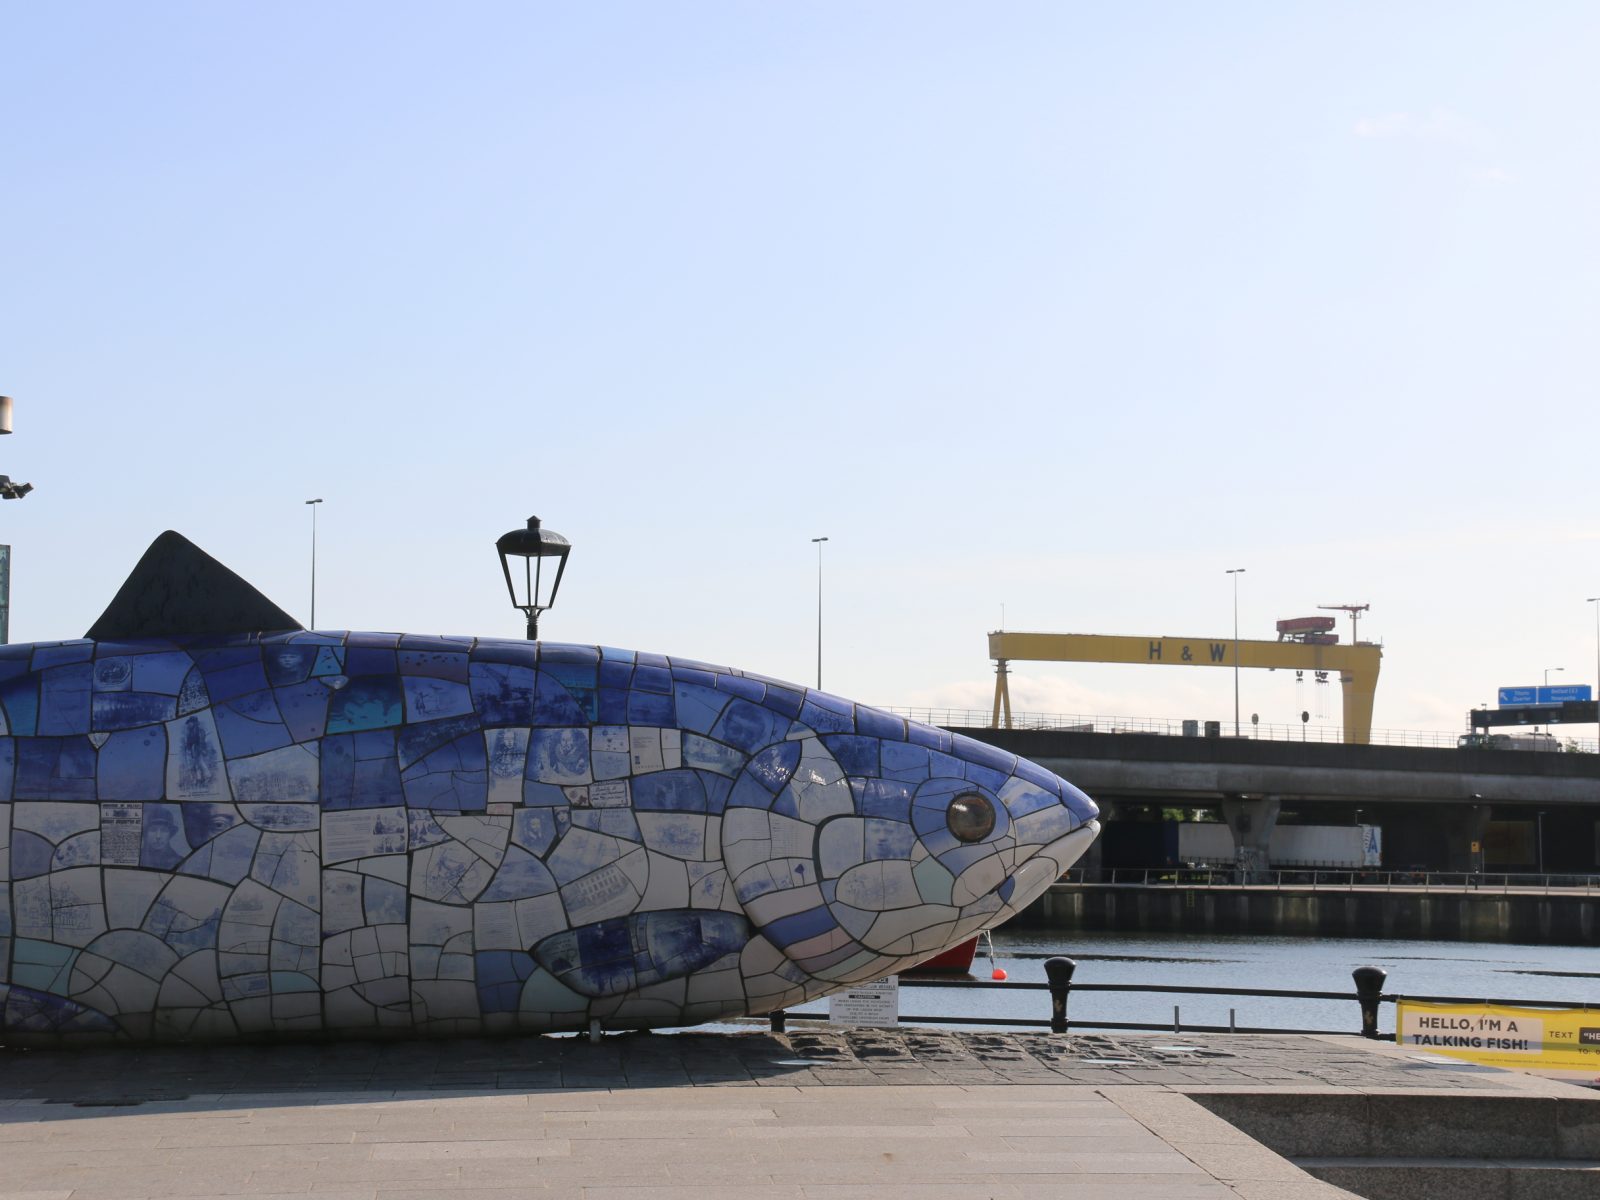
If you’re into genealogy, there are a few places you want to visit at least once to search records. One of them is the Public Record Office of Northern Ireland, or PRONI.
PRONI is in Belfast, in the Titanic Quarter. They house original documents as well as microfilms and other copies, taken from churches, businesses, and individuals, along with government records.

I’ve traced all of my lines back to the people who came over to North America, so now have to start searching elsewhere. When we were in Ireland (technically, the Republic of Ireland) in 2014, we went down to Muine Bheag (Bagenalstown), where my Doyle ancestors were from, and were able to get a little more information from the County Carlow library and the parish. But those records only really go back to about 1800.
PRONI has records from earlier, although only for Northern Ireland. The Ferriers are from Belfast according to the records I already have, and the McFarlands were Ulster-Scots from County Tyrone. And despite options for on-line research, if you don’t know where to start, it doesn’t help.
Once you get registered for access, and get your ID card, you can go upstairs to look at the self-service microfilms, or request specific items to be pulled from the archives. I was able to look at their electronic index in advance, so knew more or less what microfilm reels I wanted to search.
Despite fairly specific details, I had no luck finding the Ferriers, within 10 years on either side of the info I had. The McFarlands were harder although there was info to be found. The specific years that I was searching for had not been microfilmed, but I hoped that I would find related information about the family that might help me hone in on my family. The specific records from the mid 1700s were microfilmed in no particular order, jumping 10 years from page to page. Most of the records were christenings, with some marriages, and a few burials. The handwriting was alternately easy and impossible to read. The city names in particular were sometimes difficult to decipher. It took me nearly 3 hours to go through the Cappagh Parish records on microfilm. Then I had to read my handwritten notes and create a spreadsheet.
The only way to get images is to have the librarian do prints from the microfilms. They are somewhat emphatic that you are not to take “personal photos” within the restricted rooms.
Searching for ancestors on ships manifests is difficult, as until fairly recently, there was no requirement for a captain to submit one upon arrival. A relatively new database is DIPPAM (Documenting Ireland: Parliament, People, and Migration), which includes many items about ships and transportation. Using this, I was able to verify that the ship North Star did indeed exist, and departed from Londonderry on 1 June 1812 bound for New York. I was also able to search Filby’s index*, which showed two McFarland families, apparently on the same ship, who landed in New London, Connecticut in 1811, as well as one who landed in New York City in 1812. Now to tease out the inconsistencies in my information. And figure out where the North Star actually landed.
*
Filby, P. William, ed. Passenger and Immigration Lists Index: A Guide to Published Arrival Records of … Passengers who Came to the United States and Canada in the Seventeenth, Eighteenth, and Nineteenth Centuries. 3 volumes plus annual supplements. Detroit: Gale Research Co., 1981-__. This series is a finding aid to published passenger lists. Be sure to read the “front material” to understand how to use the information you find.
Filby, P. William, ed. Passenger and Immigration Lists Bibliography, 1538-1900. 2d ed. Detroit, MI: Gale Research Co., 1988.
More about Belfast
We opted to take the Hop On Hop Off City bus tour after the convention was over, to fill in areas of town that we hadn’t gotten to already.
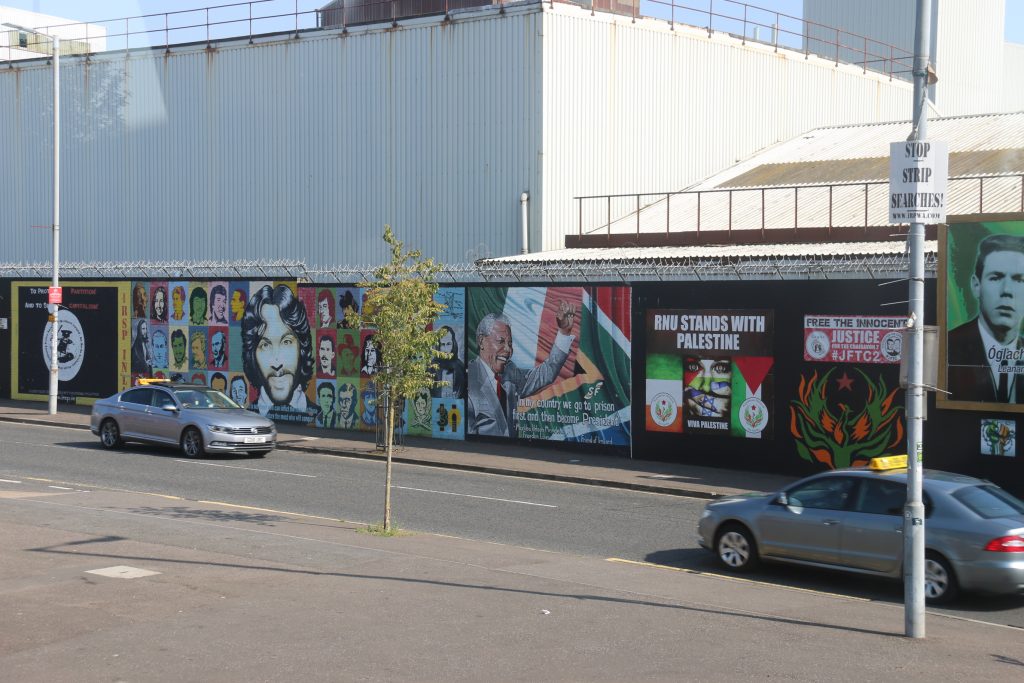
The tour guide, Eoin, explained the history behind the places we were seeing. He referred to The Troubles and their place in history. And it became evident that much of that divide still exists in Belfast.

These walls and many others are covered with murals depicting important people in the history of Belfast, and people world-wide who have been important in terms of supporting and fighting for oppressed people. You can get more information from the Virtual Belfast Murals Tour site.
The spectre of Brexit weighs heavily on the Irish, particularly with concerns about a formal border again. The pound was at near historical lows compared to the dollar and euro. Despite this, there was construction going on throughout town as well as renovations on historical buildings.