Whirlpool Gladiator “Freezerator”
We got a Whirlpool Gladiator series garage fridge/freezer, the “Freezerator,” after the remodel. It looks like a typical fridge/freezer with a smaller top section than bottom — except that the bottom is the freezer, and the top is either refrigerator or freezer.
Over the years, we have had ongoing problems with ice buildup in the freezer section. And it became clear that it was water running down from the upper section. We had defrosted it, to the point of being able to get the obvious ice dealt with, every couple of years. Earlier this year, we got a pair of TempSticks, which let us check on the temperature and humidity in both compartments. The humidity always seemed a bit high, but there was no information in the user manual or on the web about what should be “normal” in either a fridge or freezer.
I did some searching on the web, and found this video by Dion Hock about his solution: https://youtu.be/nGdIS1uLAto. I remember having a standard freezer-over-fridge that did something similar years ago, so the whole concept of taking off the back of the upper unit was not foreign to me.
This is what I saw once I finally got the back off:
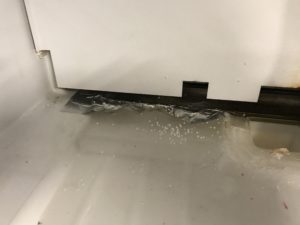
The entire back area was frozen solid, and this was 2 hours after I pulled the plug and started to let the freezer defrost!
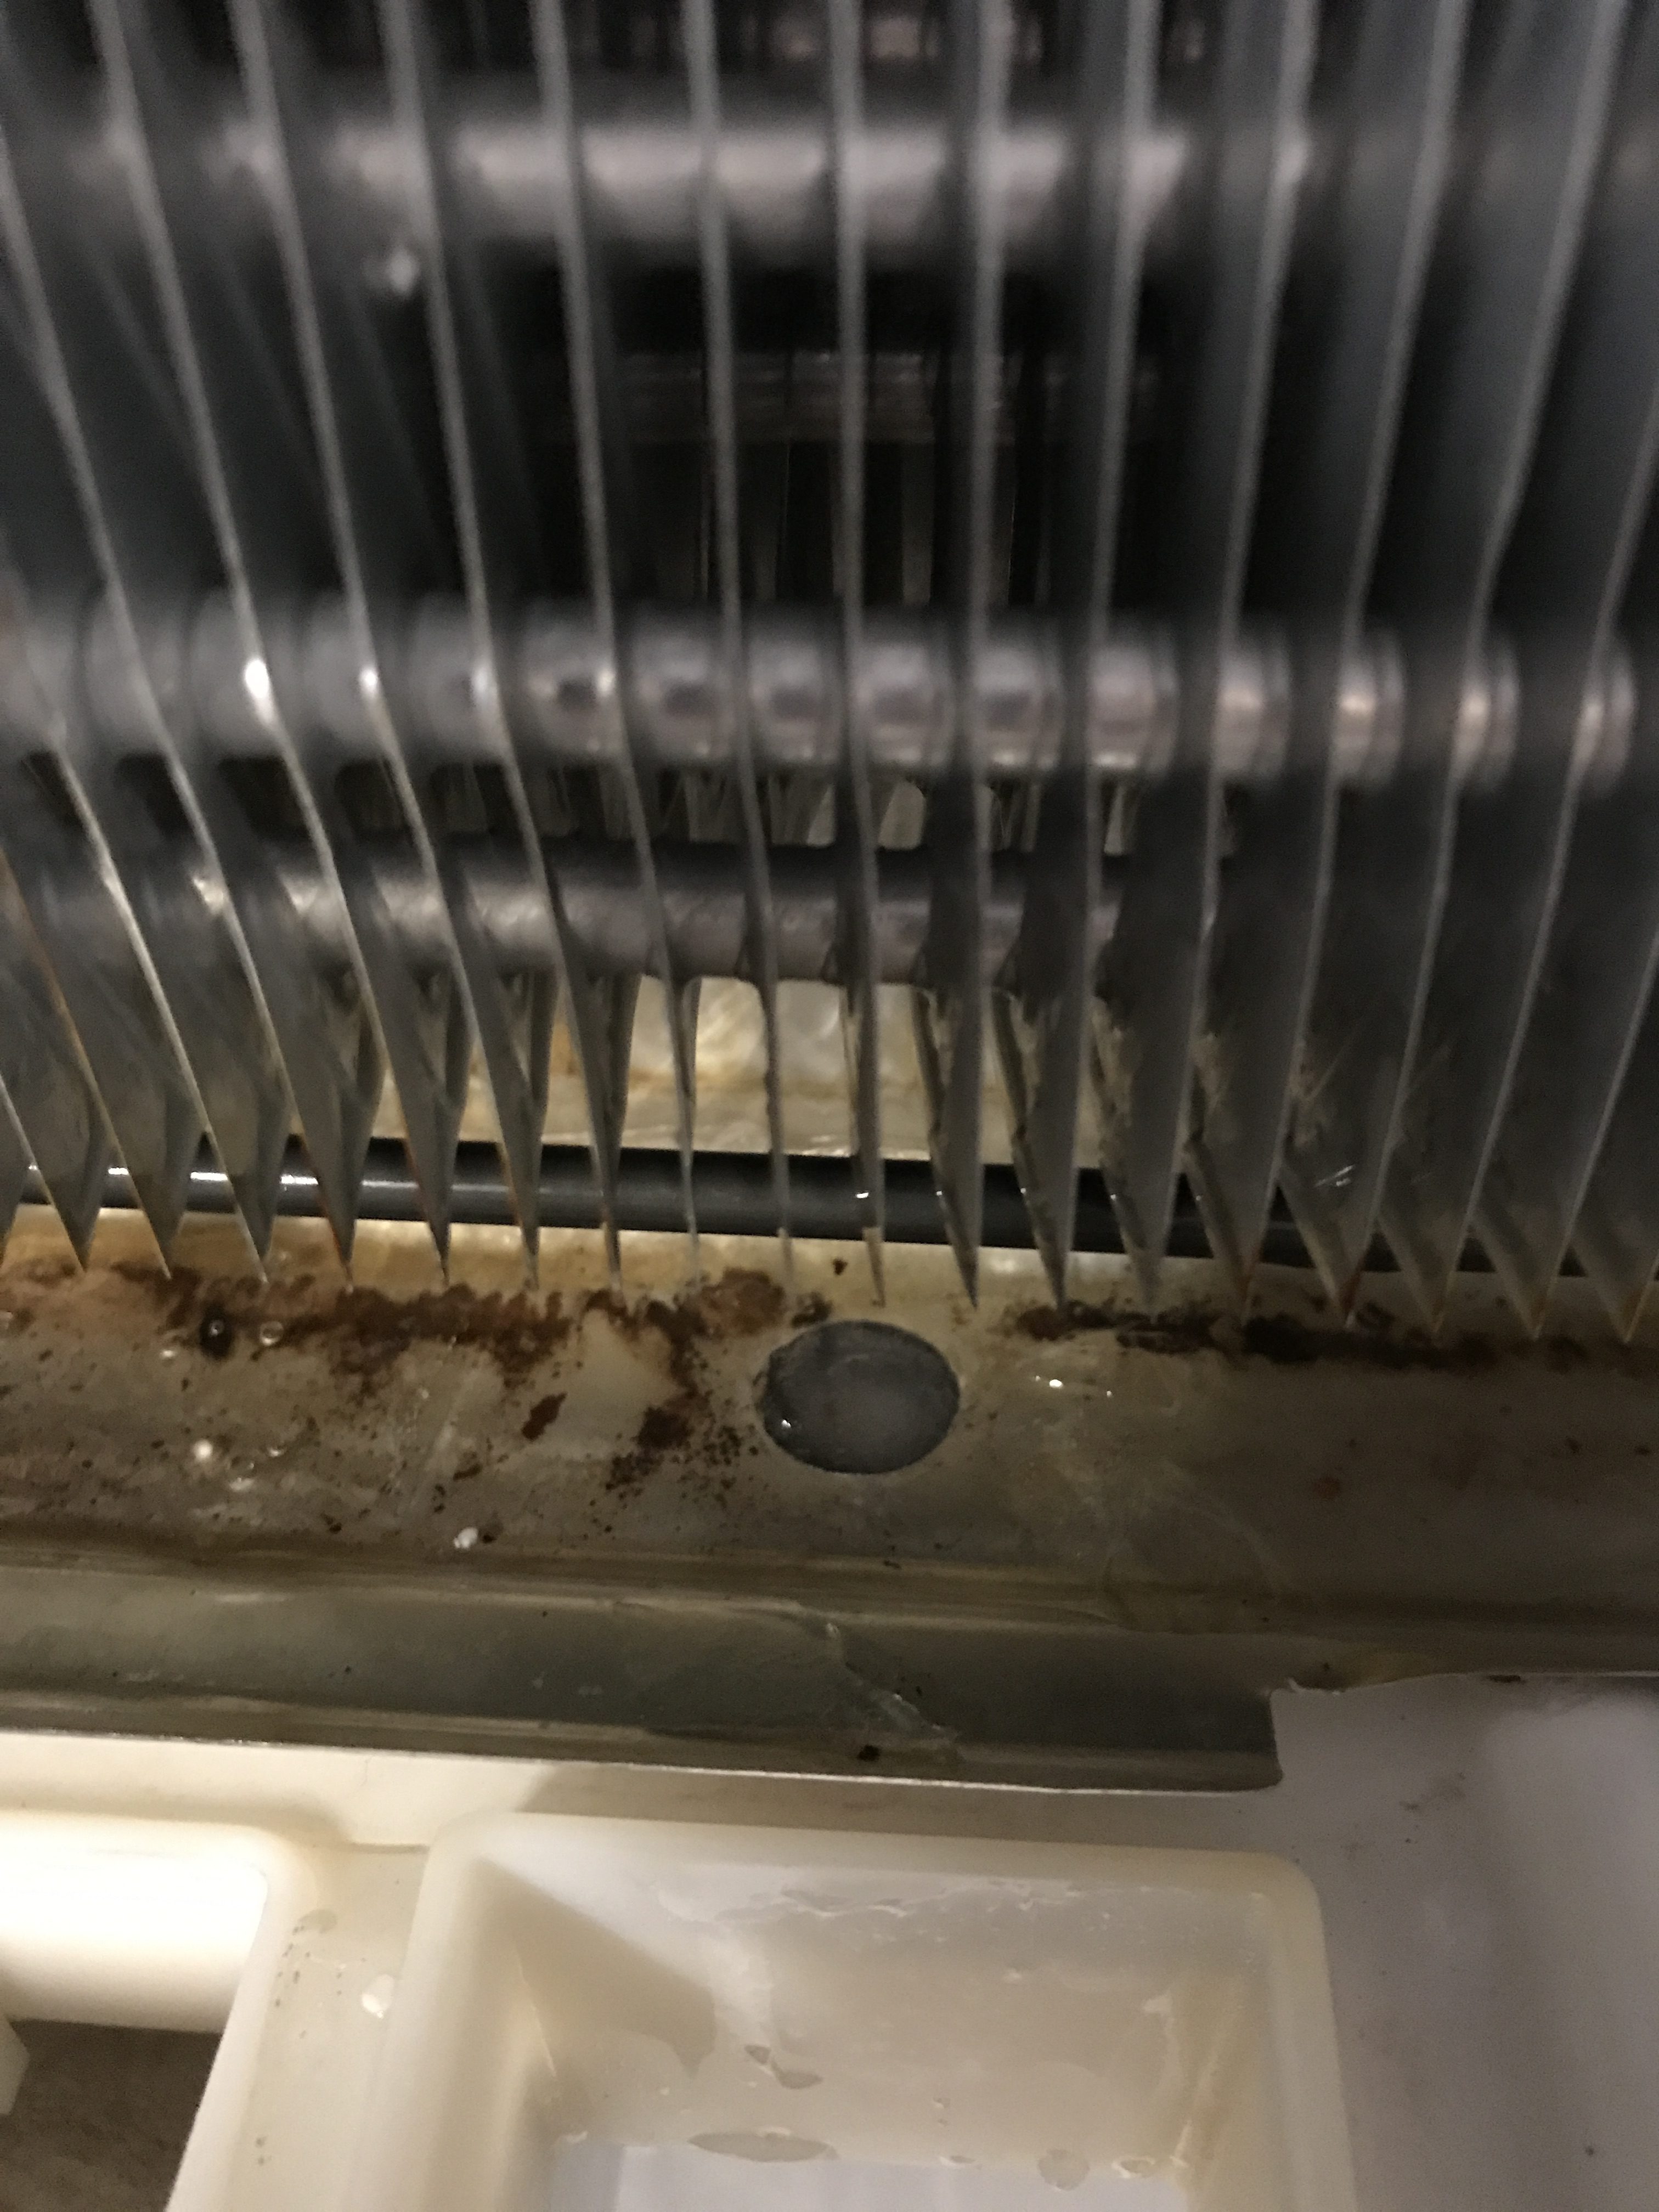
 Once I got the next layer off, I could see the drainage area. The entire thing was full of ice still, and the actual drainage channel was a solid plug of ice. That drain tube goes all the way down to the bottom of the device, to drain into the evaporation pan which is under the freezer compartment.
The basic defrost was done in about 2 hours, but it took over 6 hours and the application of some hot water using a turkey baster and straw directly into the top of the channel to get the ice to melt and the water to drain.
Now to see how long it takes before it gets iced over again.
Stockholm and the ABBA Museum
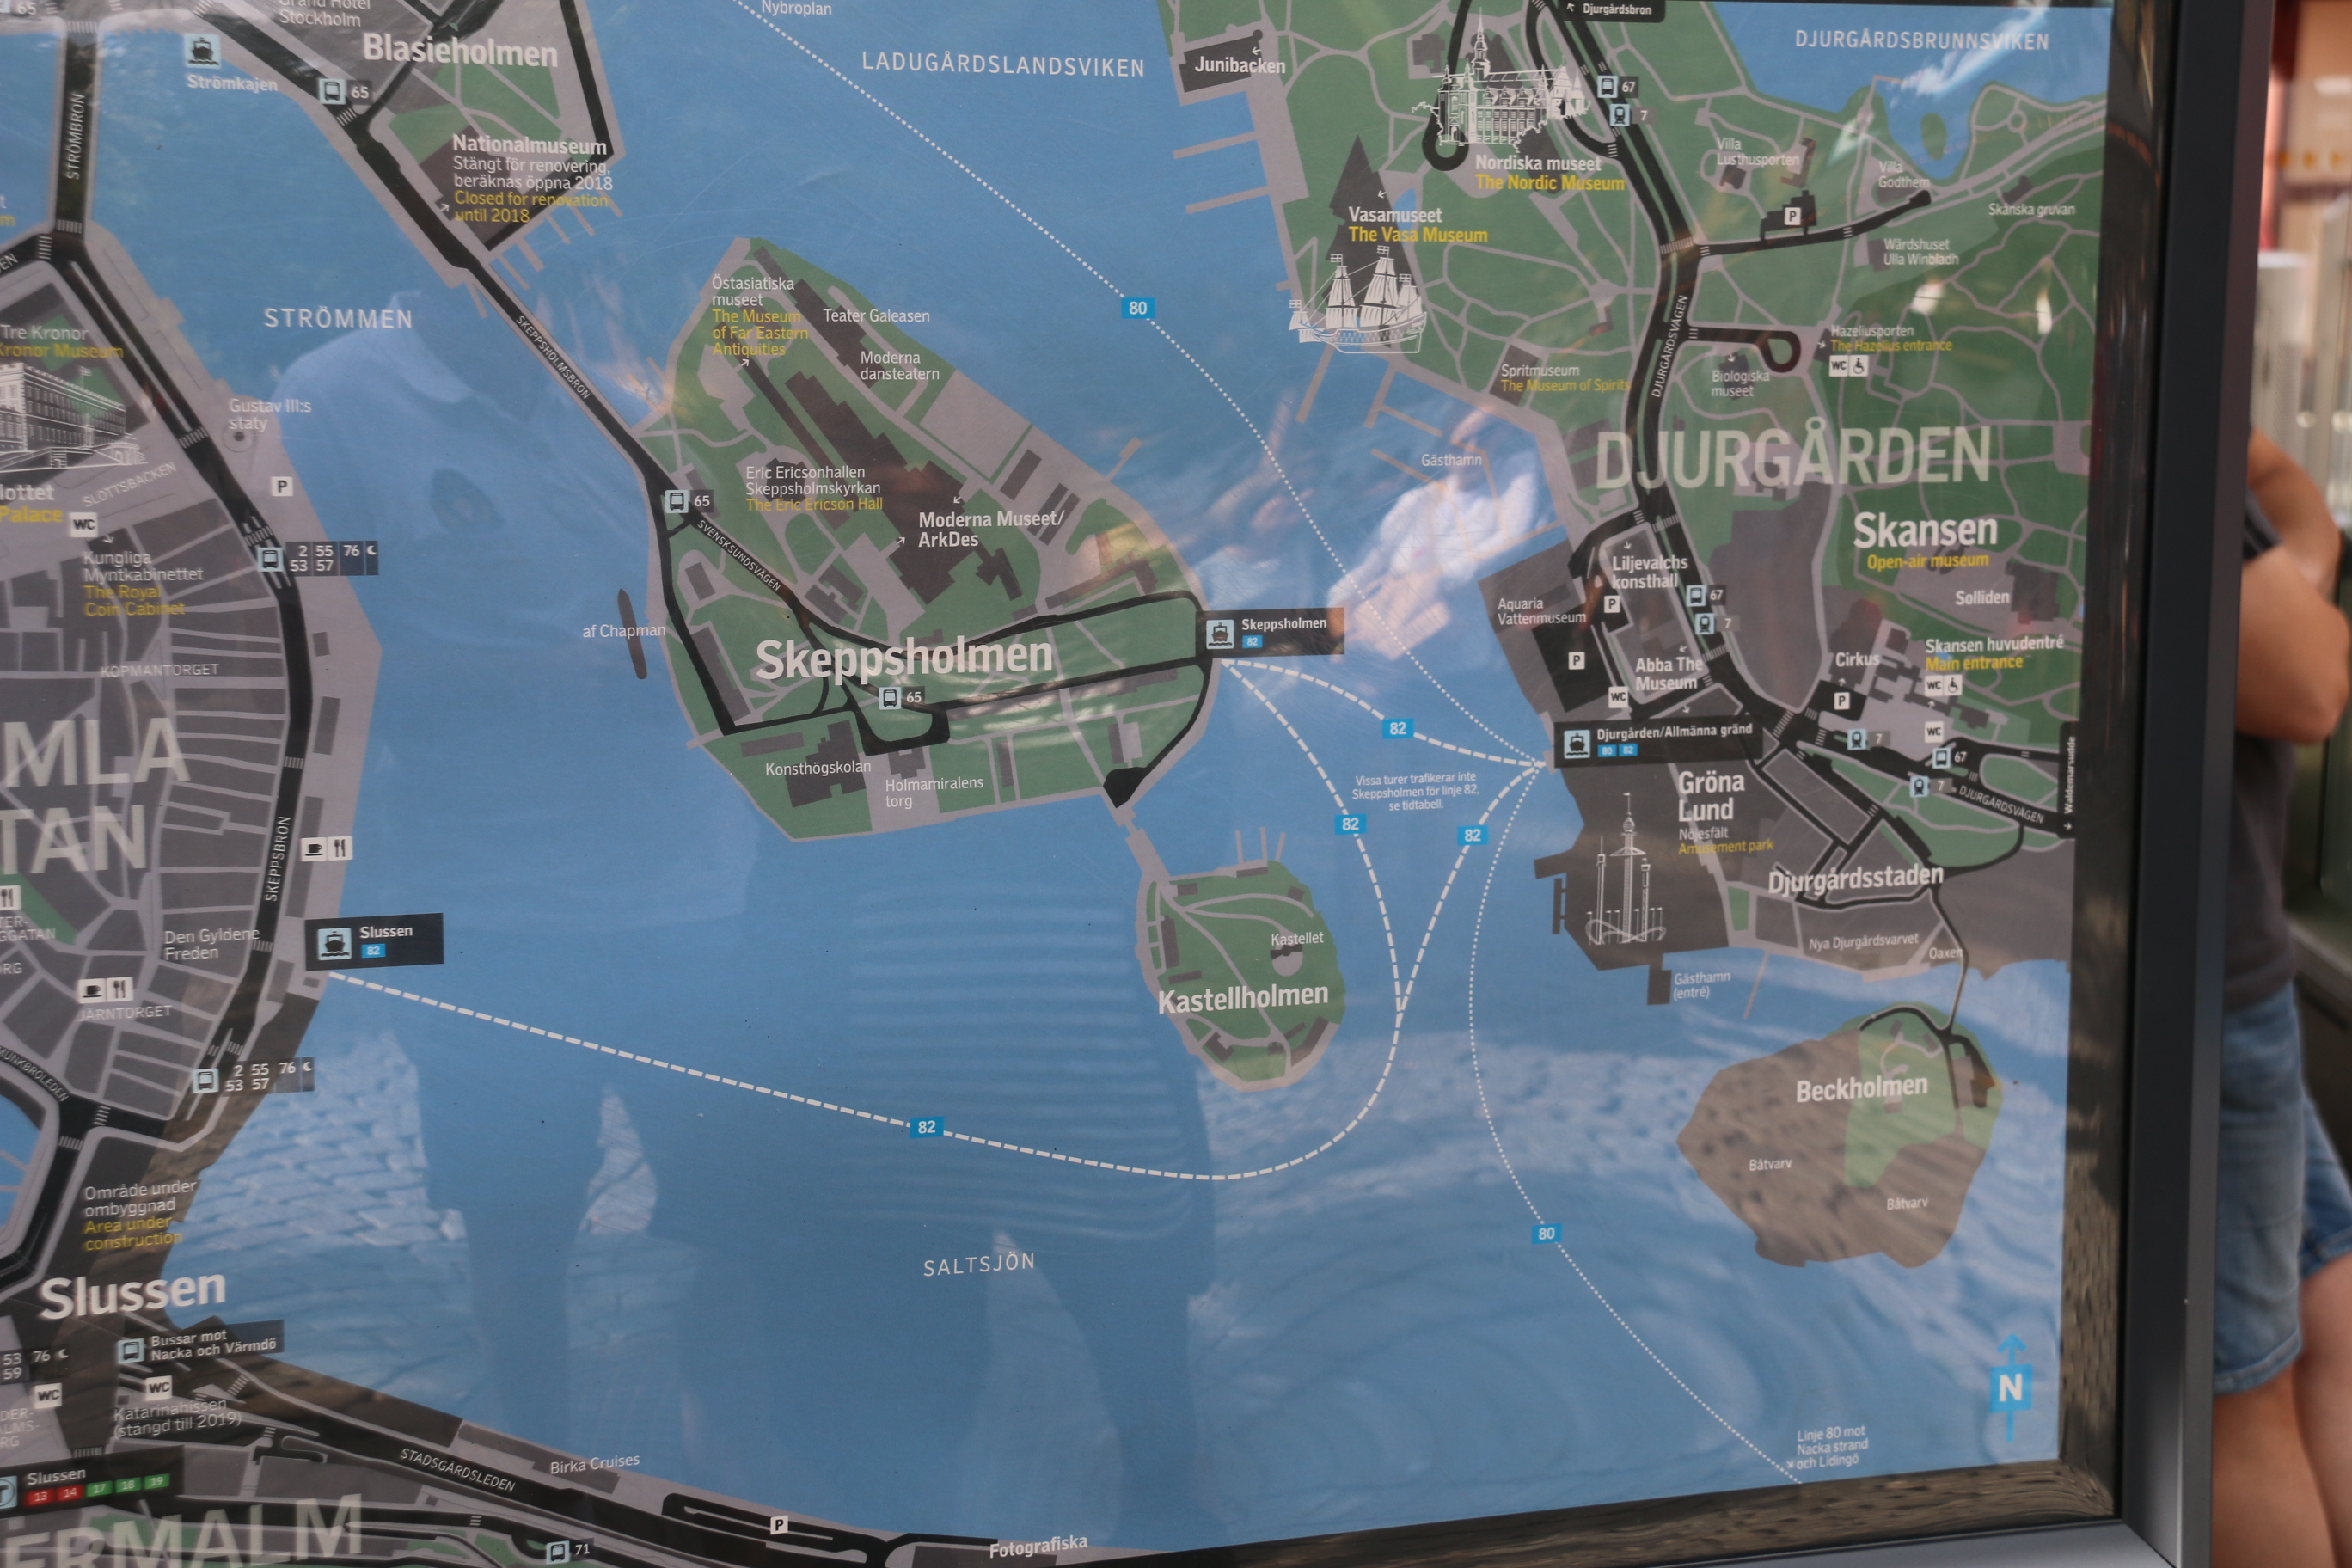

Stockholm is a city made up of many small islands with bridges and inlets and ferries. We had two things we absolutely wanted to do in Stockholm — see the Vasa, and go to the ABBA museum.
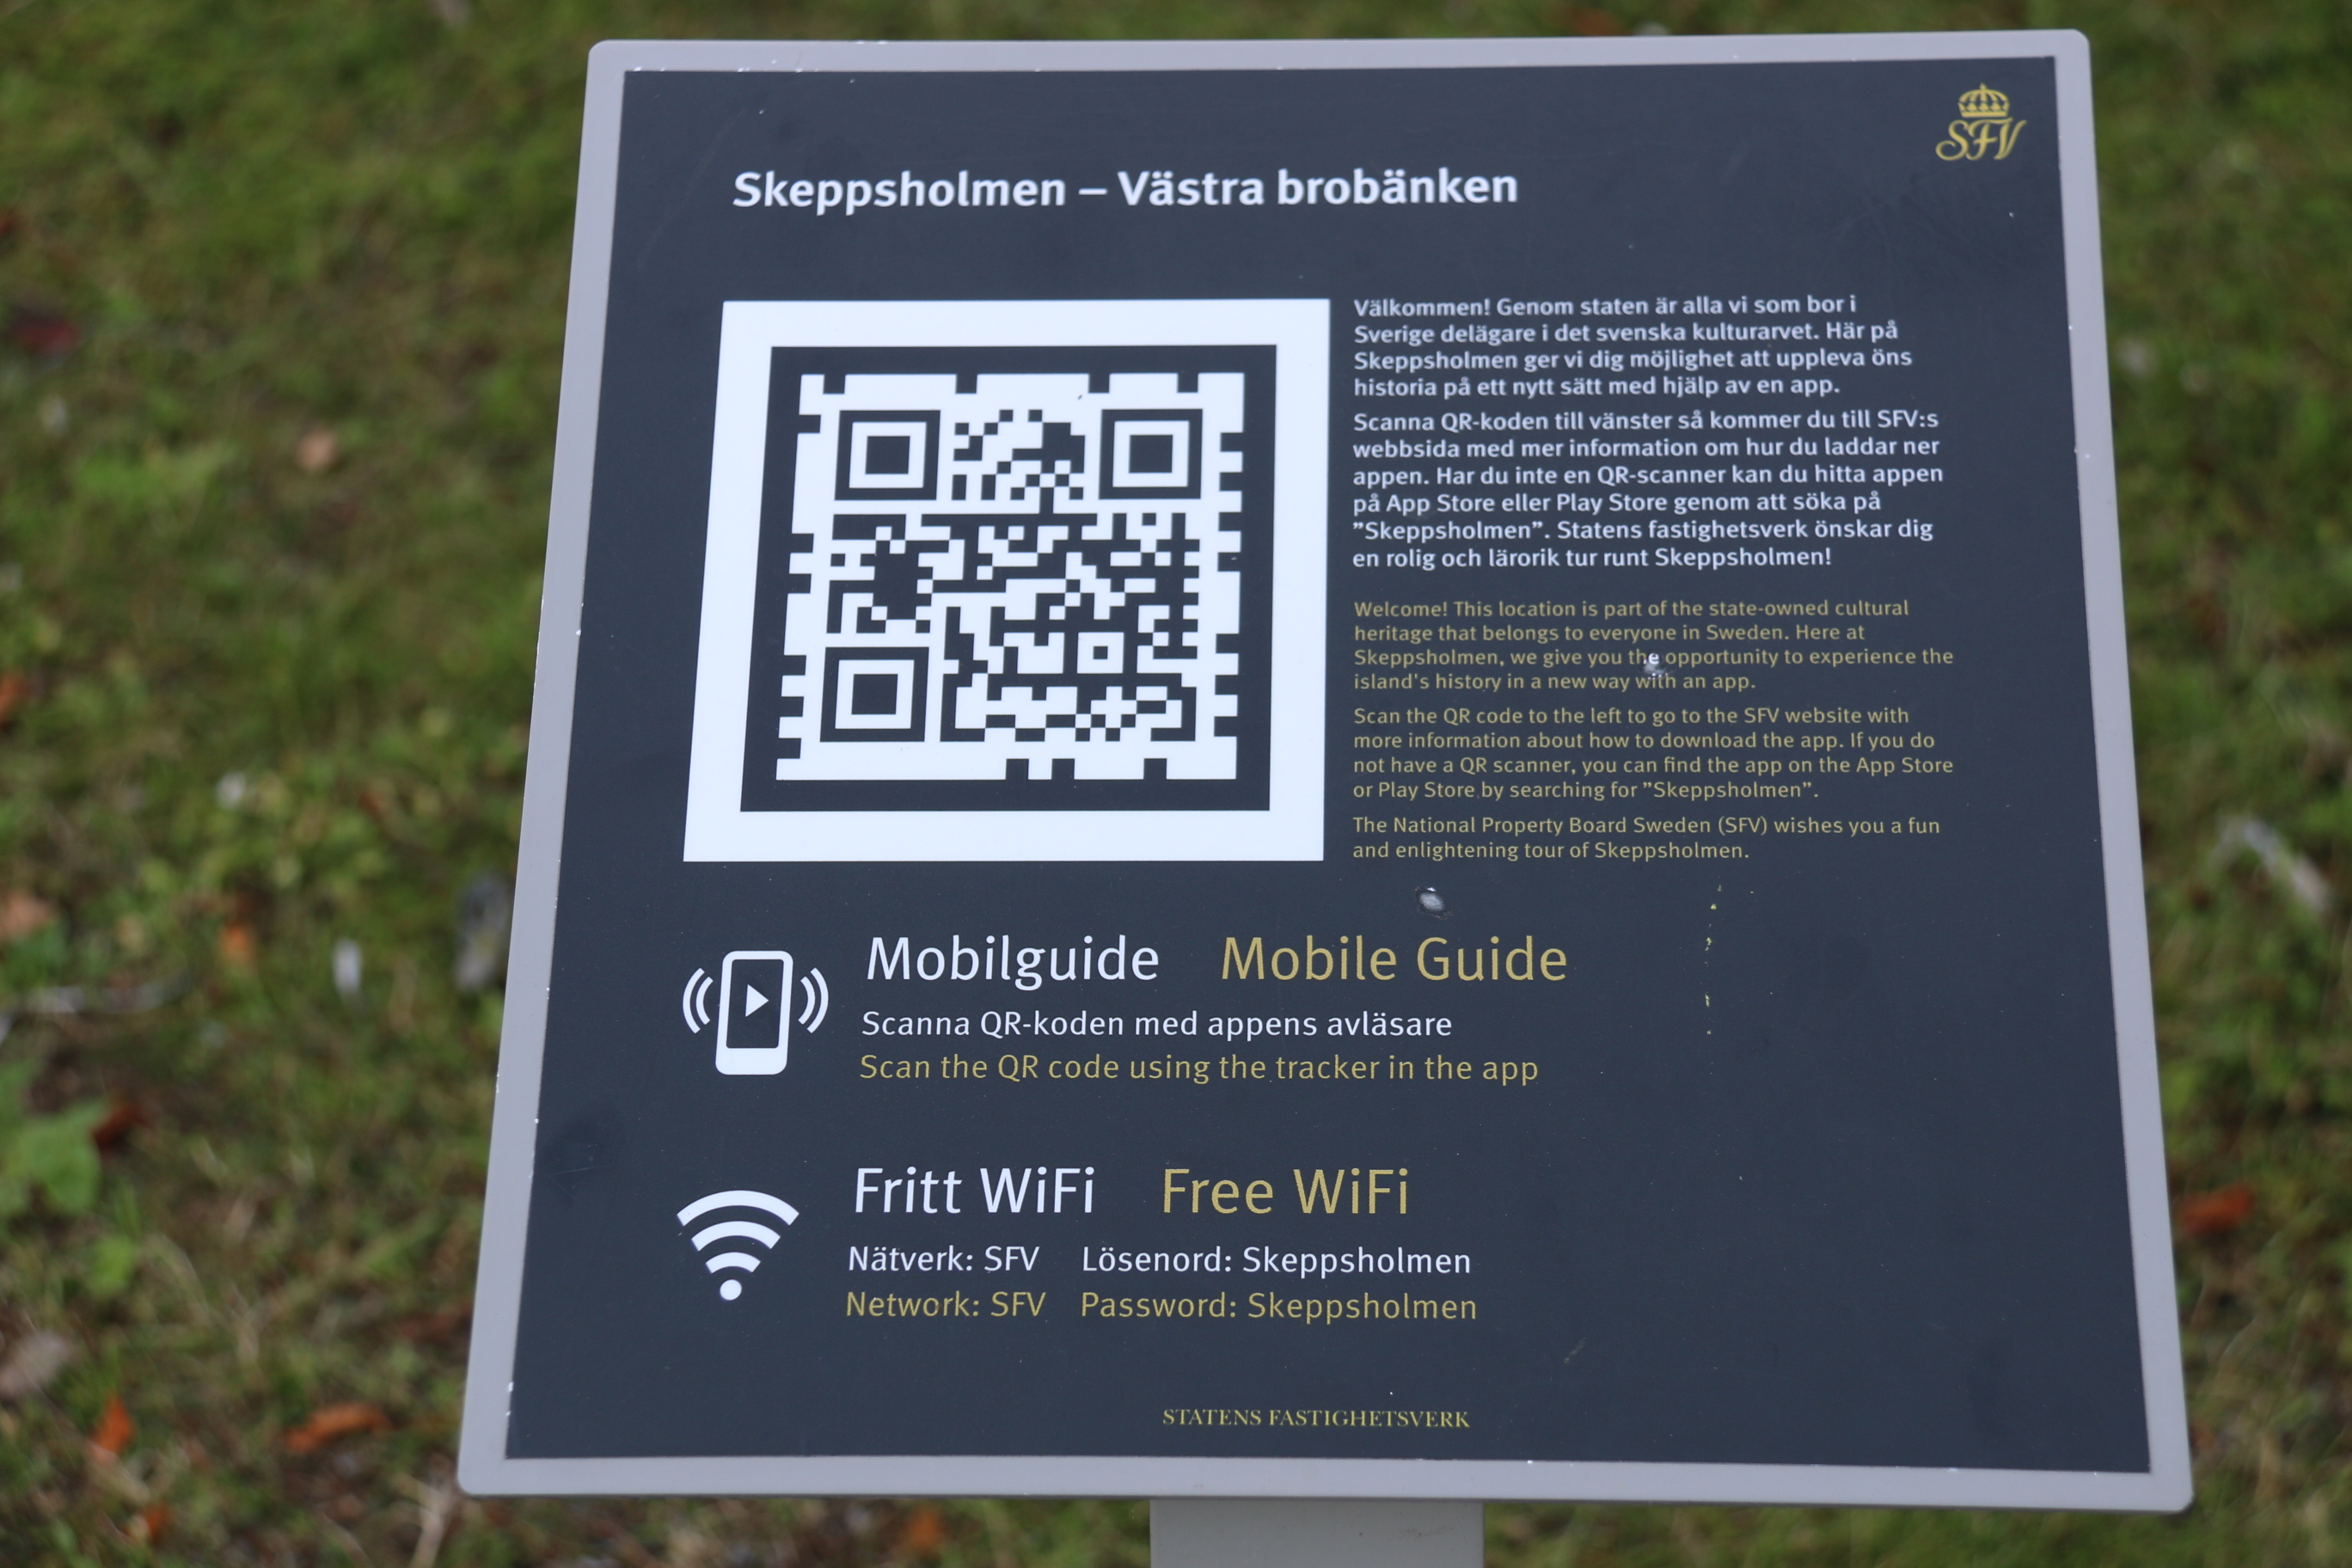
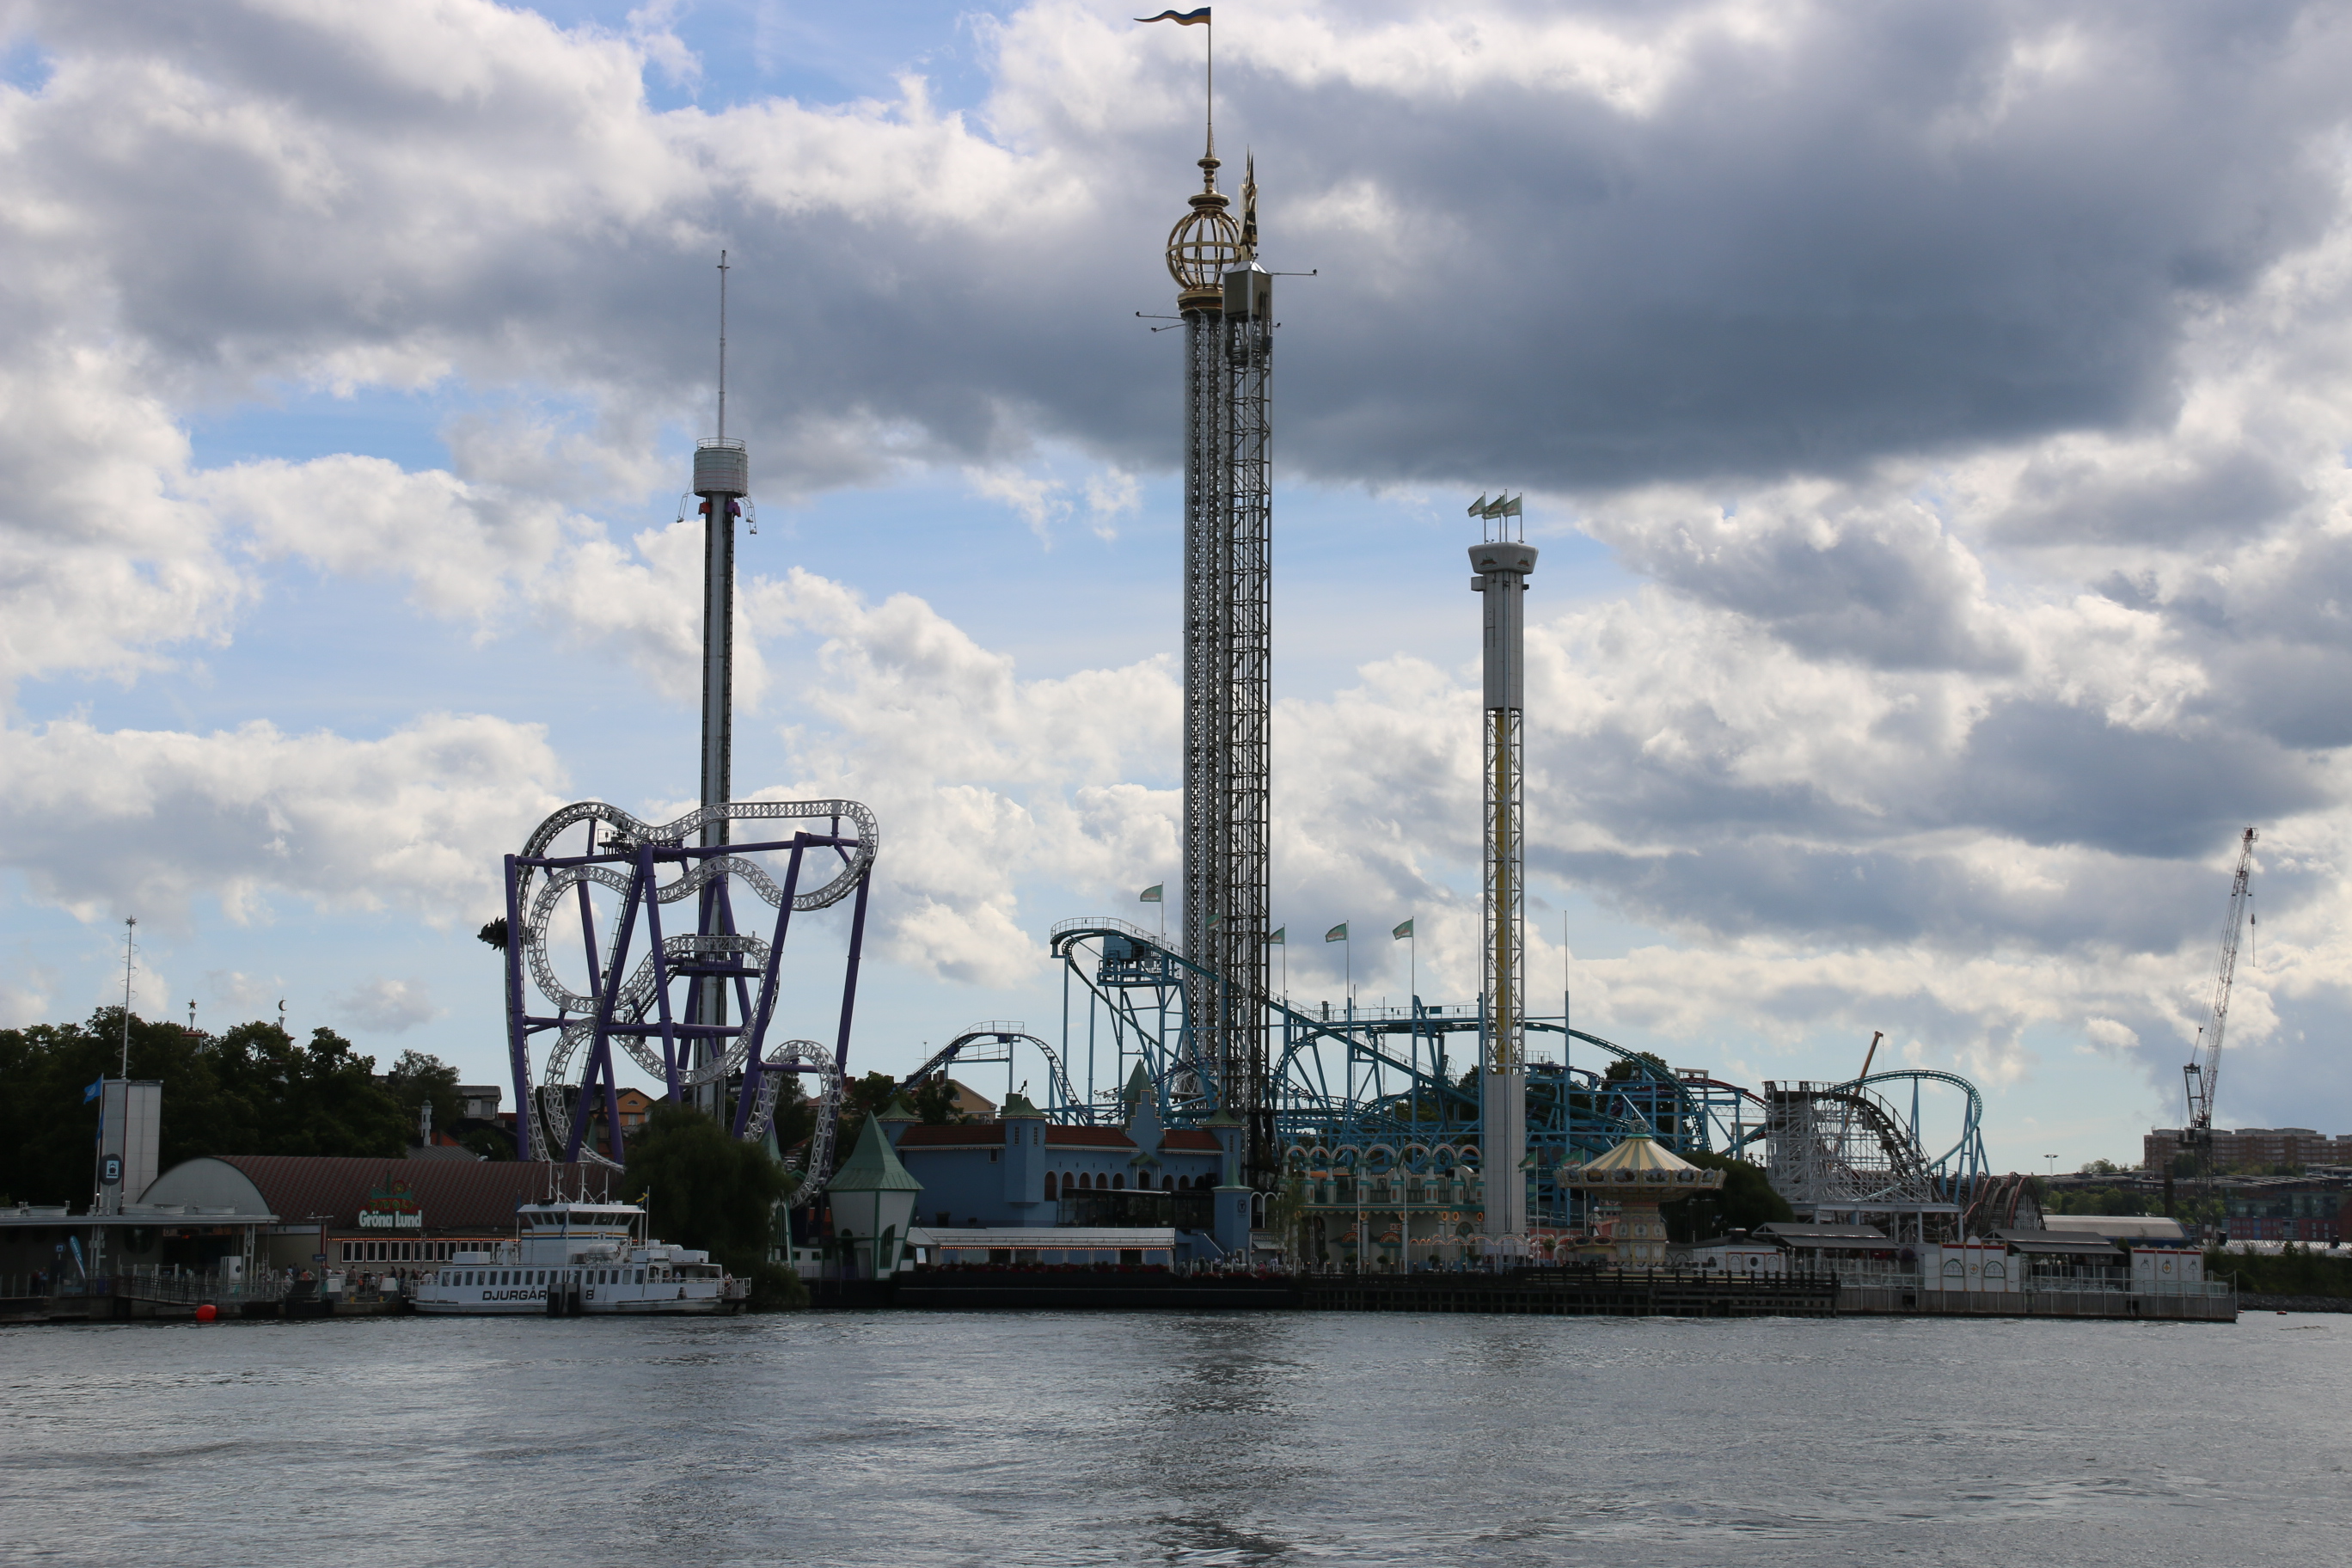
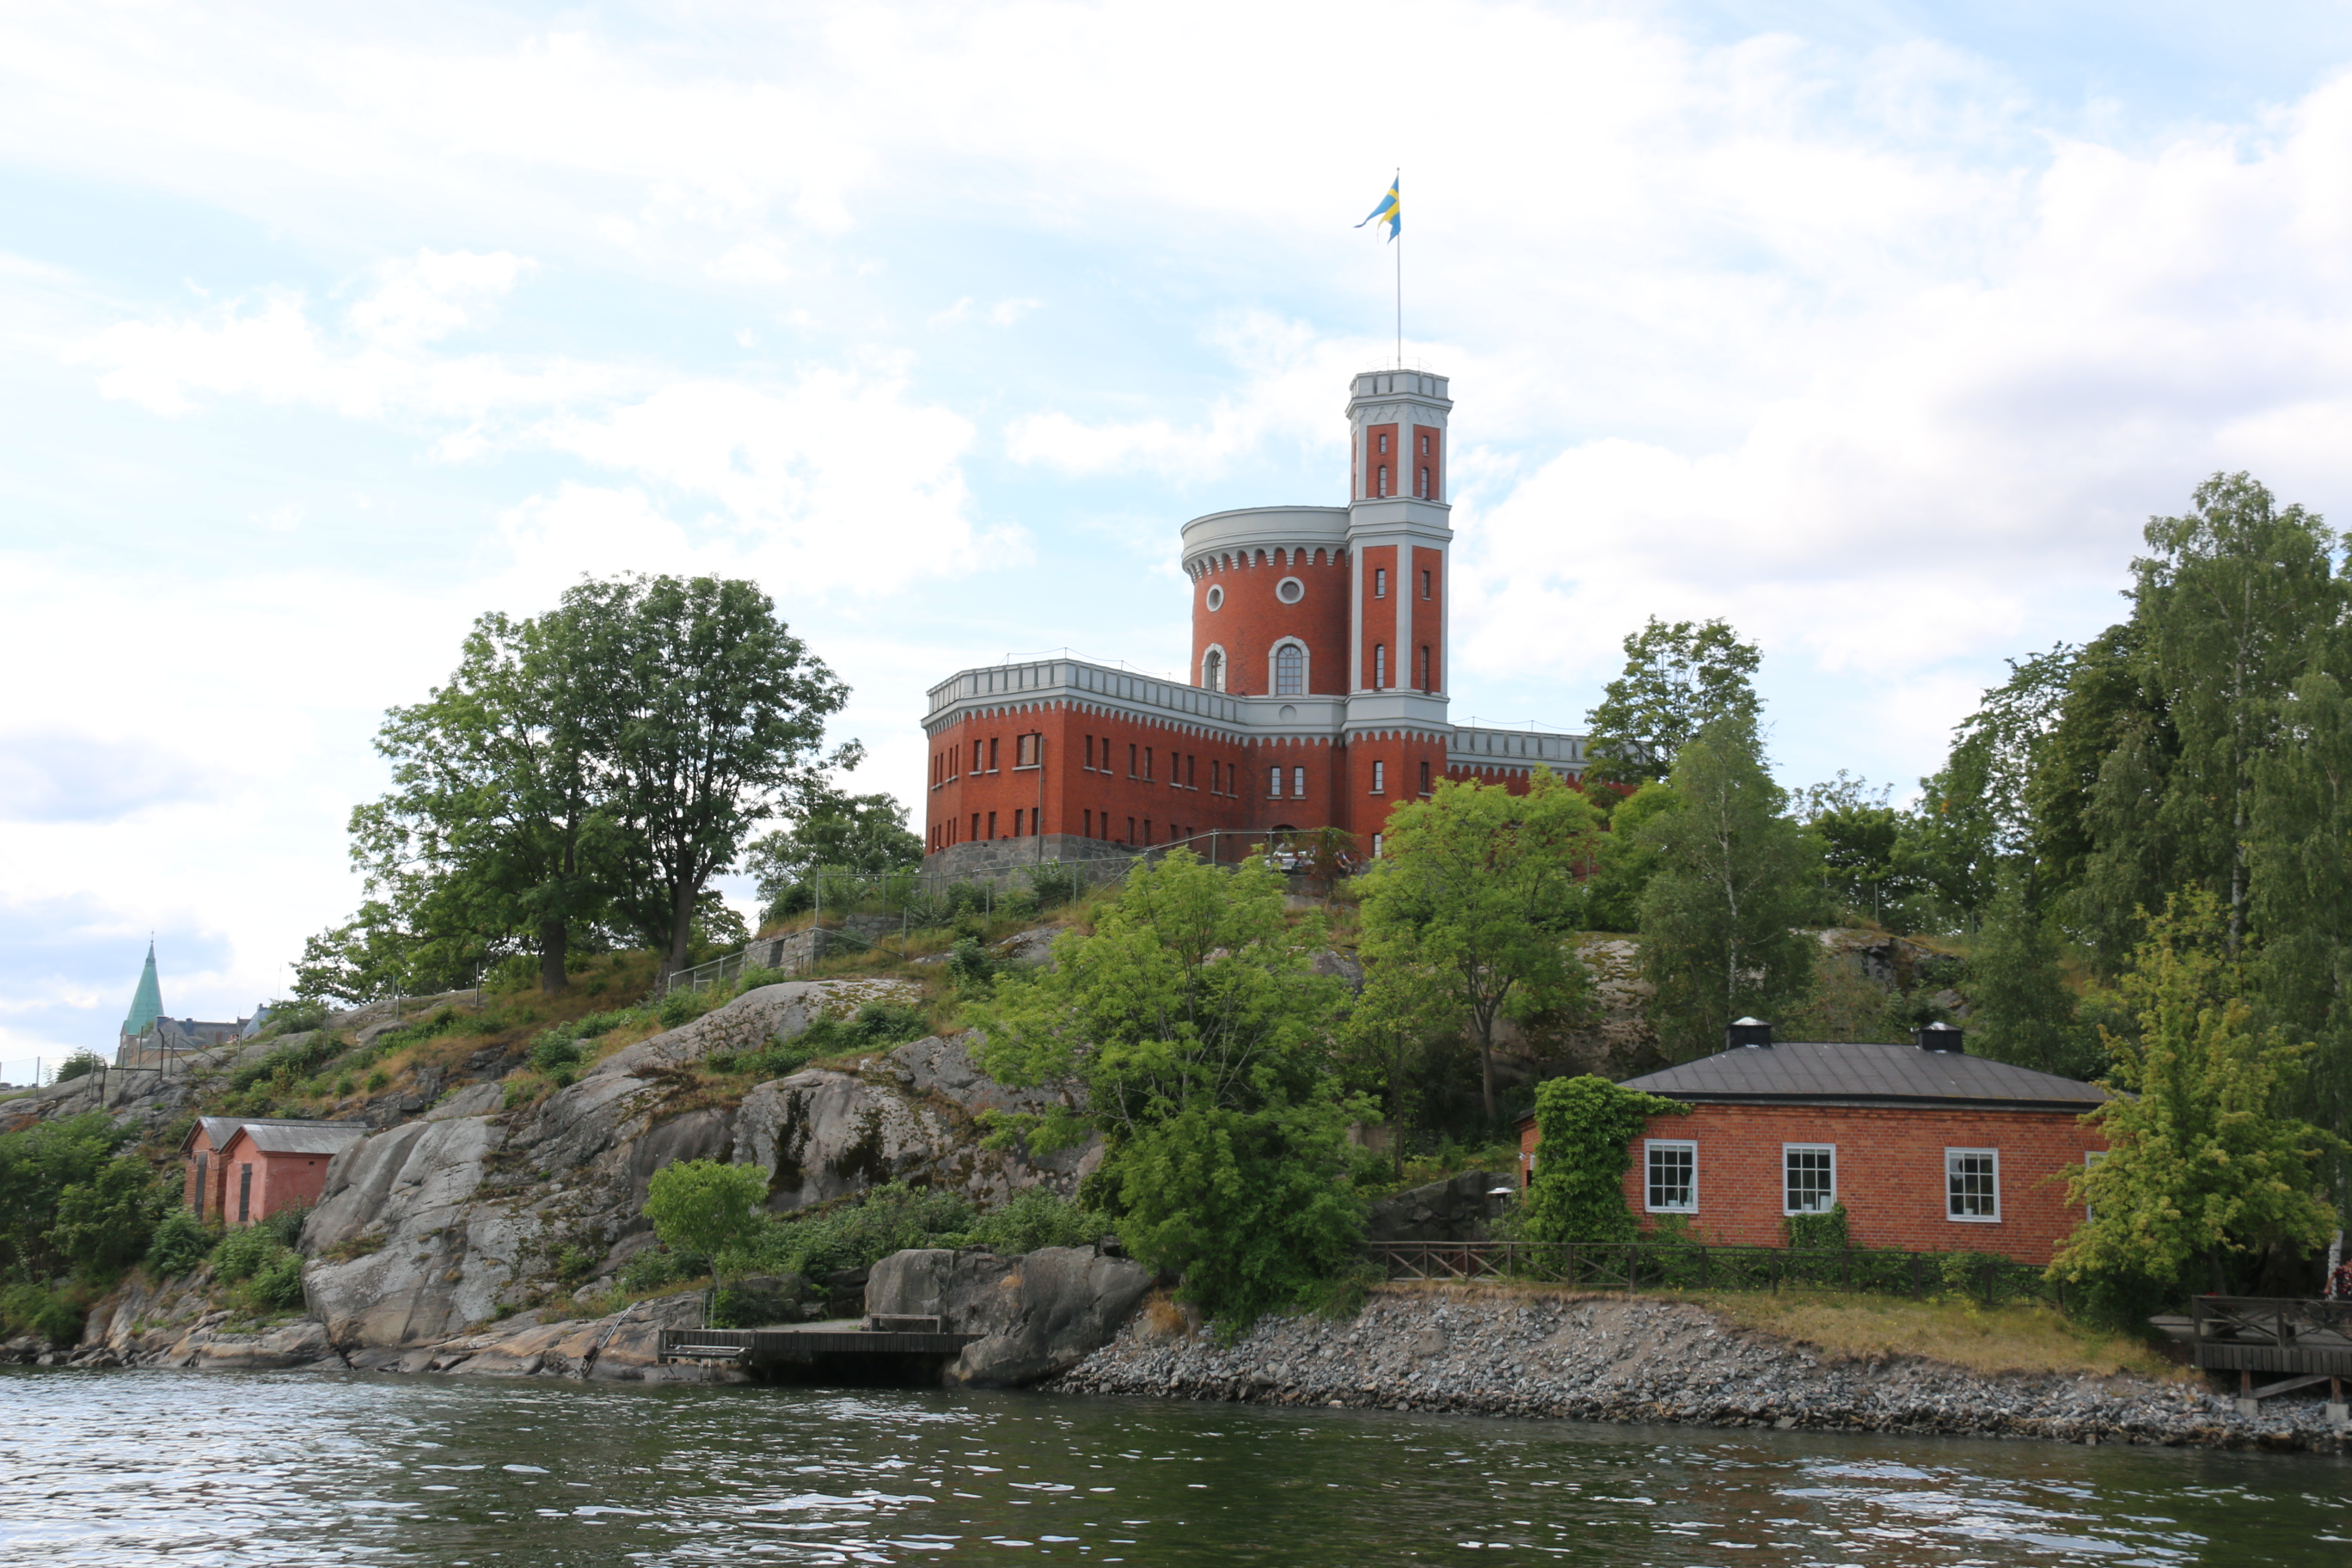
To get there from our hotel, we needed to either walk “up and over” a portion of the harbor, or take the ferry across. We opted to take the ferry over and walk back. We walked across a small bridge to Skeppholmen, to see a sign with a QR code for a mobile guide. We went past the af Chapman, around the Moderna Museet, to the ferry — we went across the harbor to Slussen and then back across to Djurgården. We got to see the rides at the amusement park Gröna Lund while on the ferry. One of them looked pretty gnarly — it’s apparently called Insane and is one of a handful of “4-D” coasters around the world.
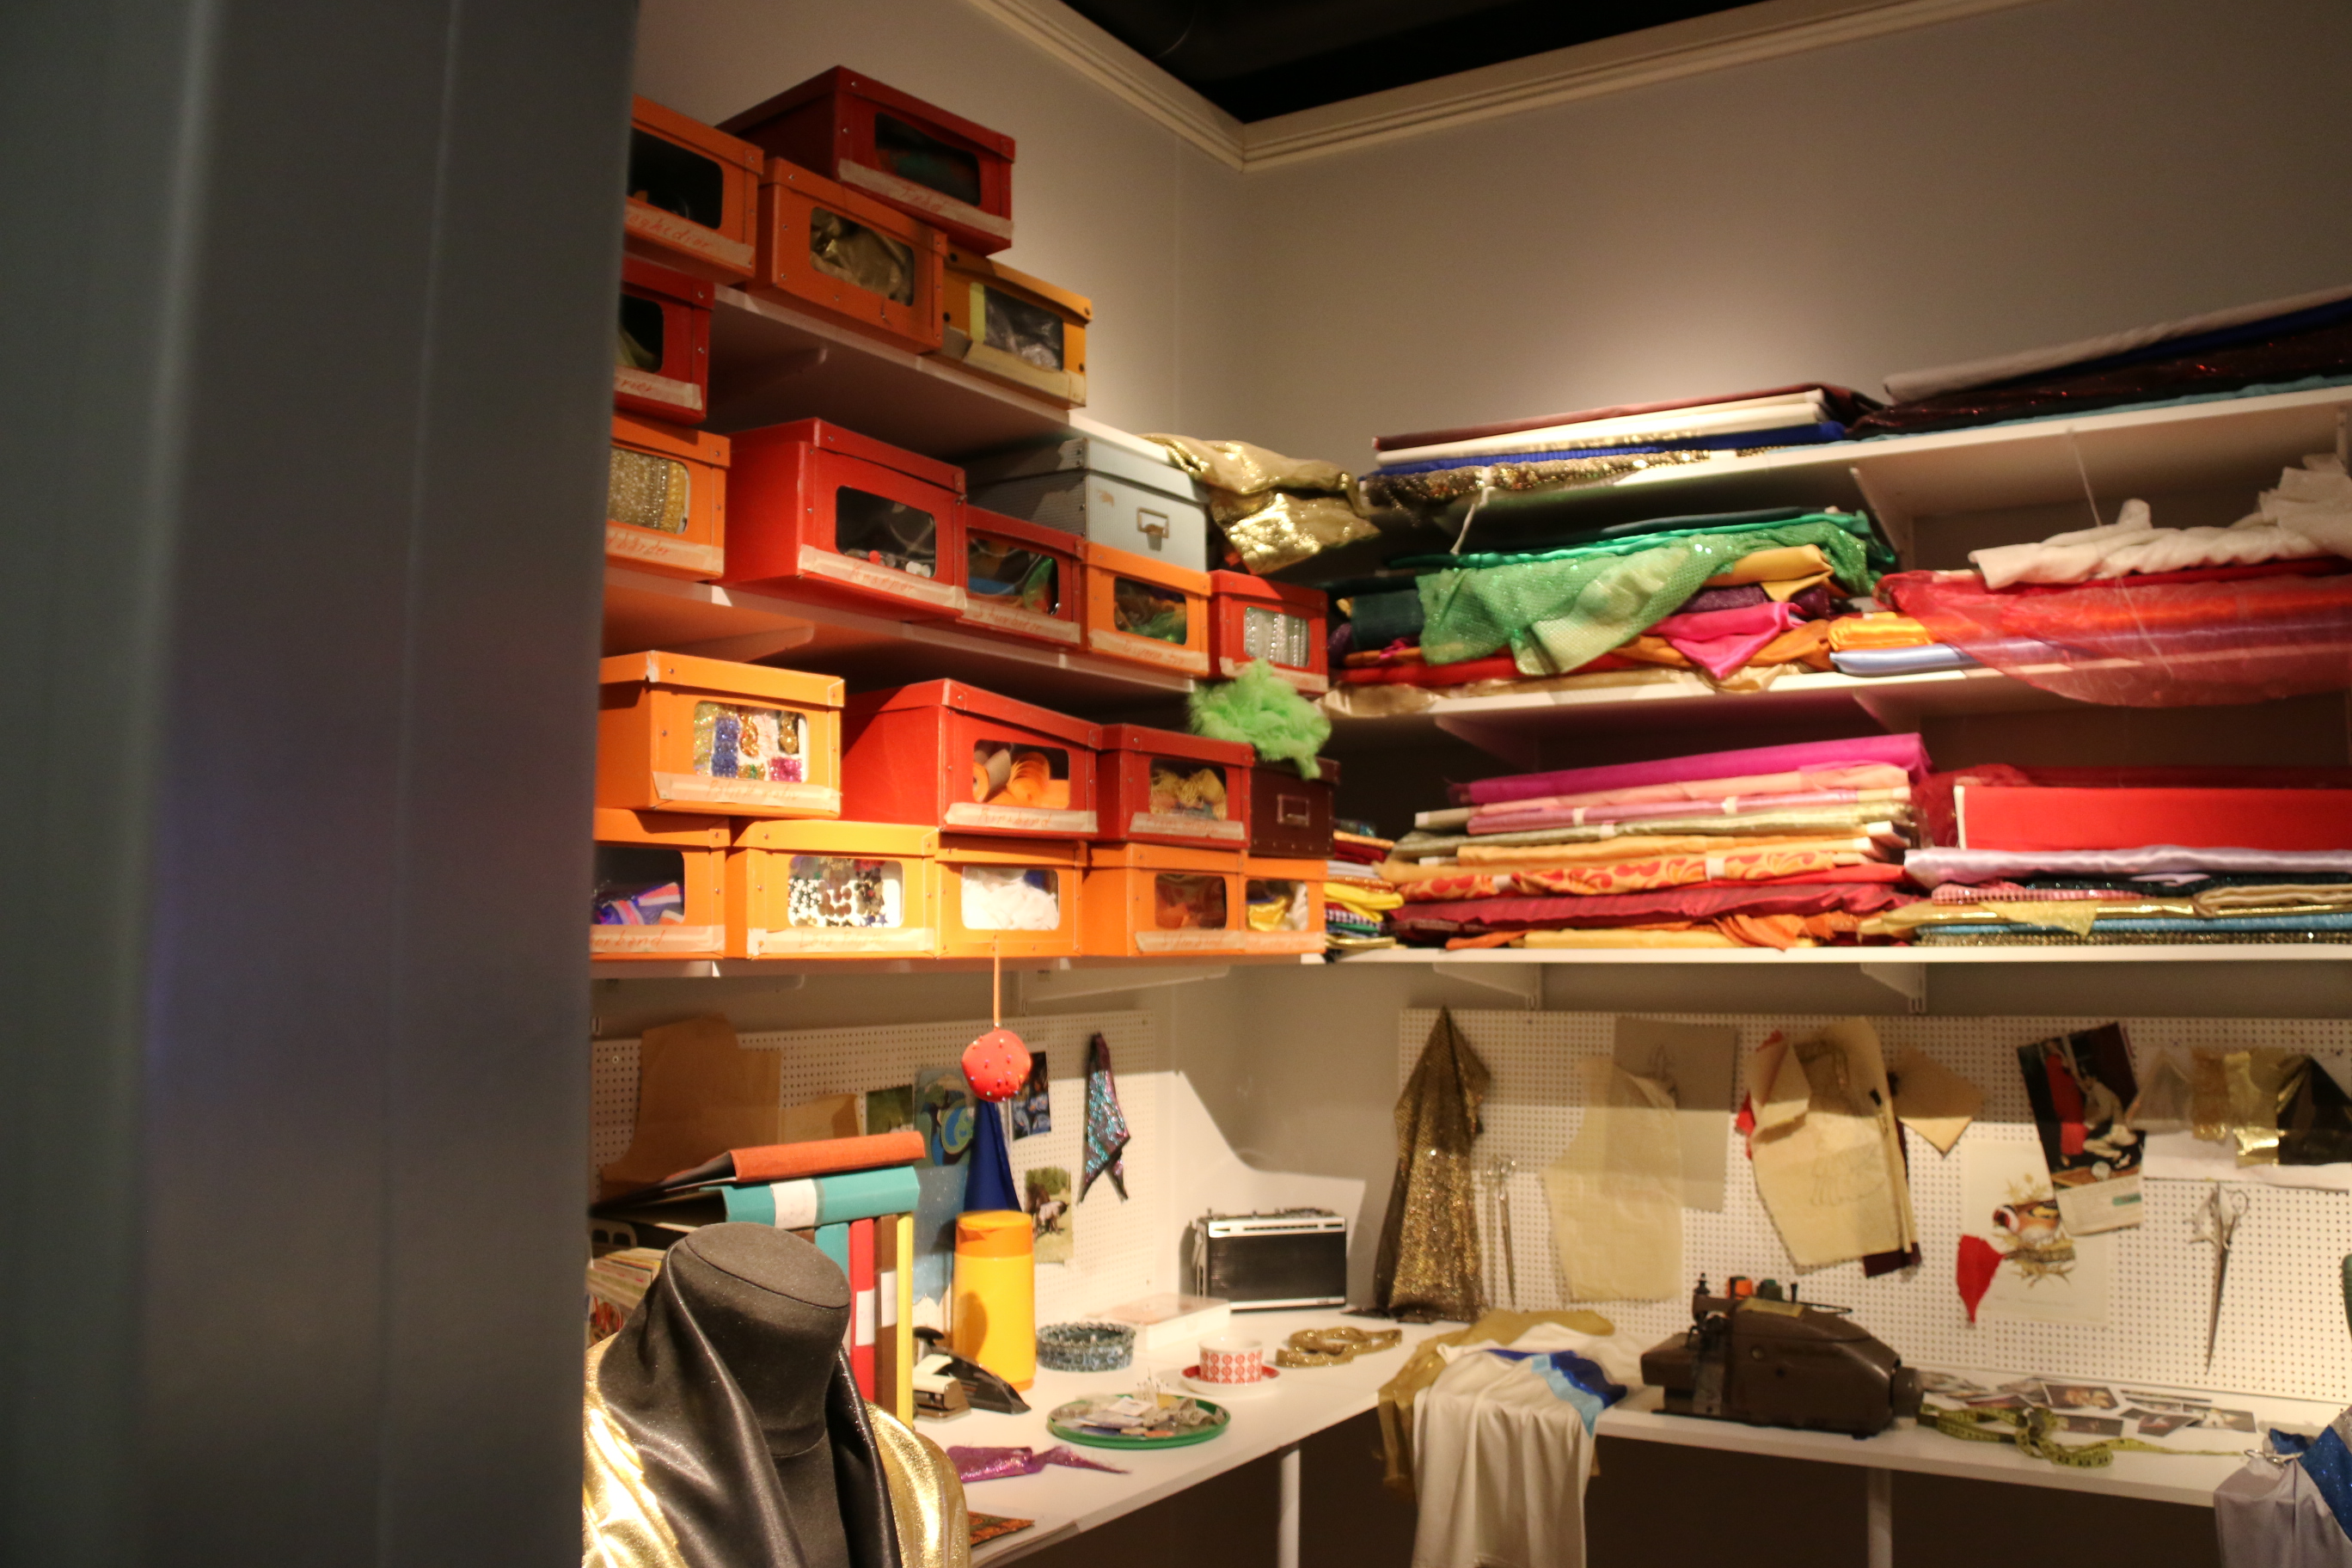
We walked around the corner from the ferry to the ABBA Museum. As we got our tickets, they asked if we wanted the audio tour as well, and then handed us a device about the size of a banana which played back audio clips when we held it over an indicator in various places in the exhibits. Most of the audio was one of the four band members talking about a specific part of the exhibit and their history. They also had different interactive stations where you swiped your ticket to later review your “audition” as a 5th member of the band, your sound mixing, or your on-stage performance. Needless to say, I was taking close looks at all of their costumes and took lots of detail pictures. We were told that one of the reasons they wore such wild outfits had to do with taxes, and if they weren’t something you would wear on the street, they weren’t taxed. I’m sure we will find an excuse to make a set at some point – maybe the kimono-inspired ones. The exhibits also included a section of Eurovision costumes, although Verka Serduchka’s wild silver outfit wasn’t there.
Remember the Vasa!
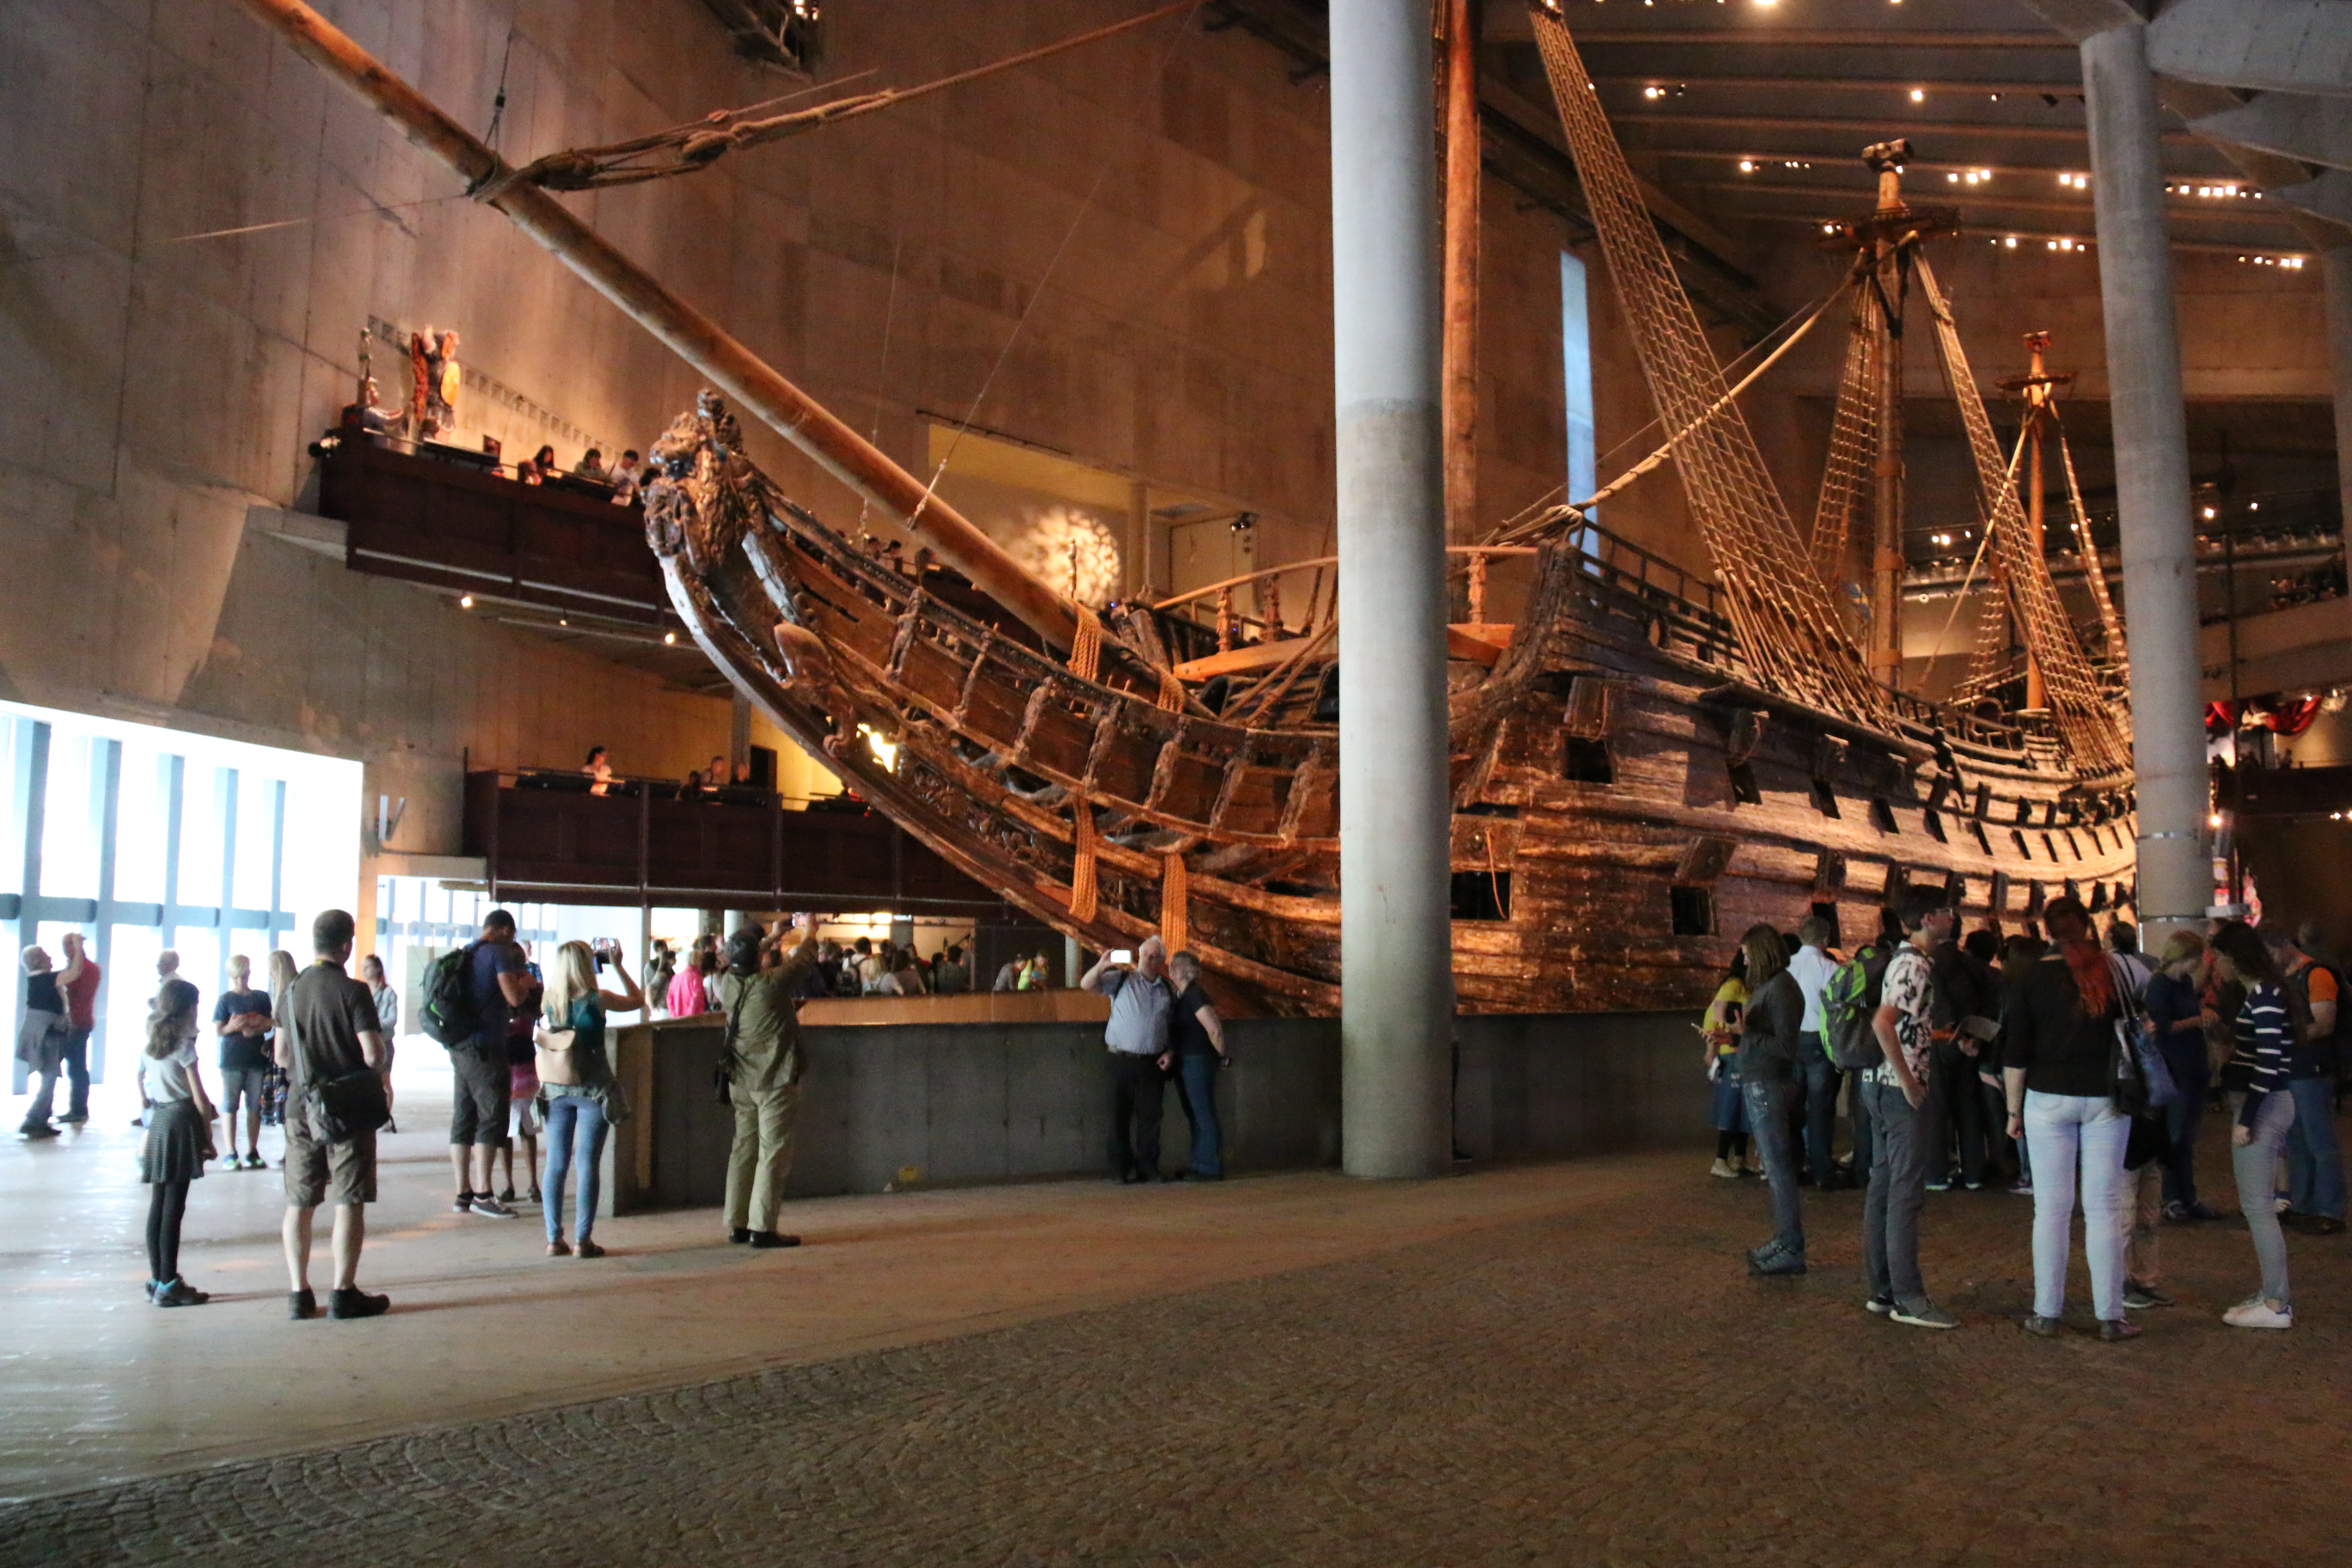
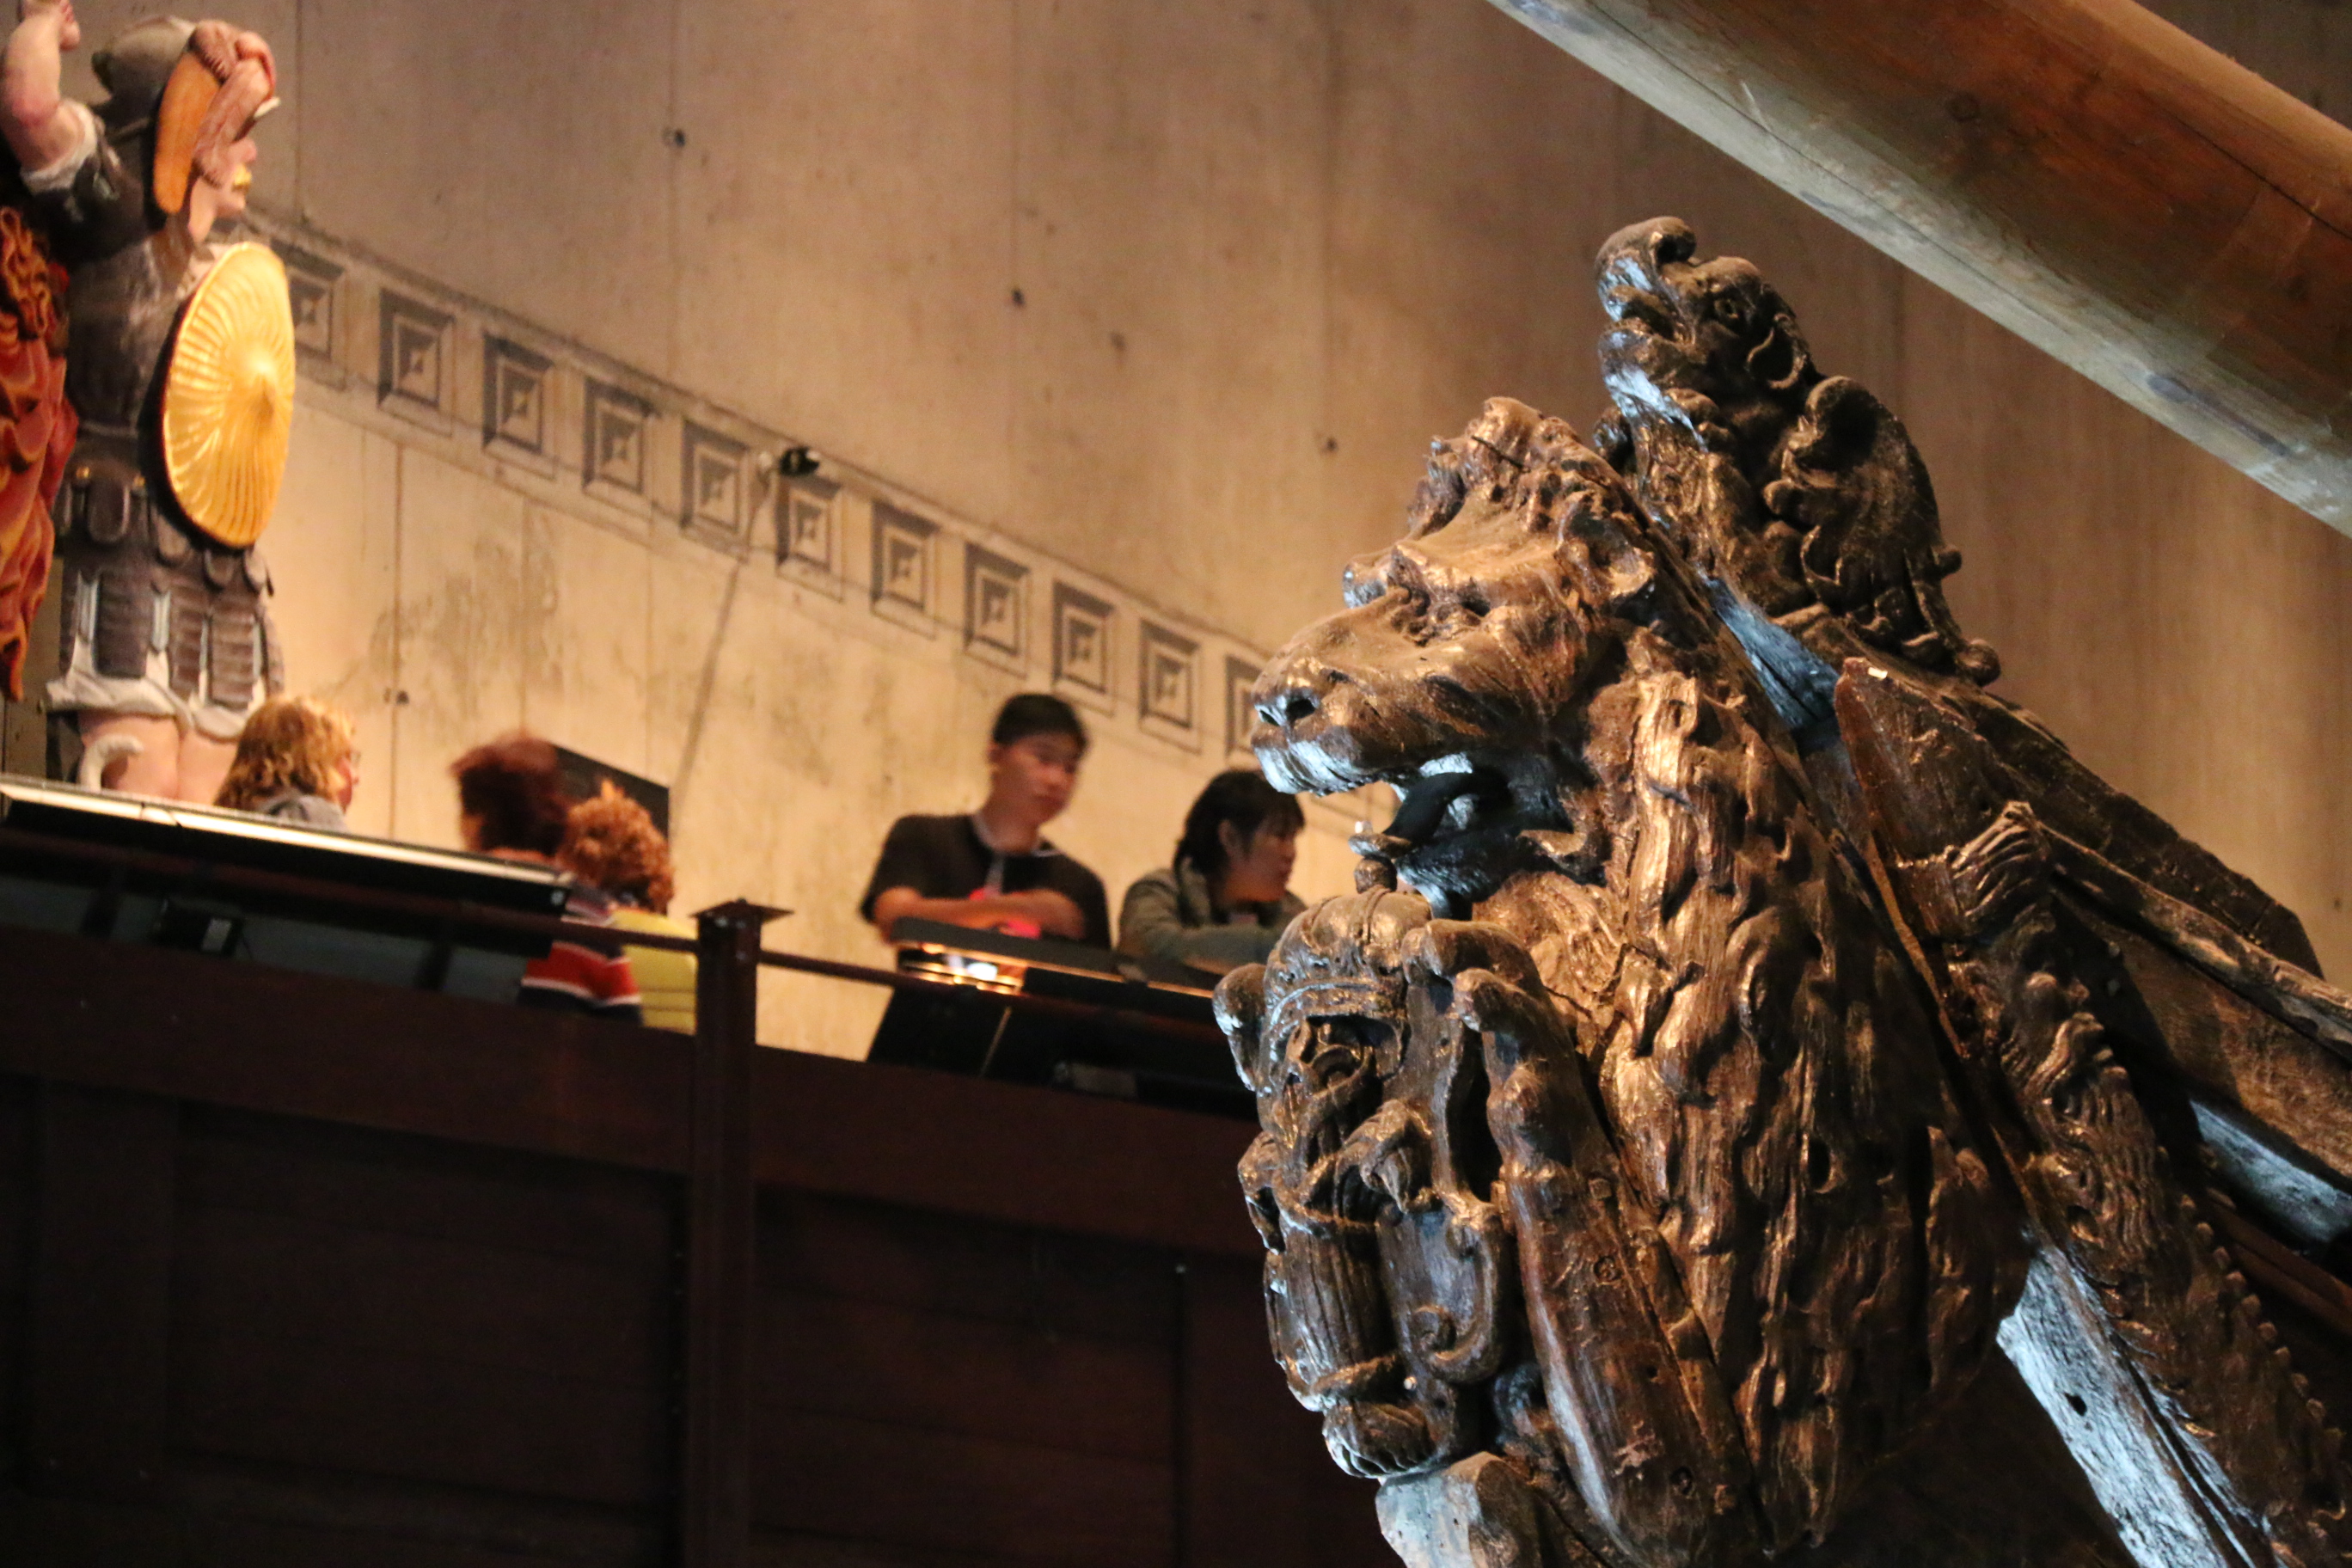
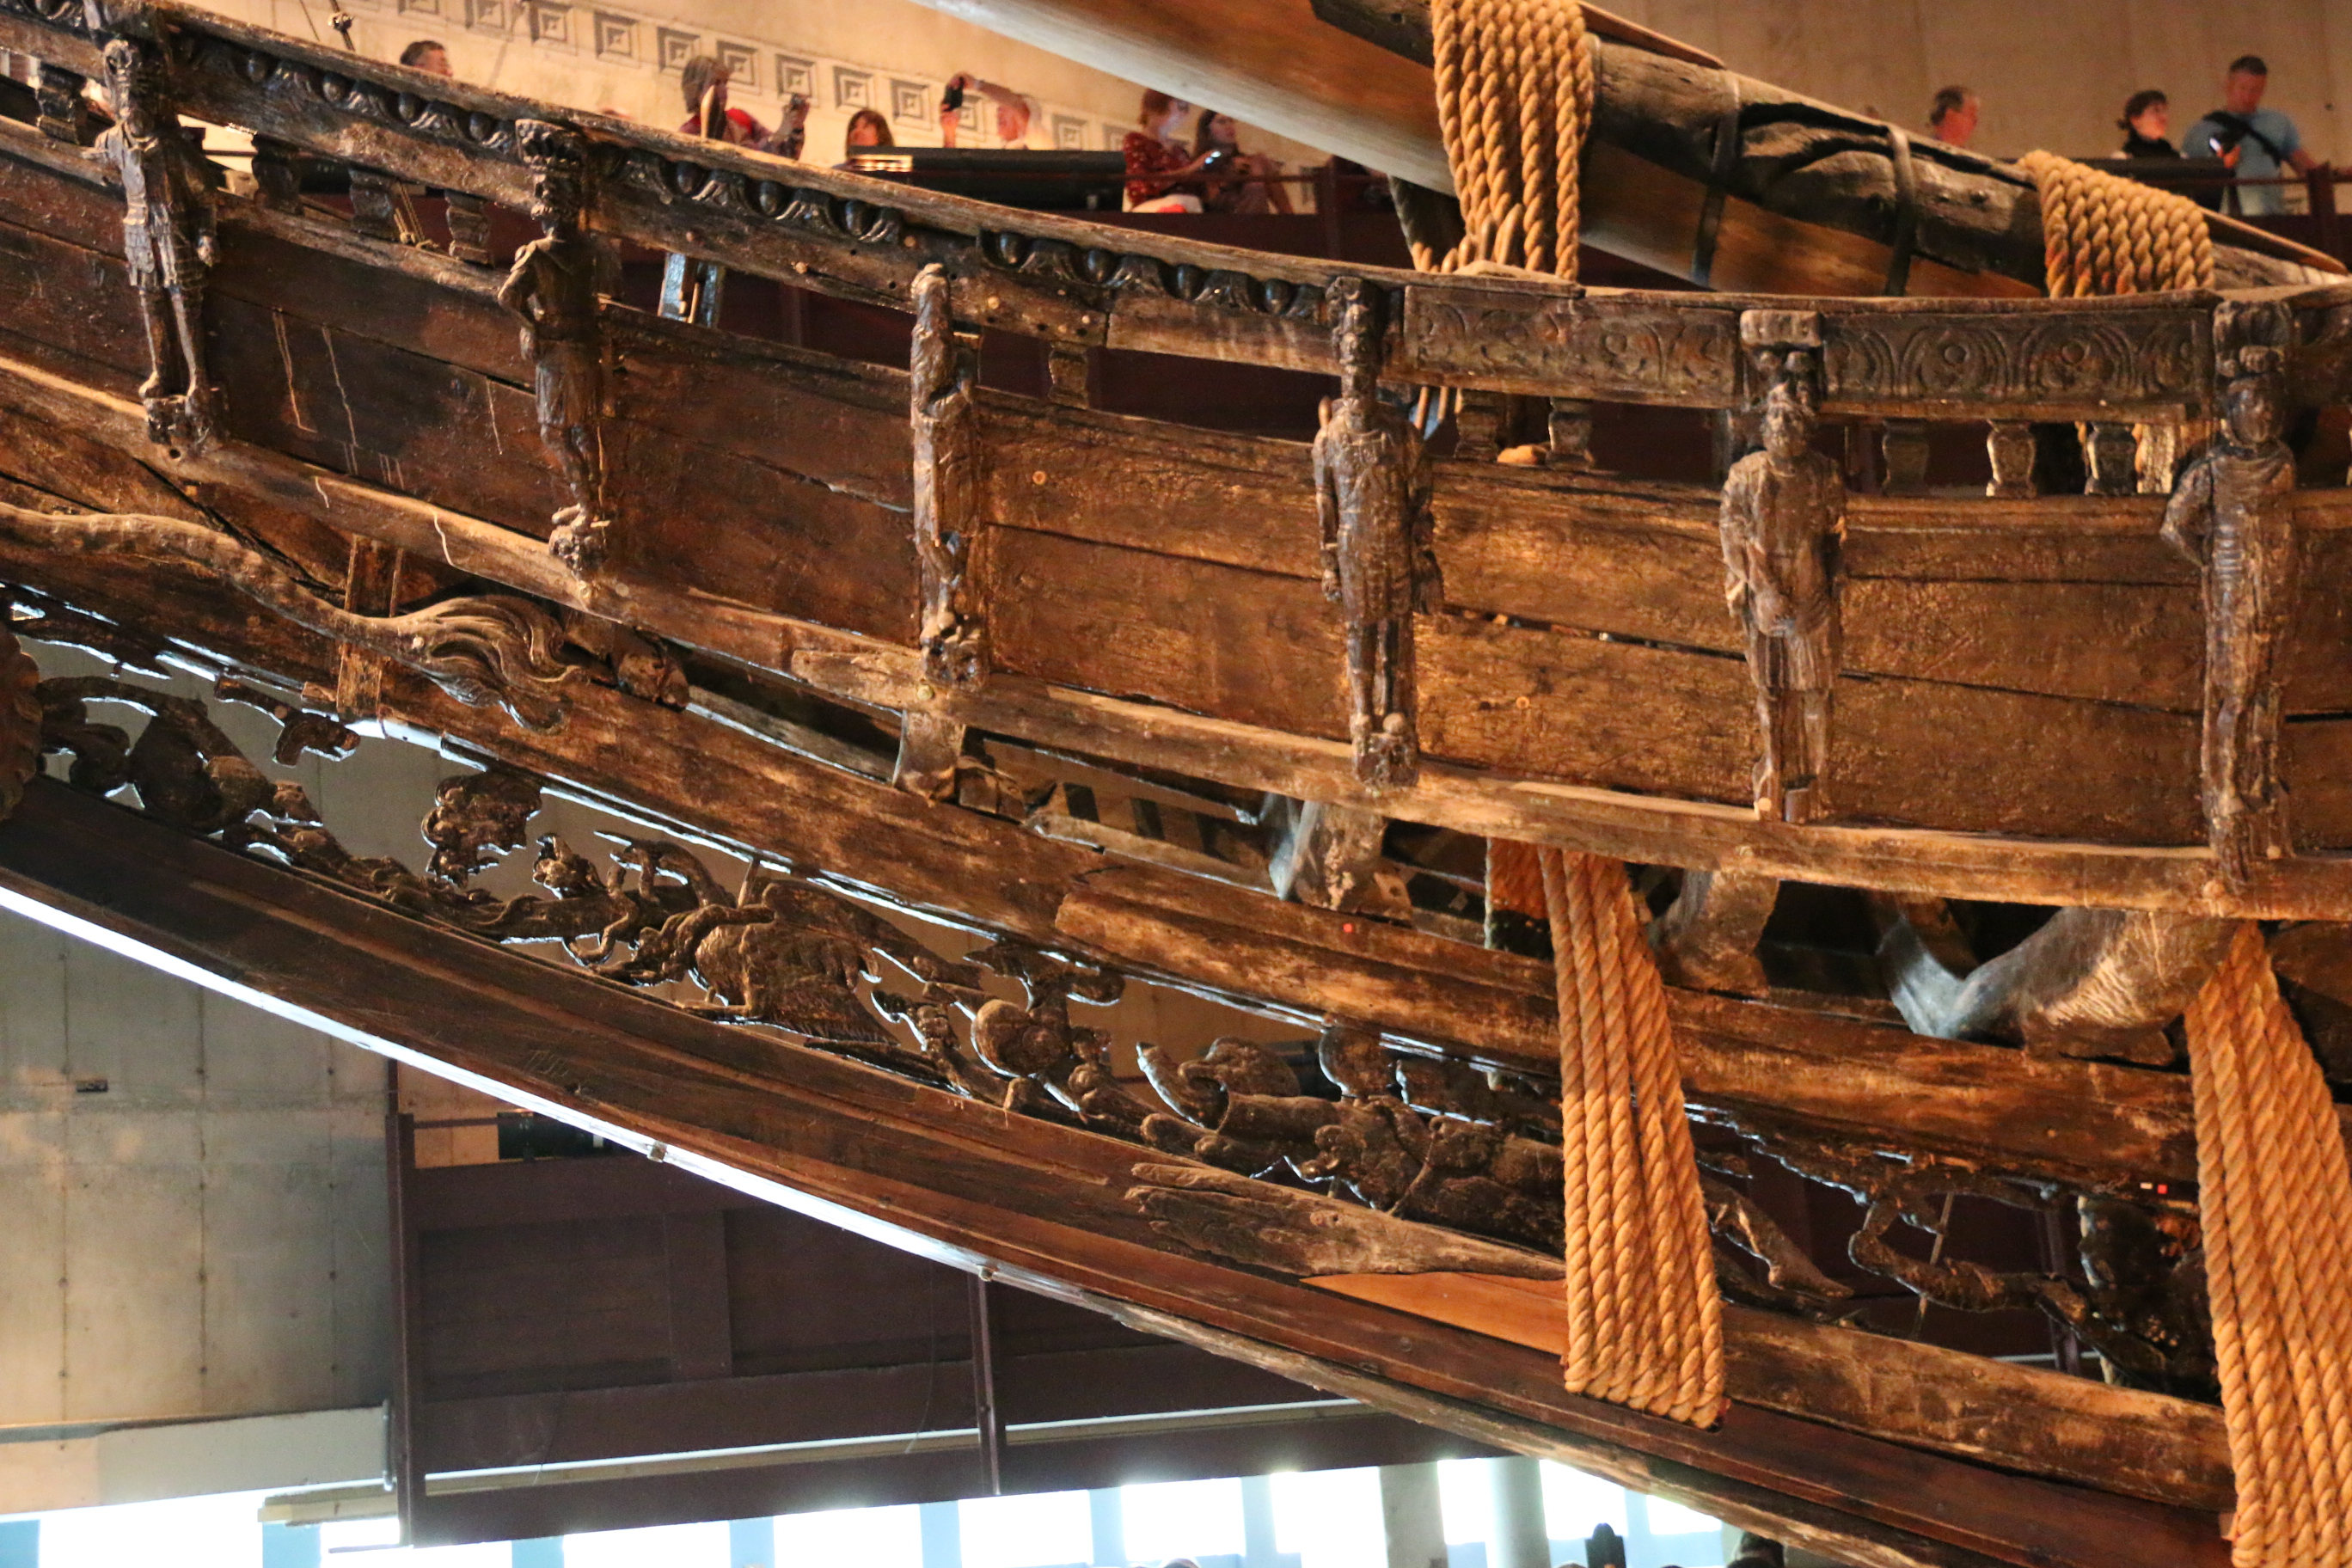
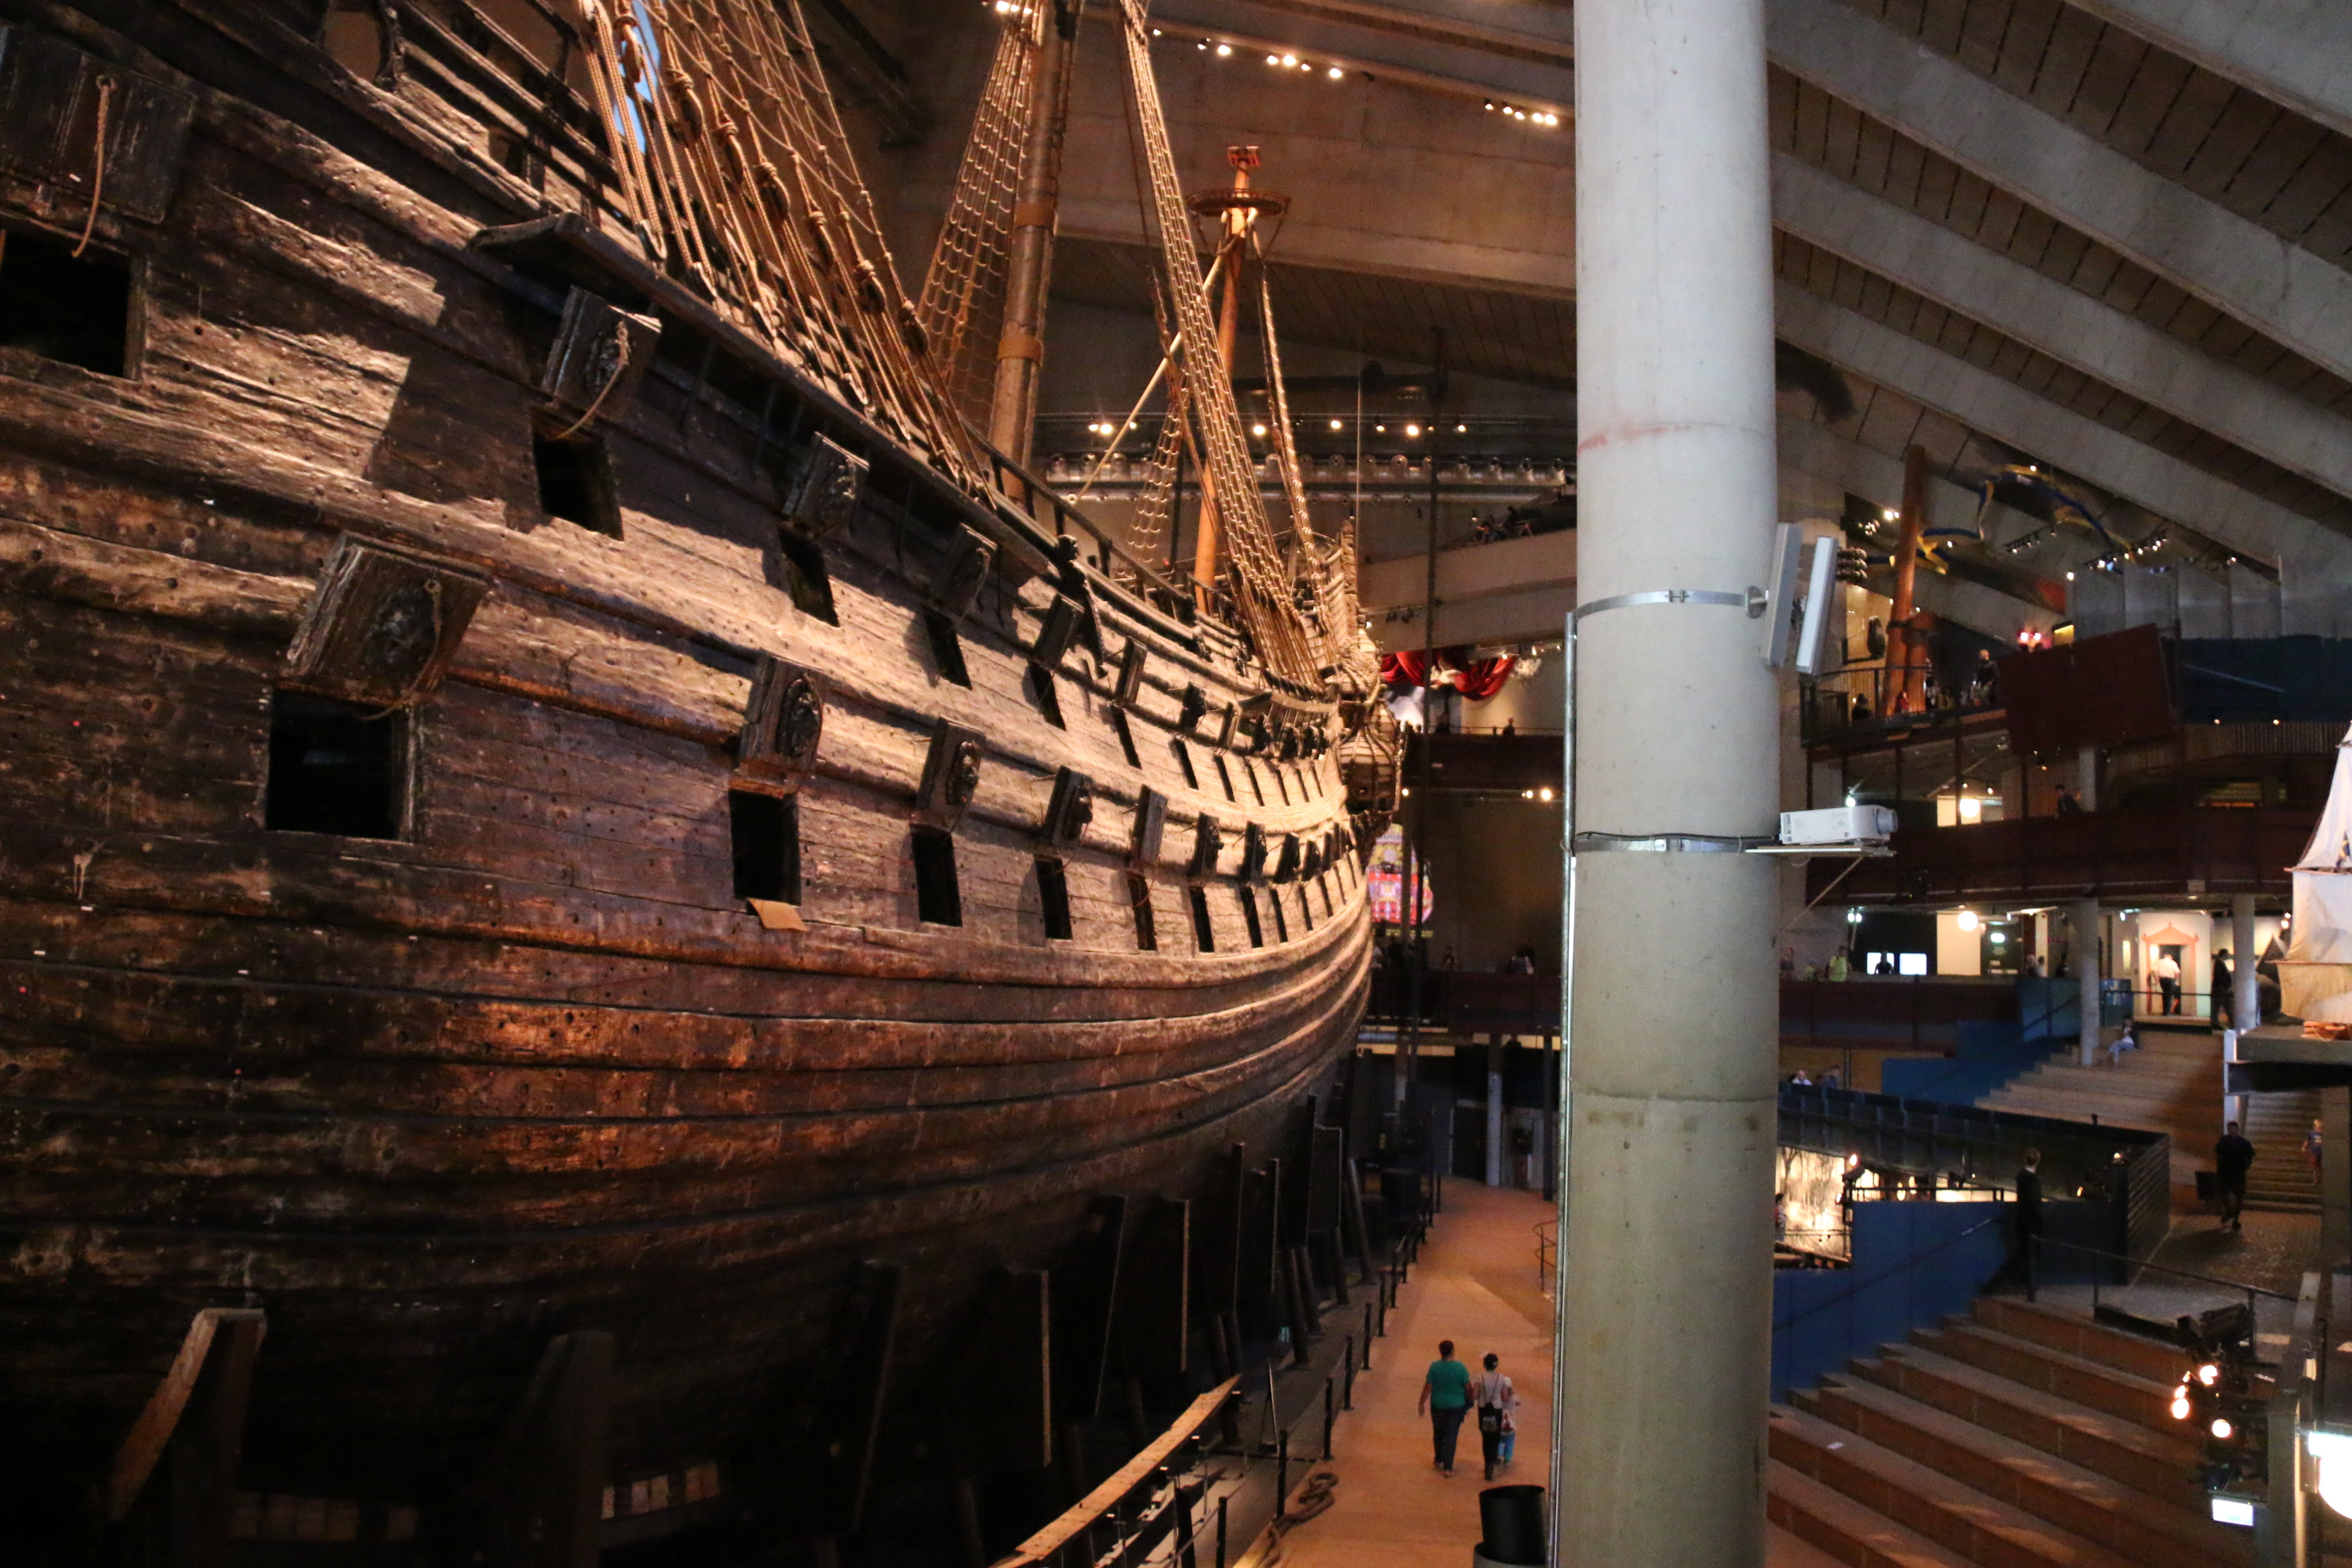
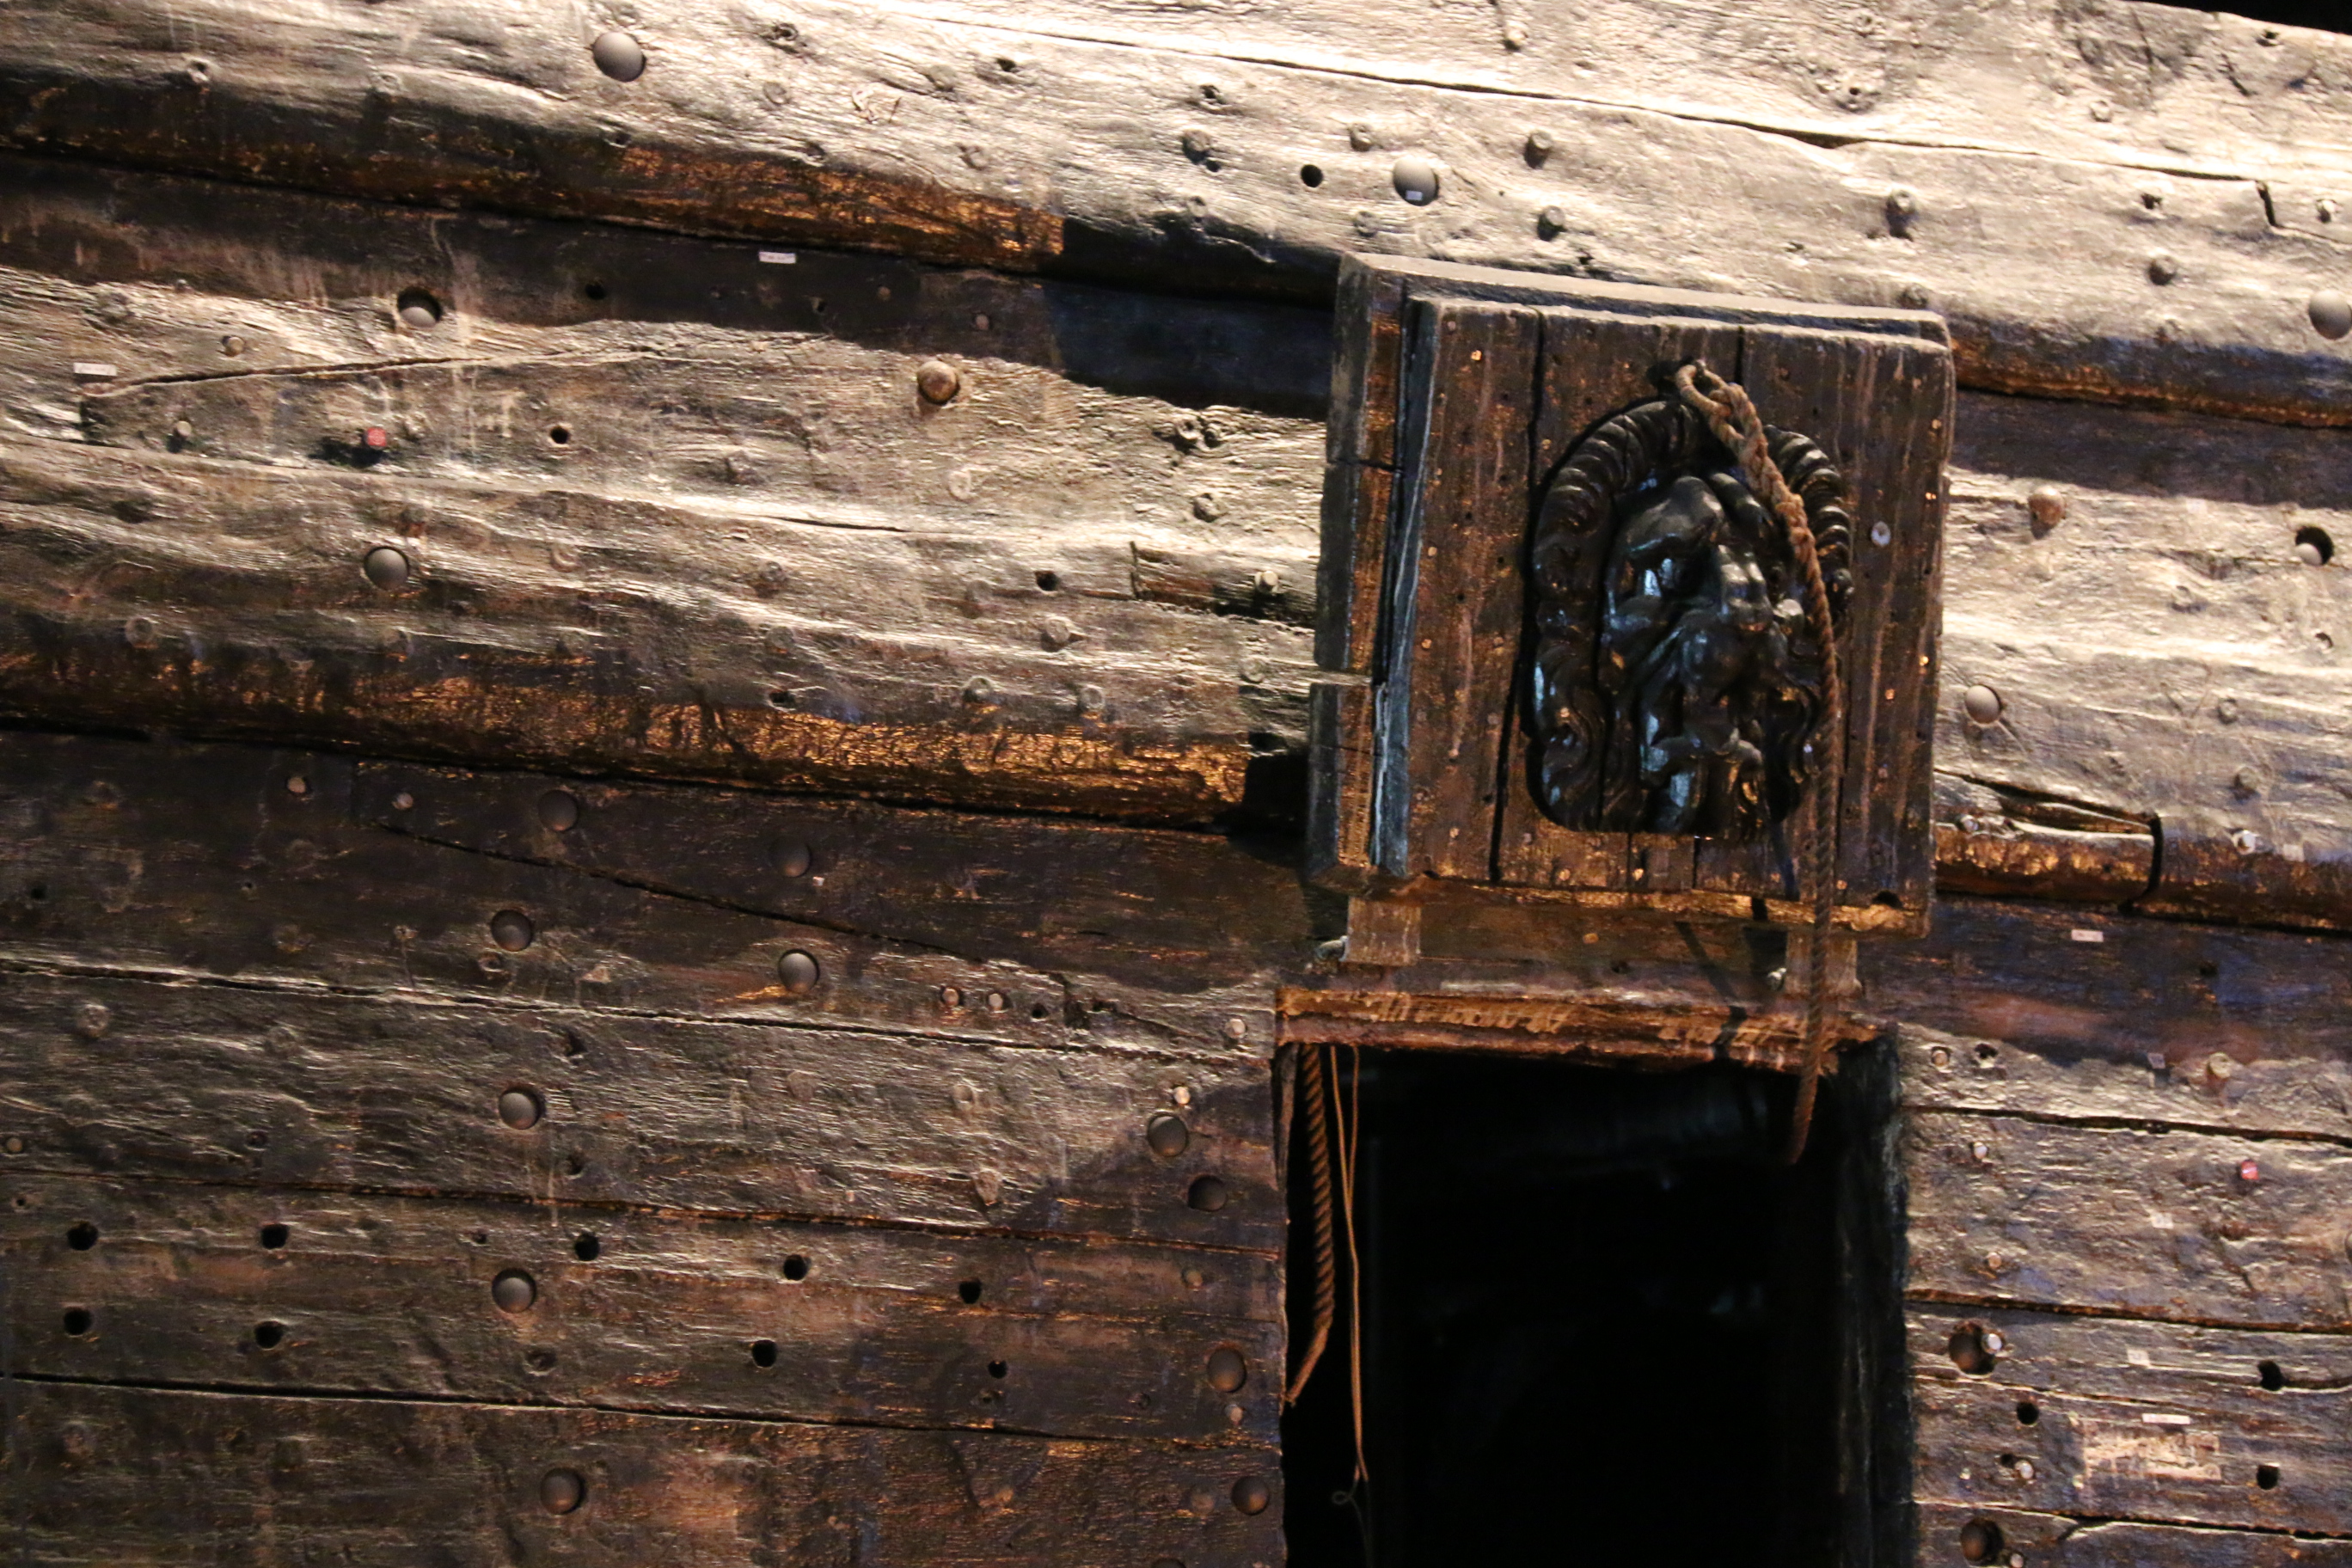
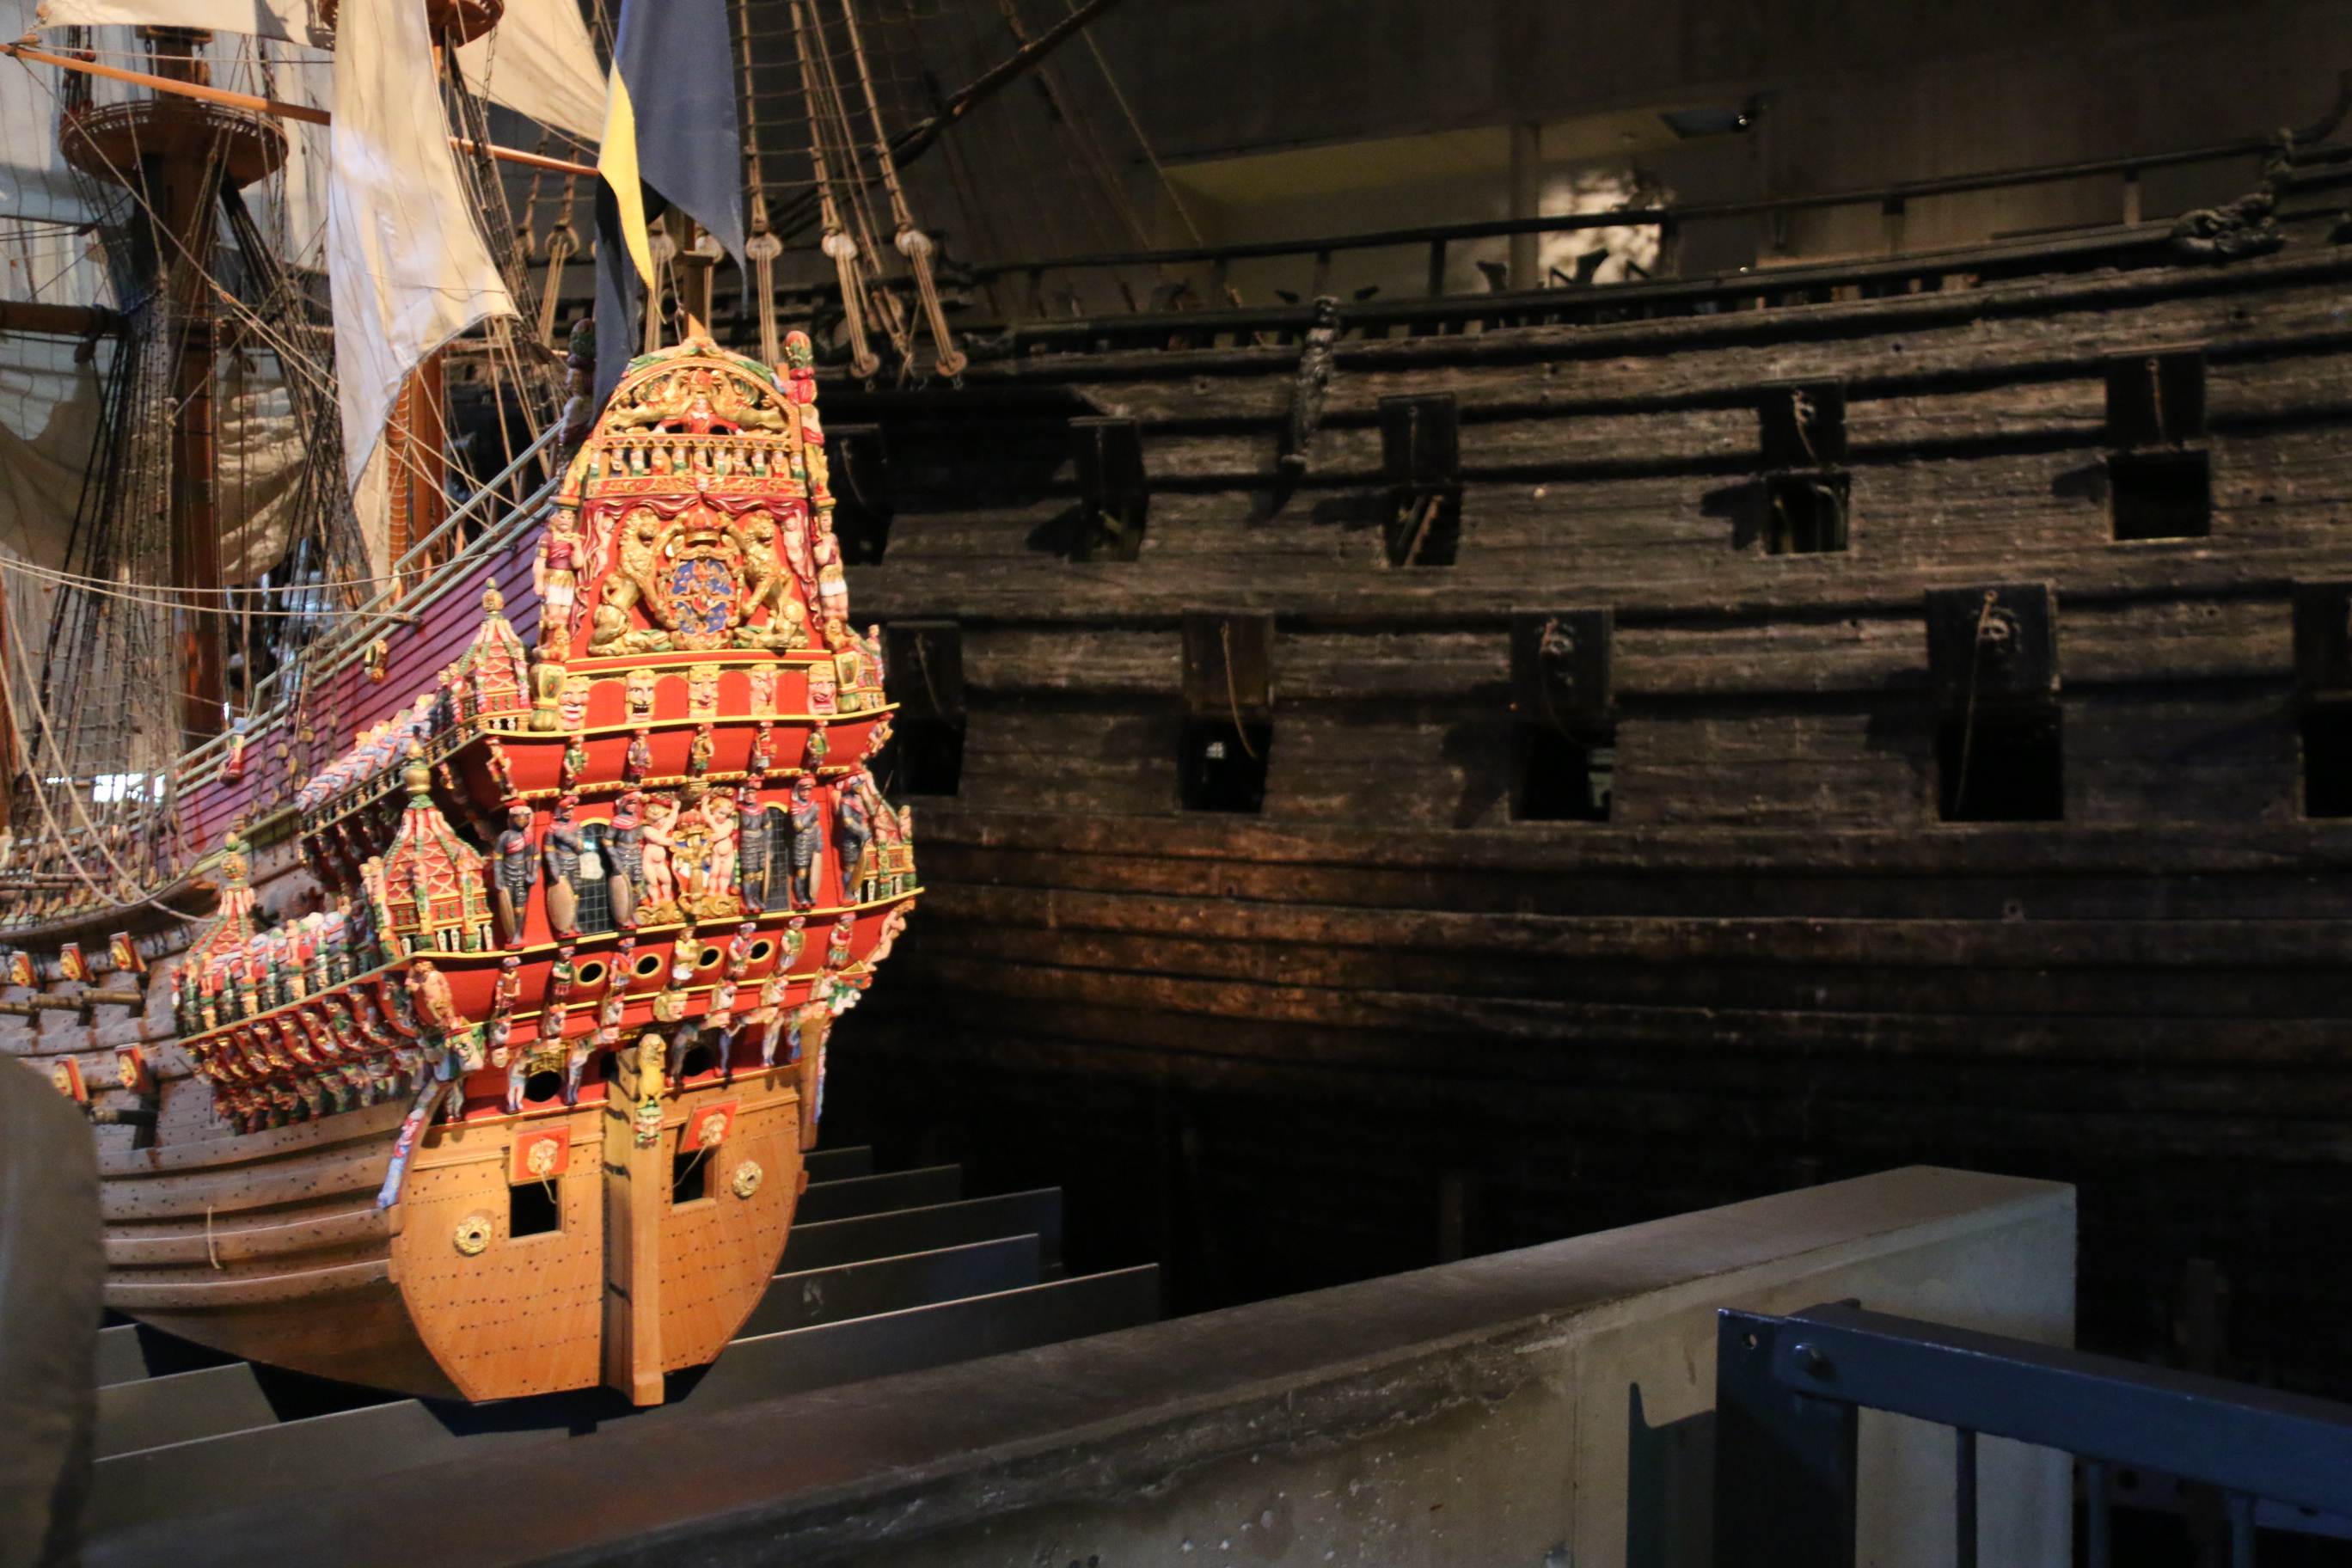
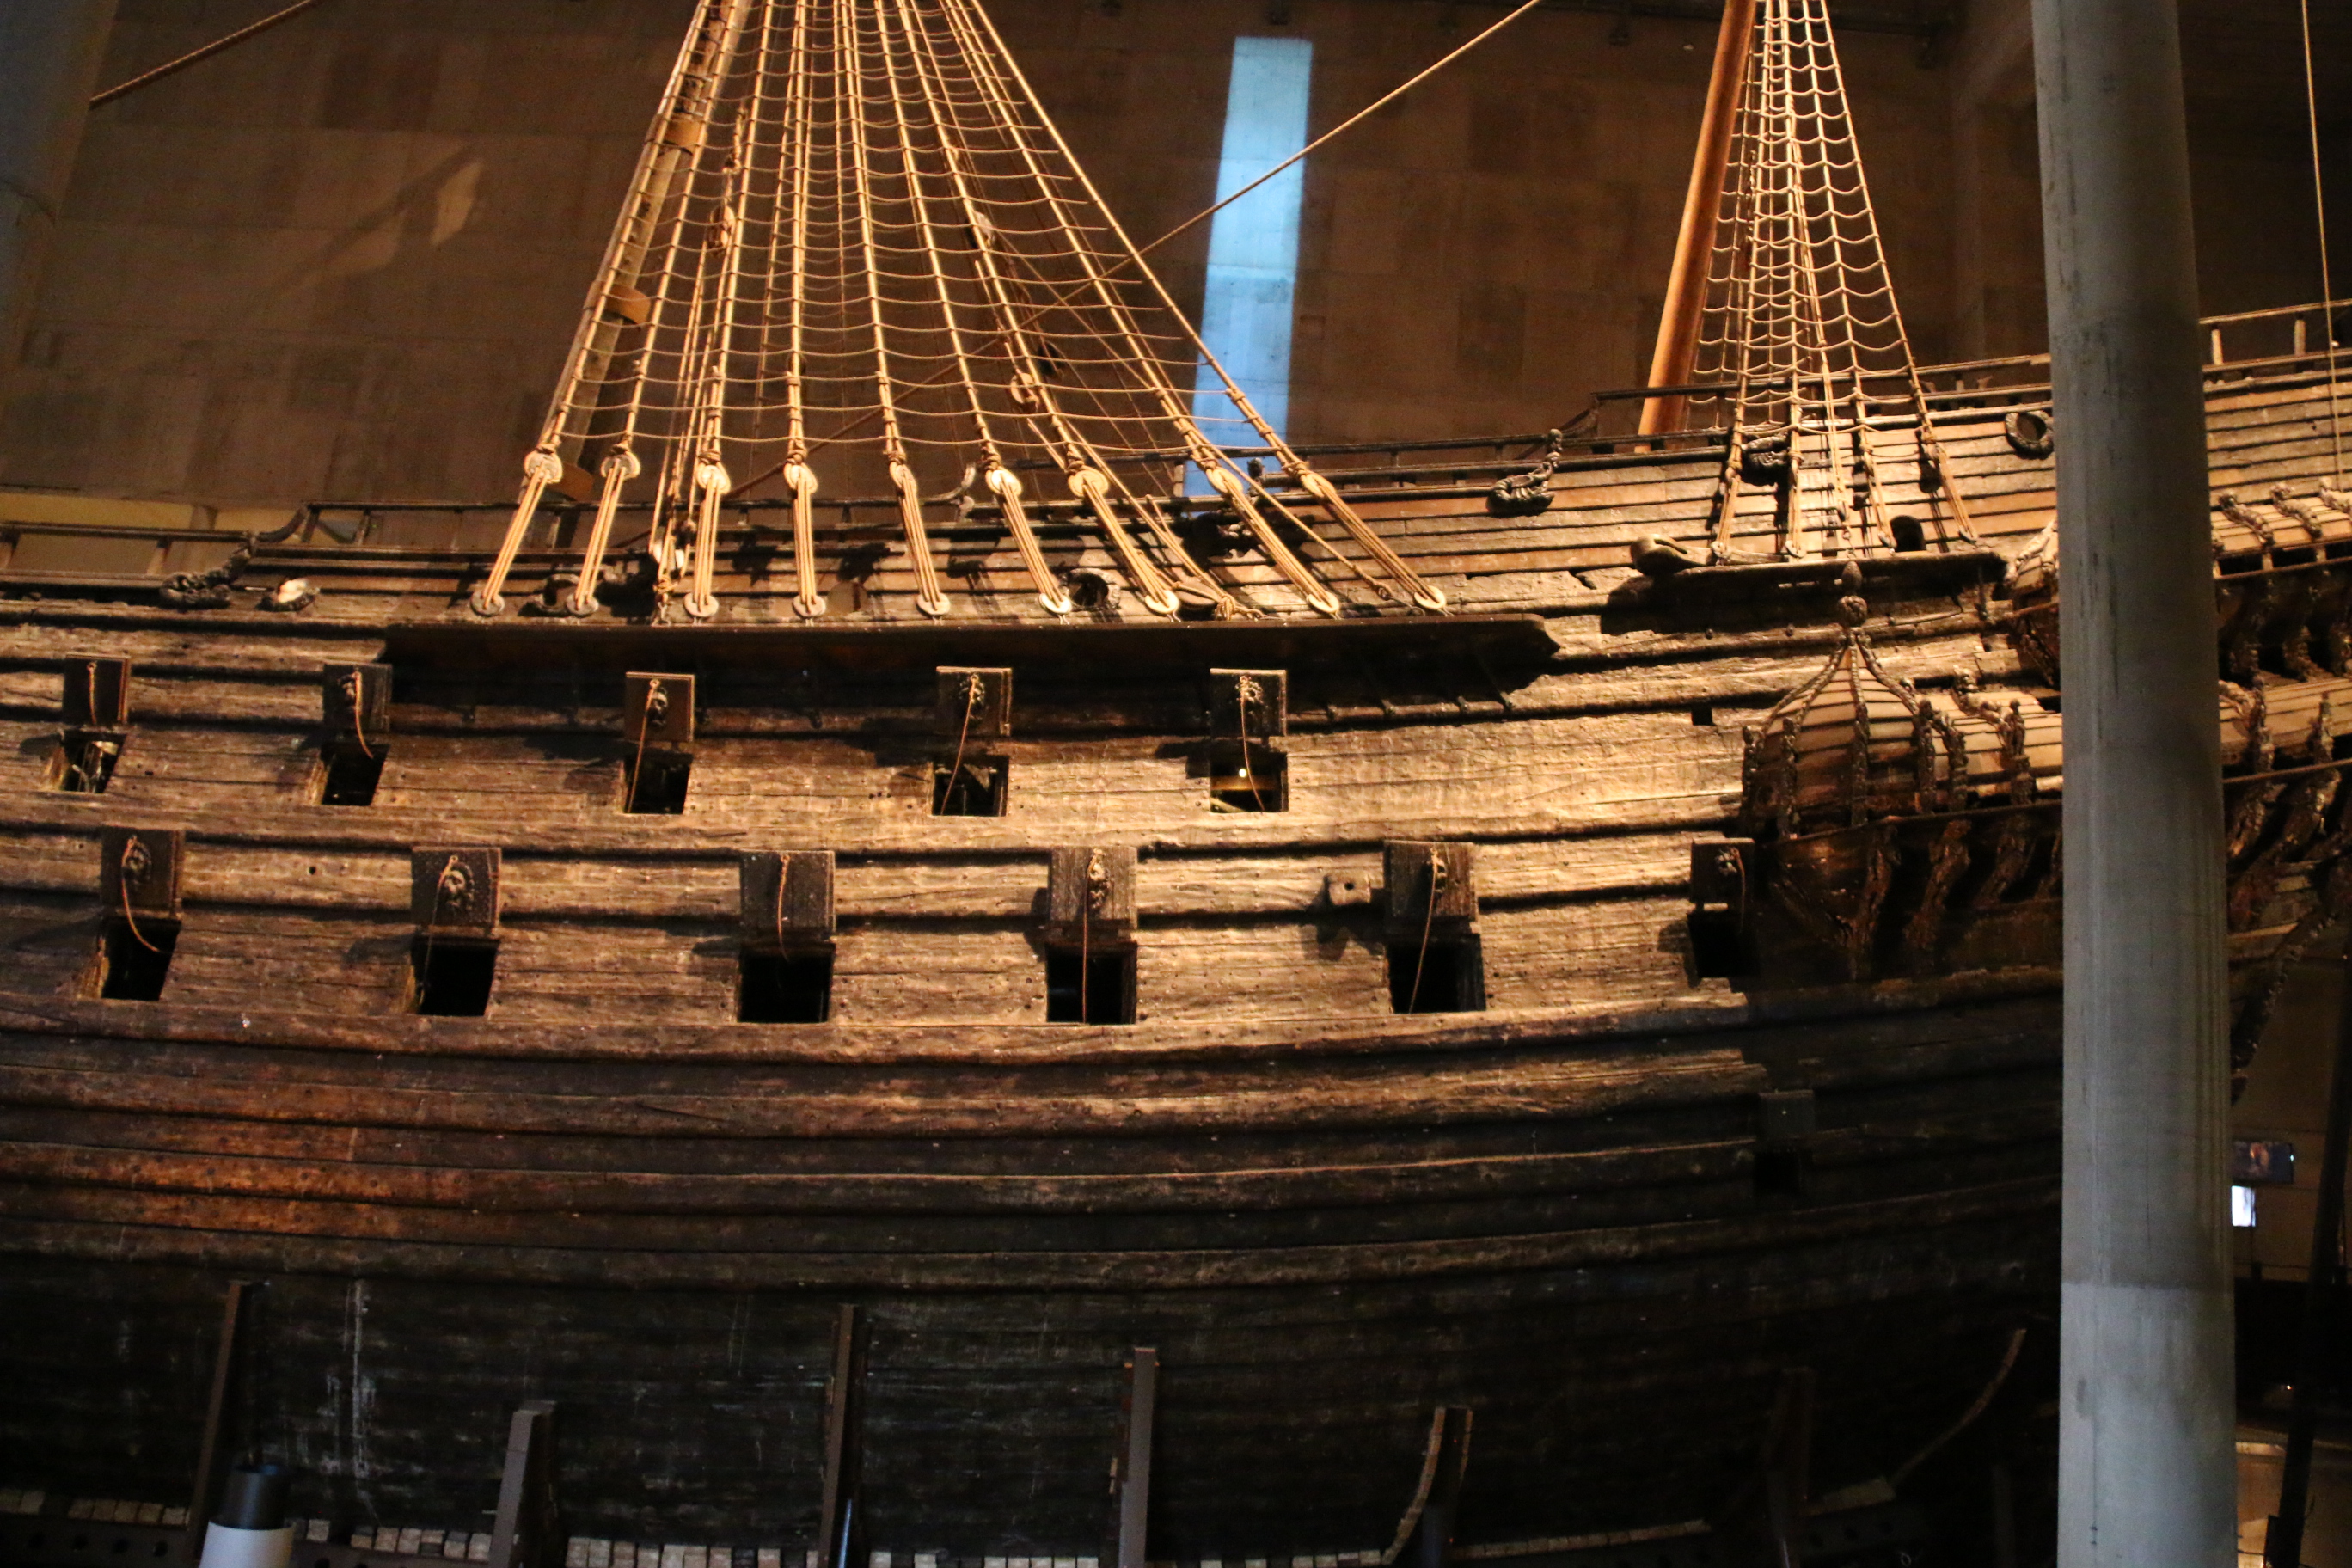
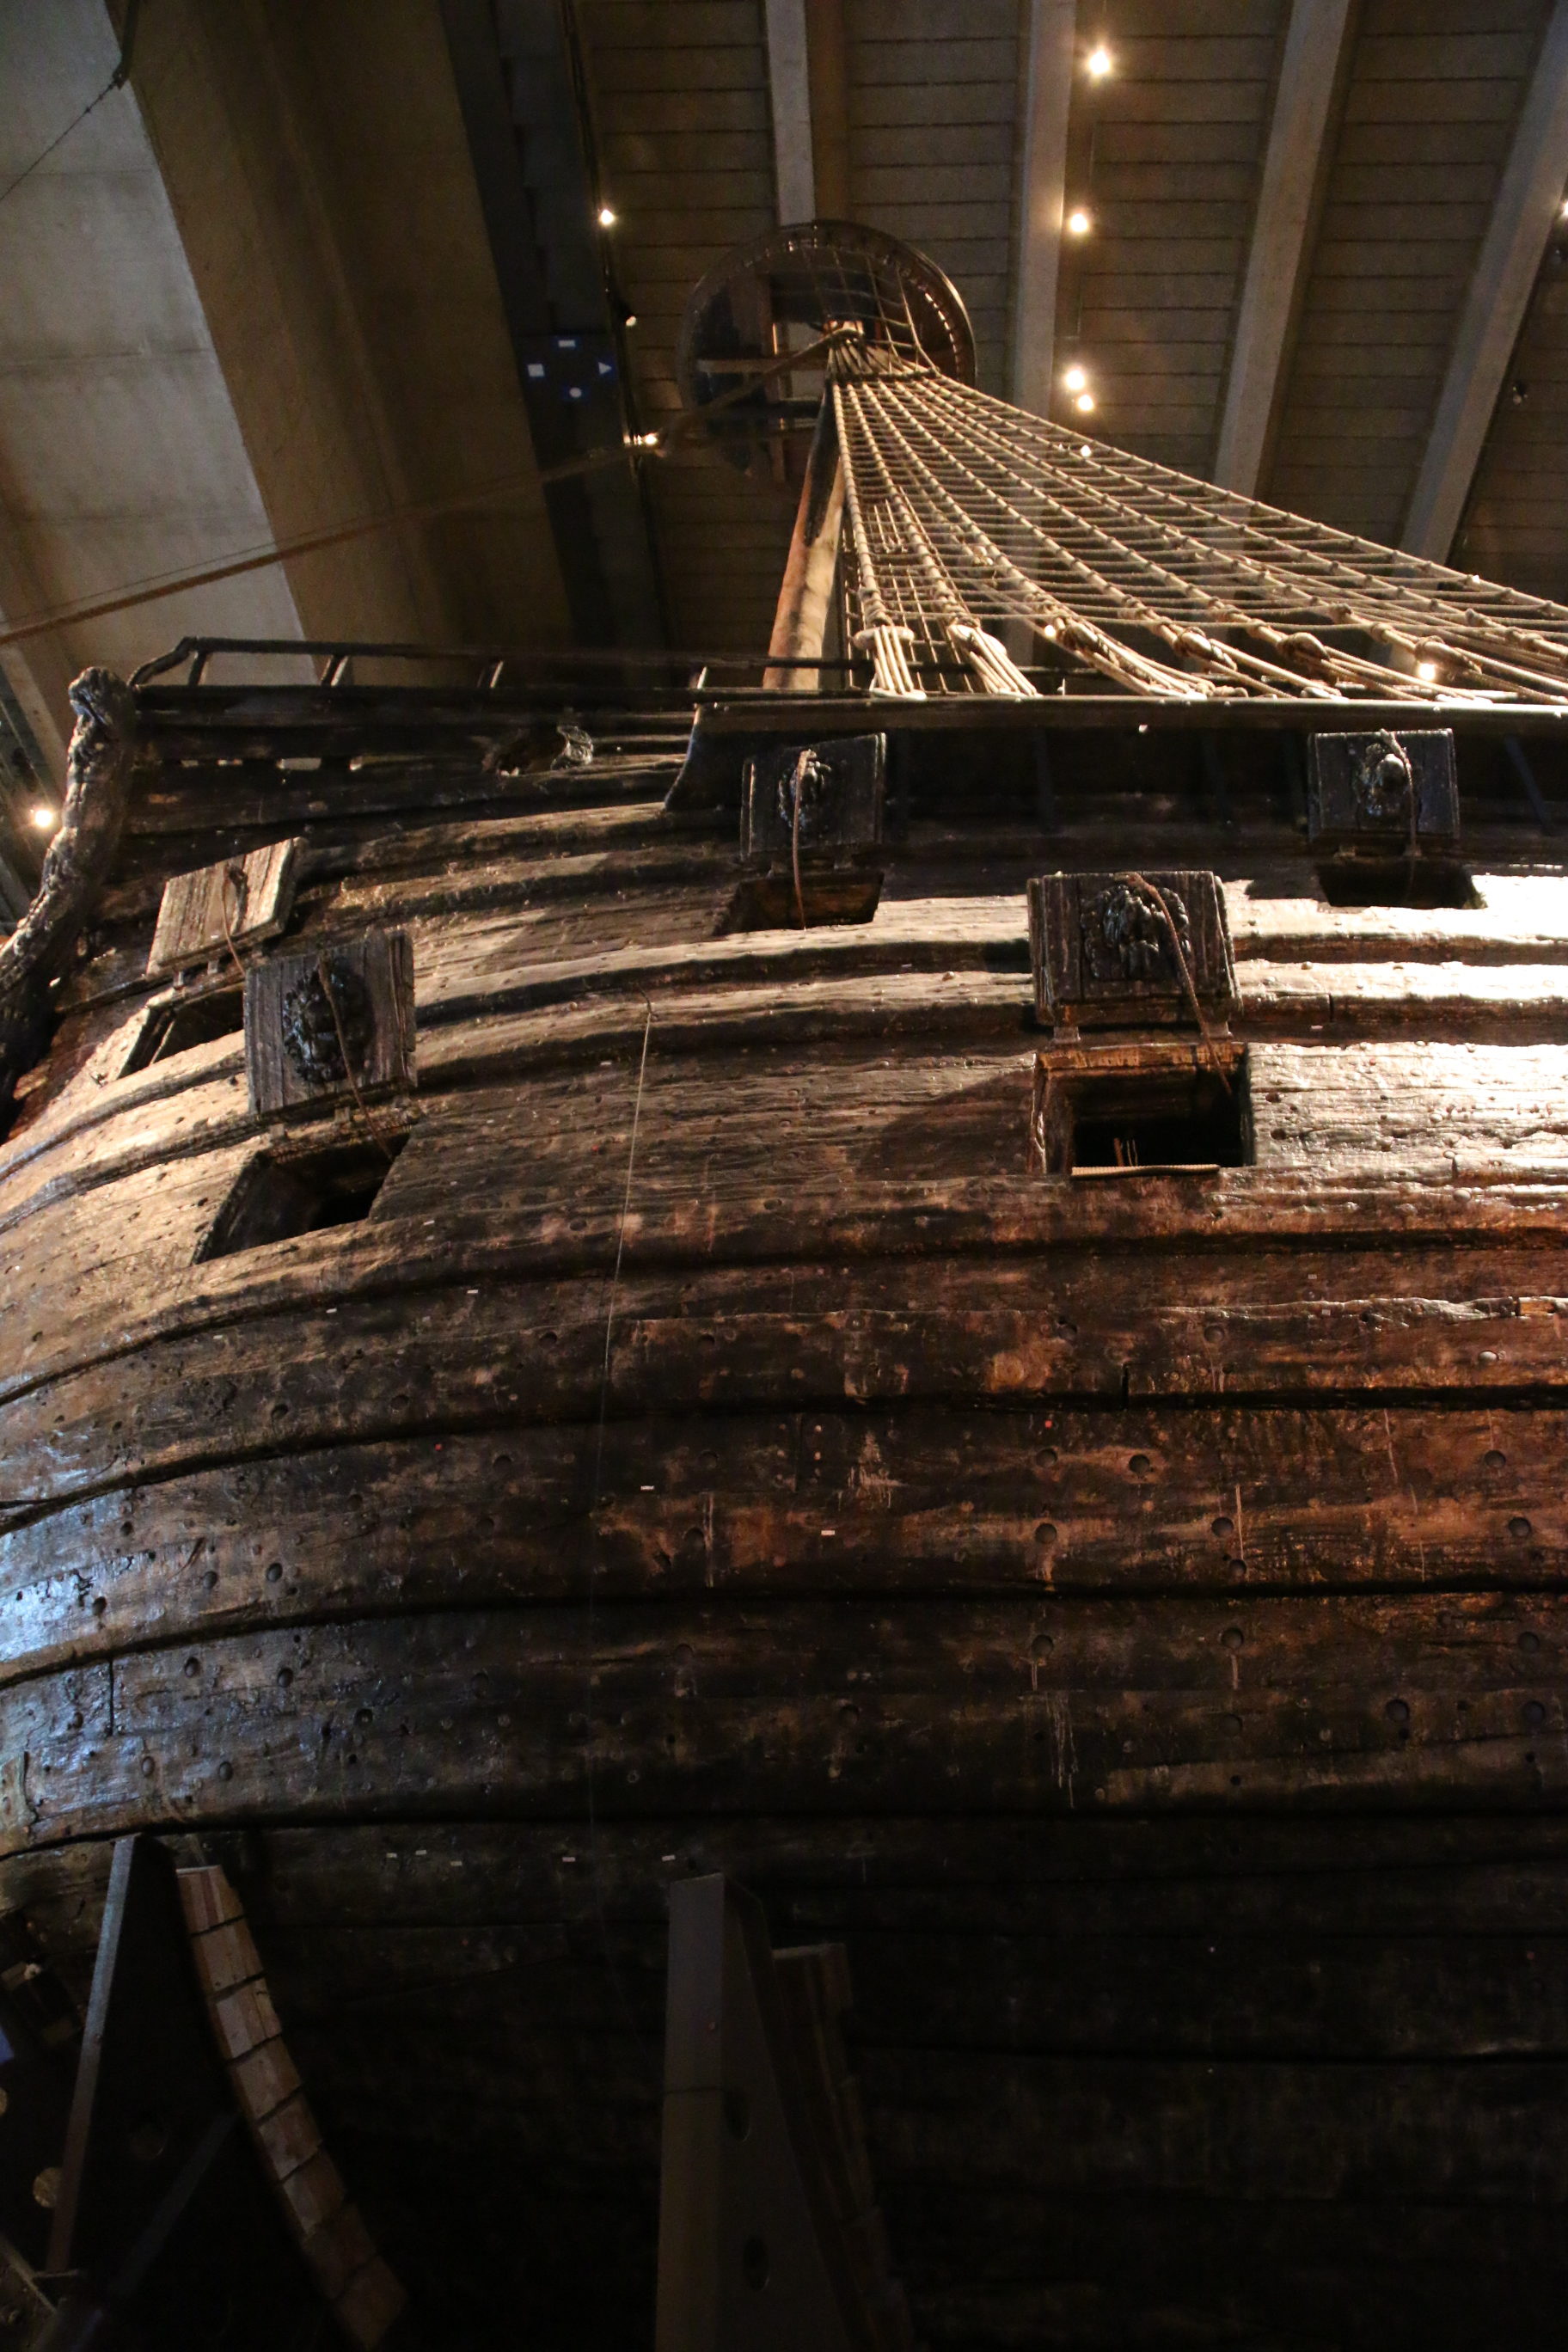
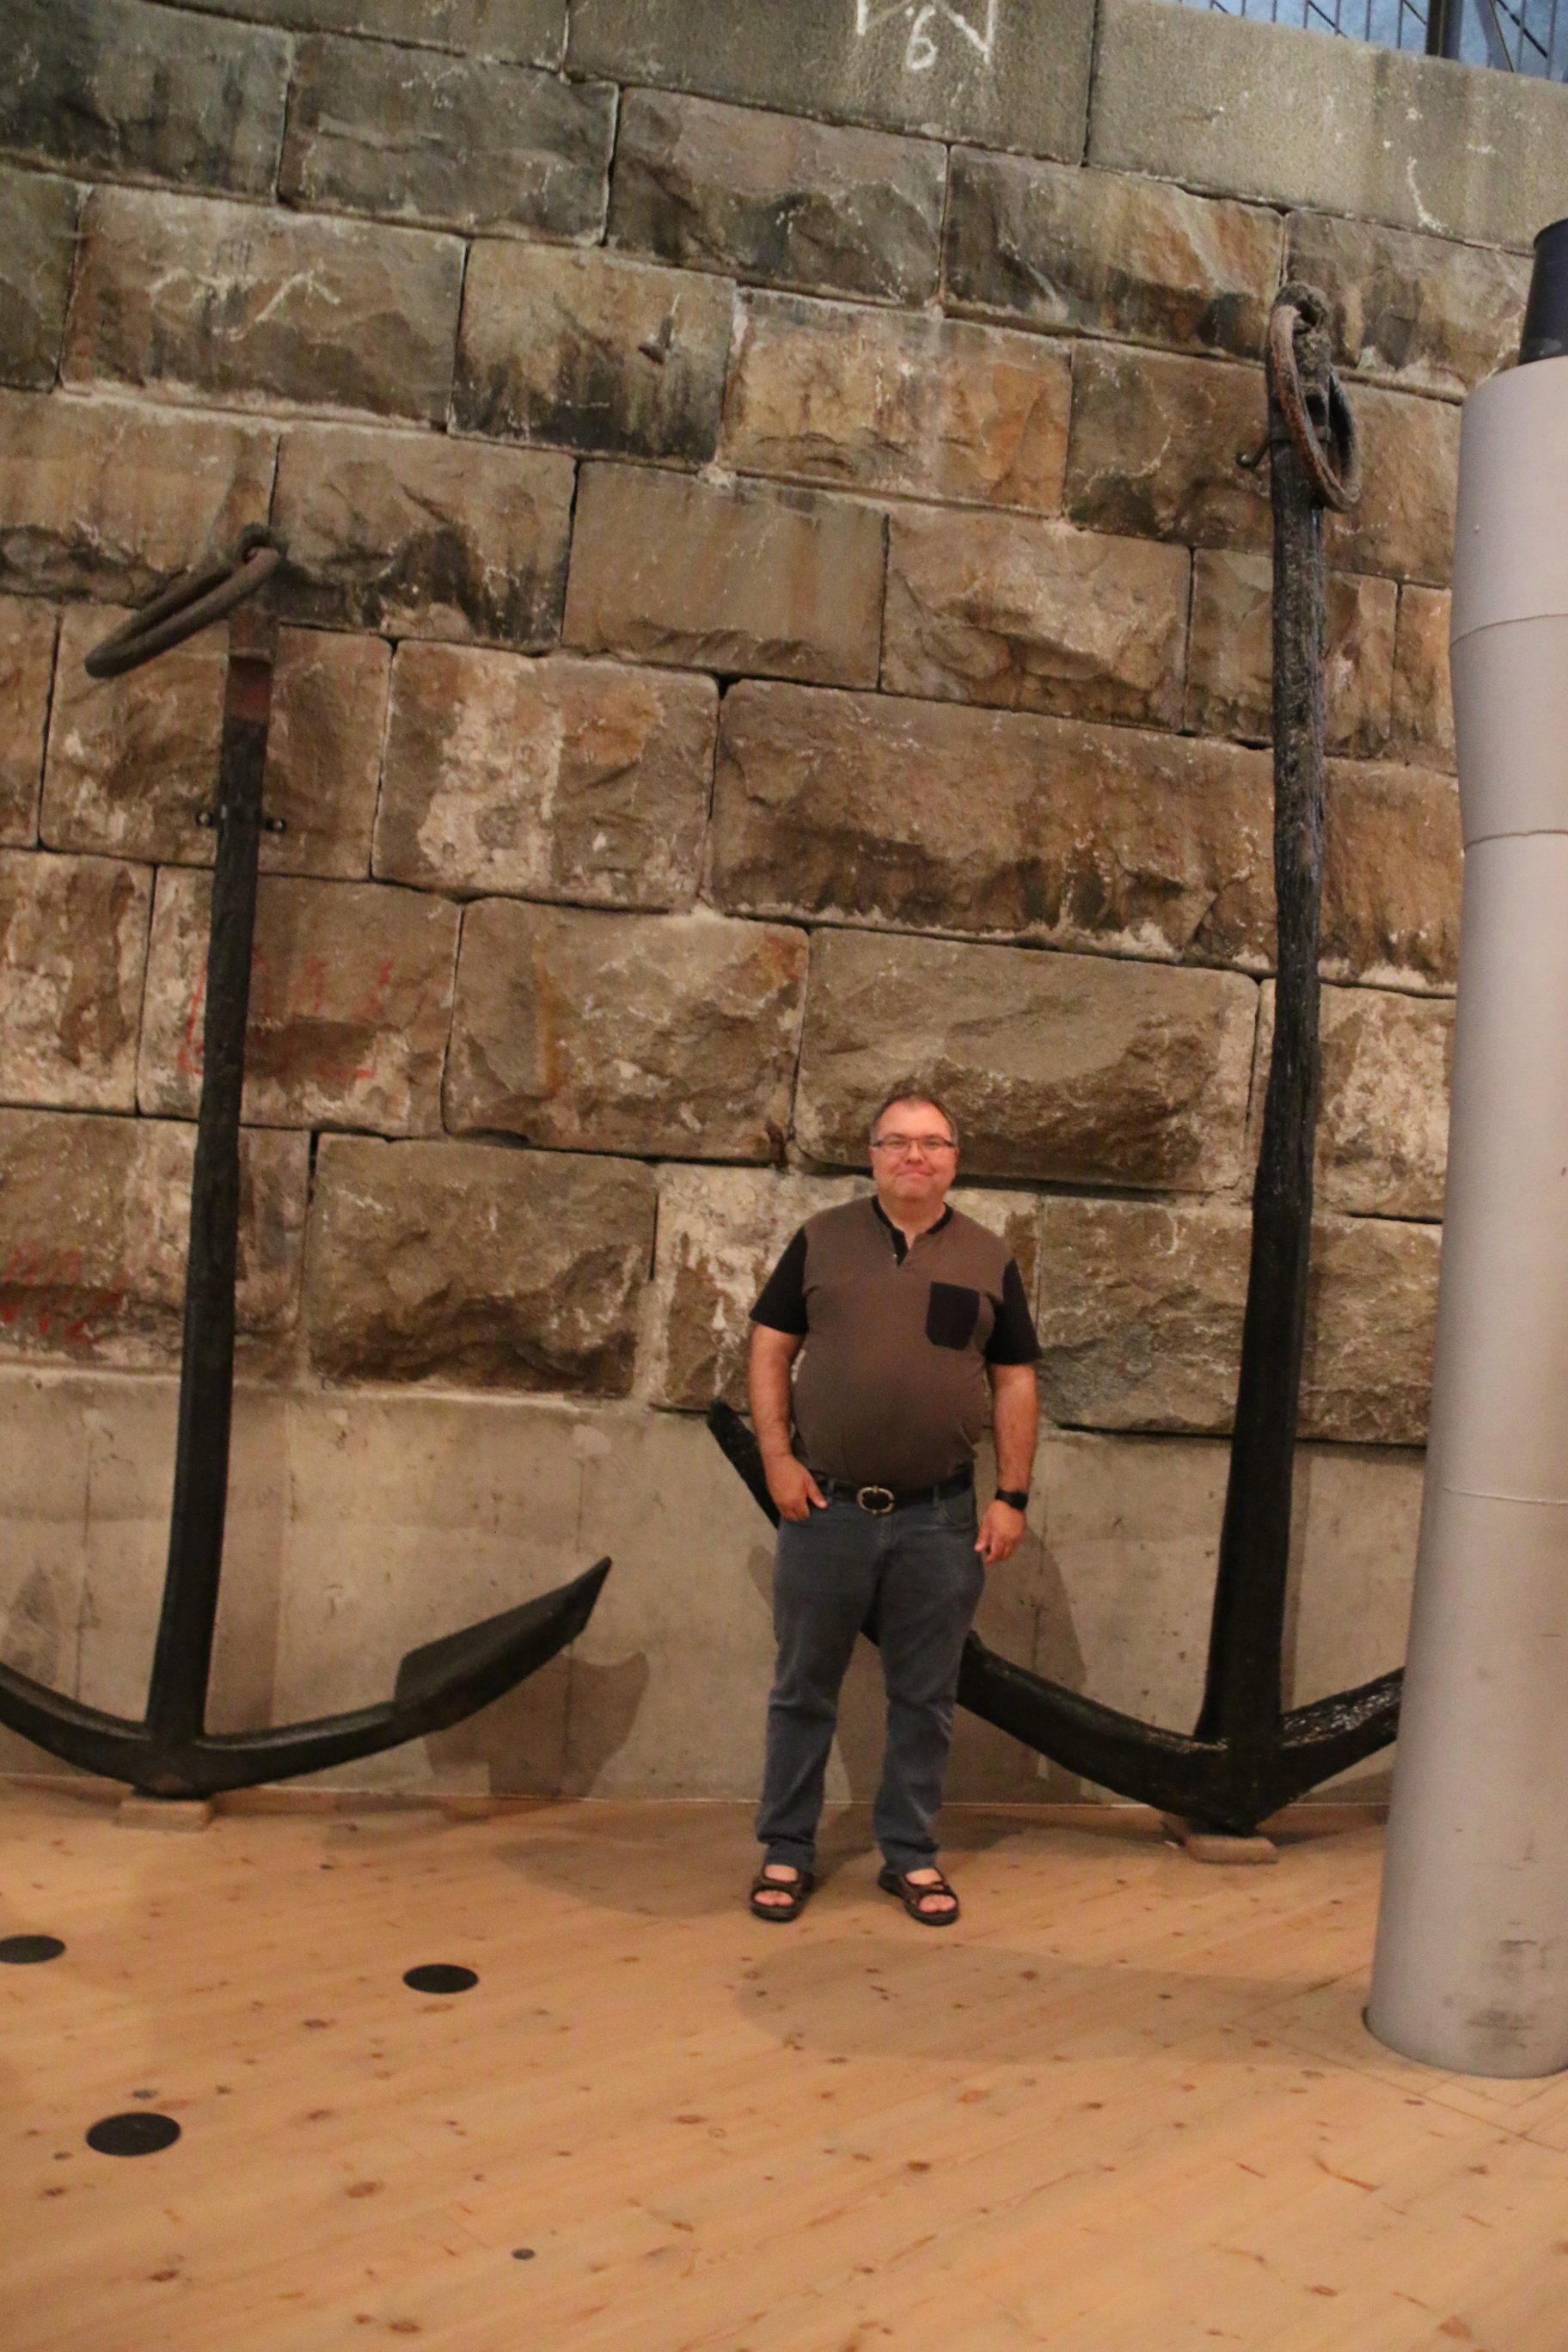
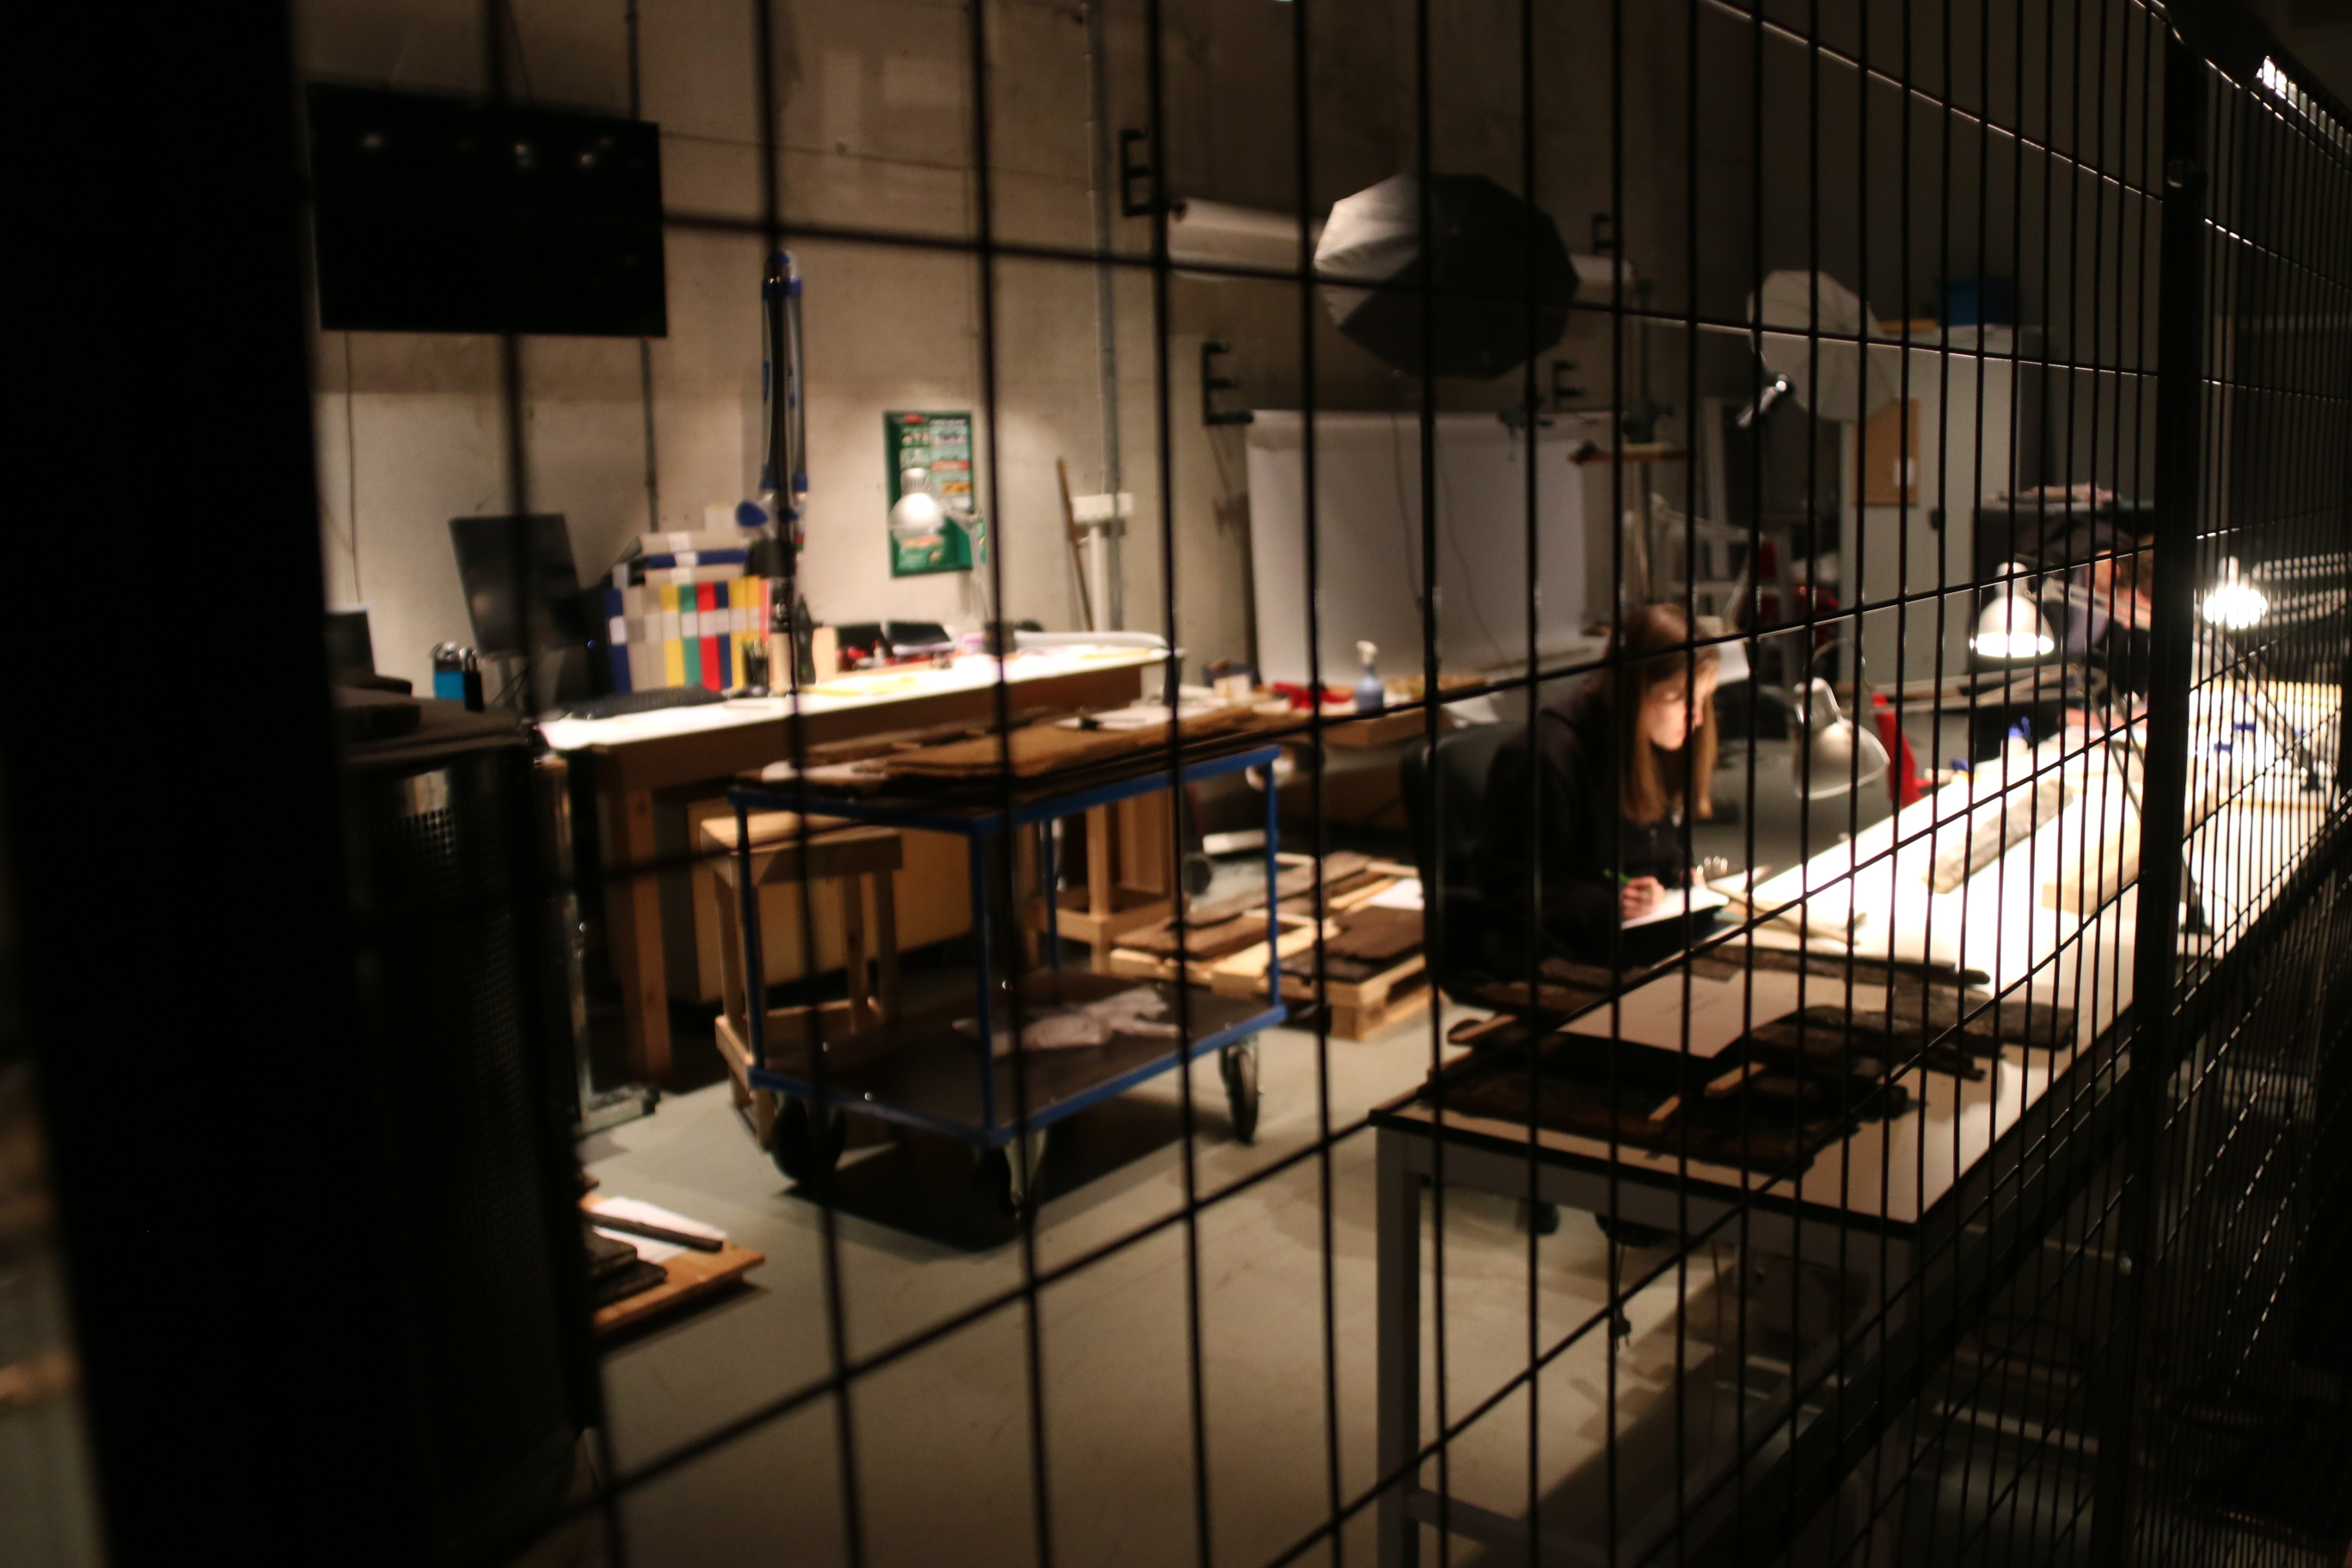
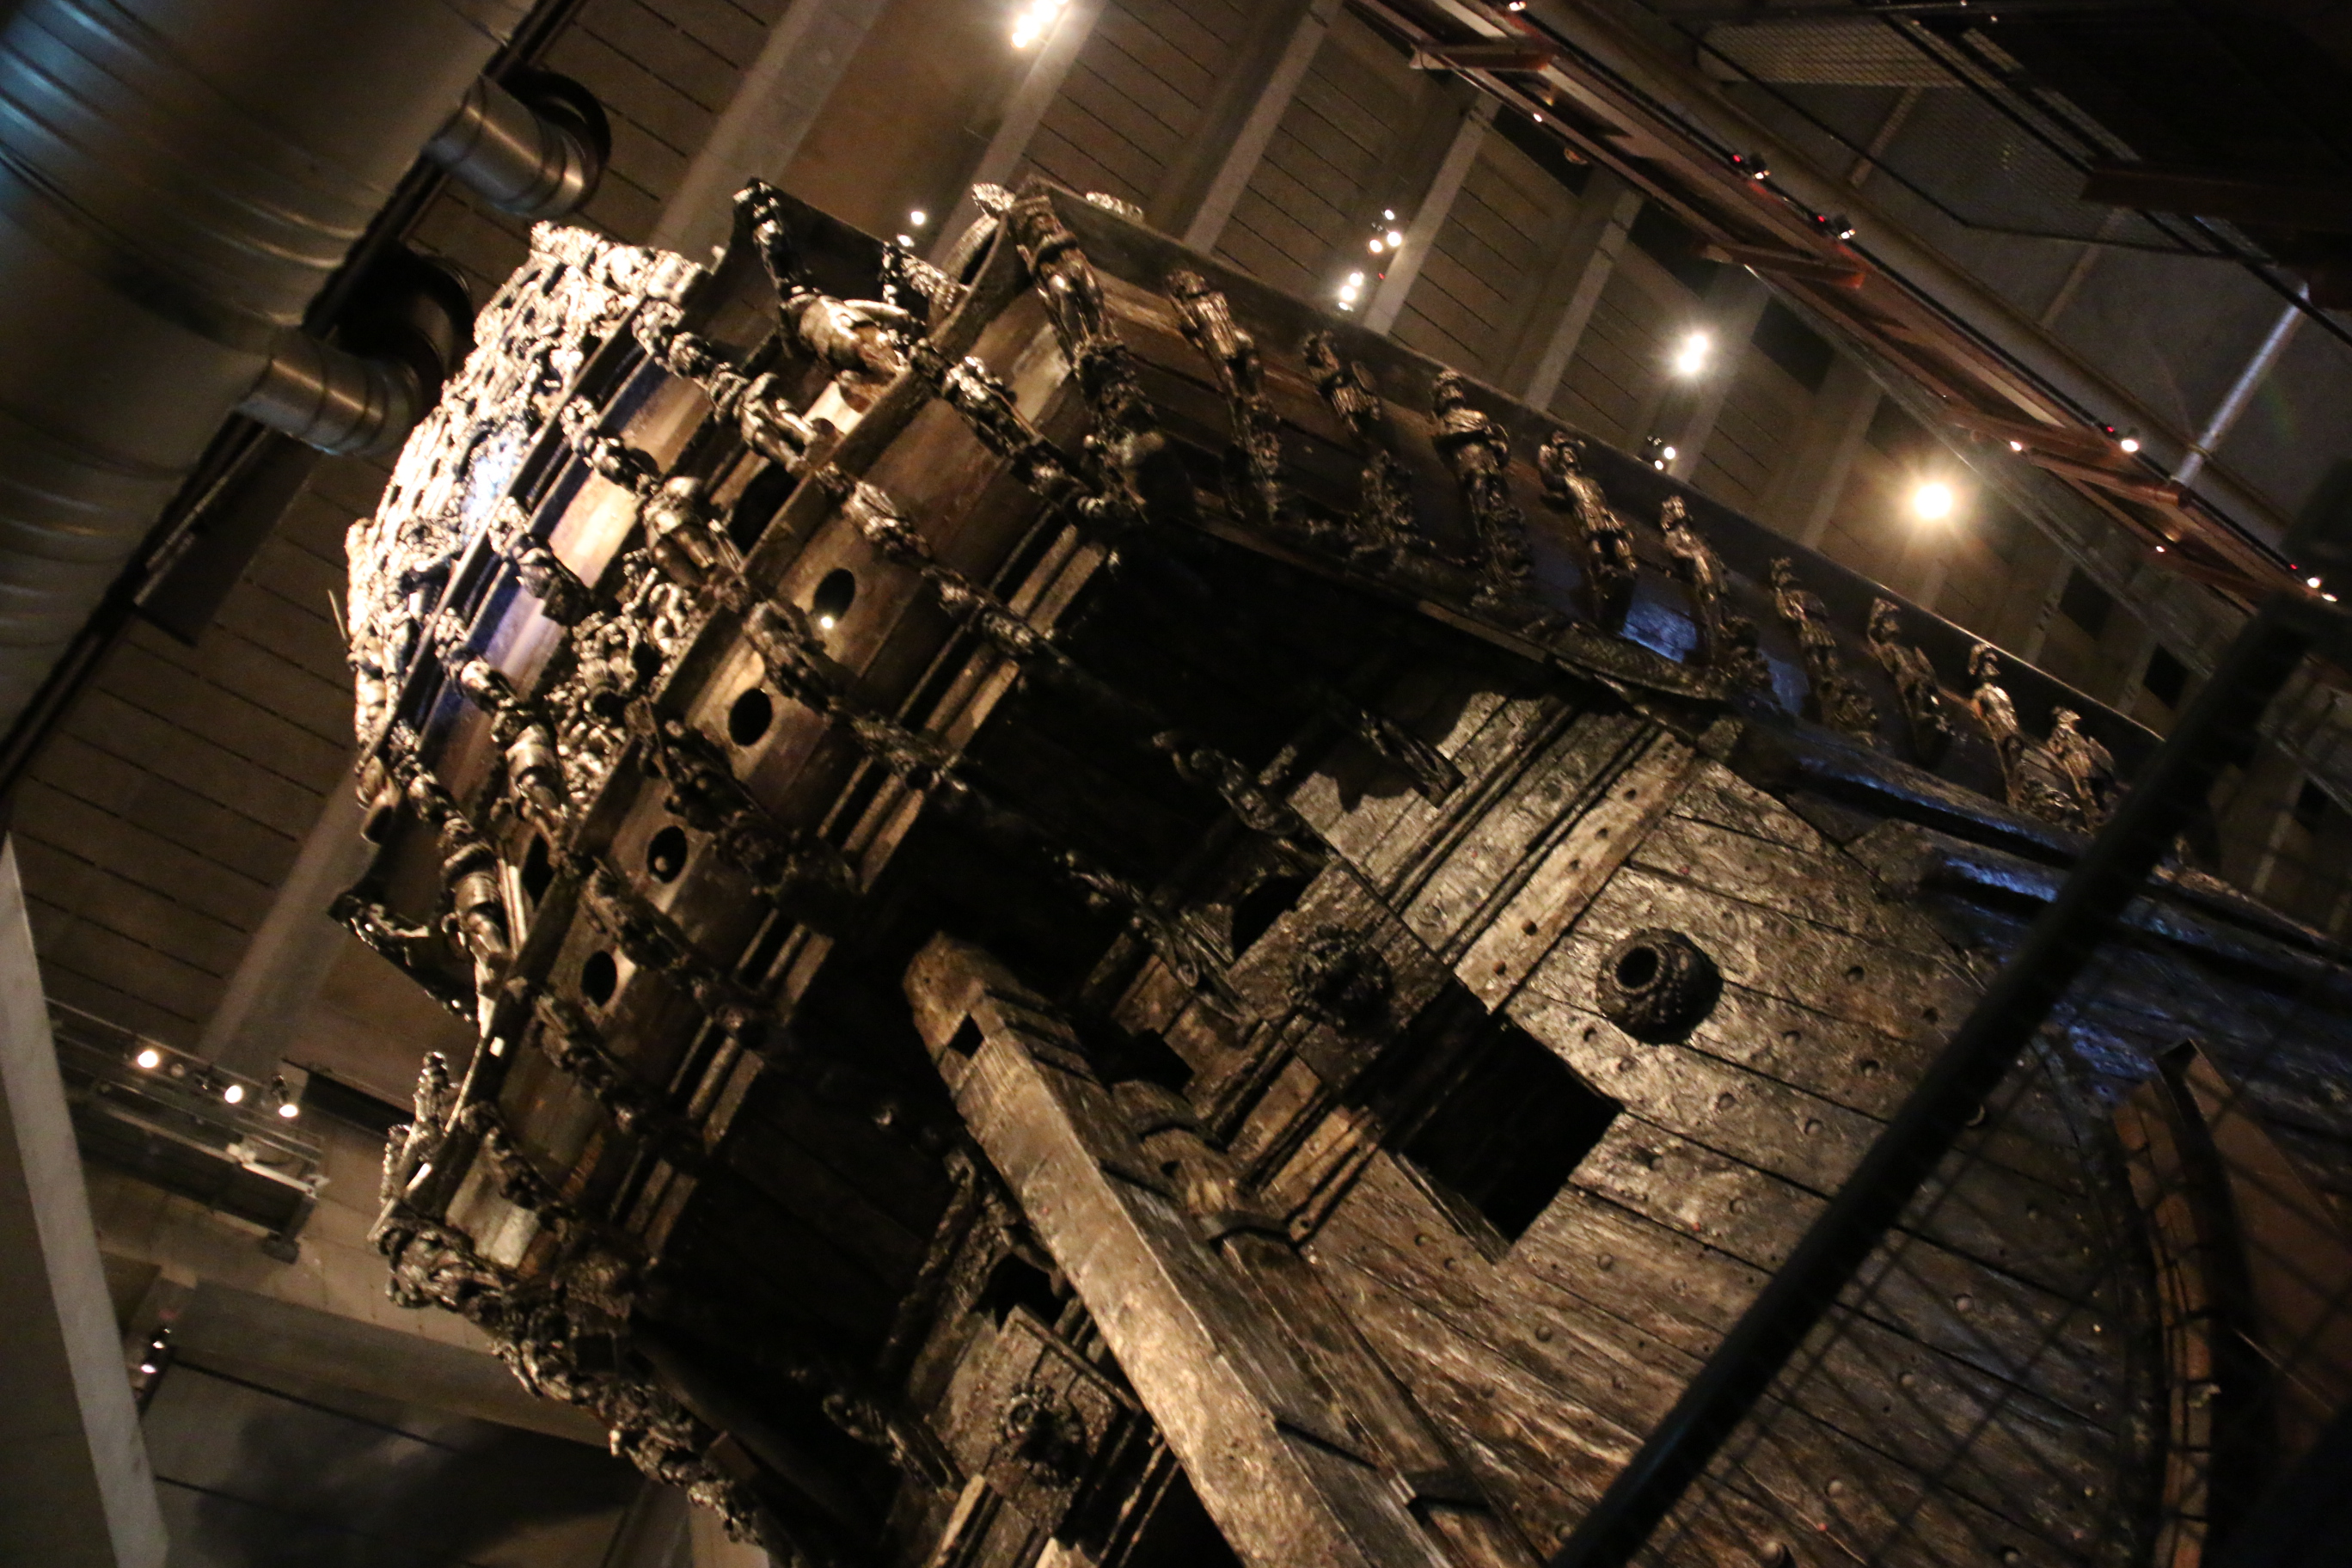
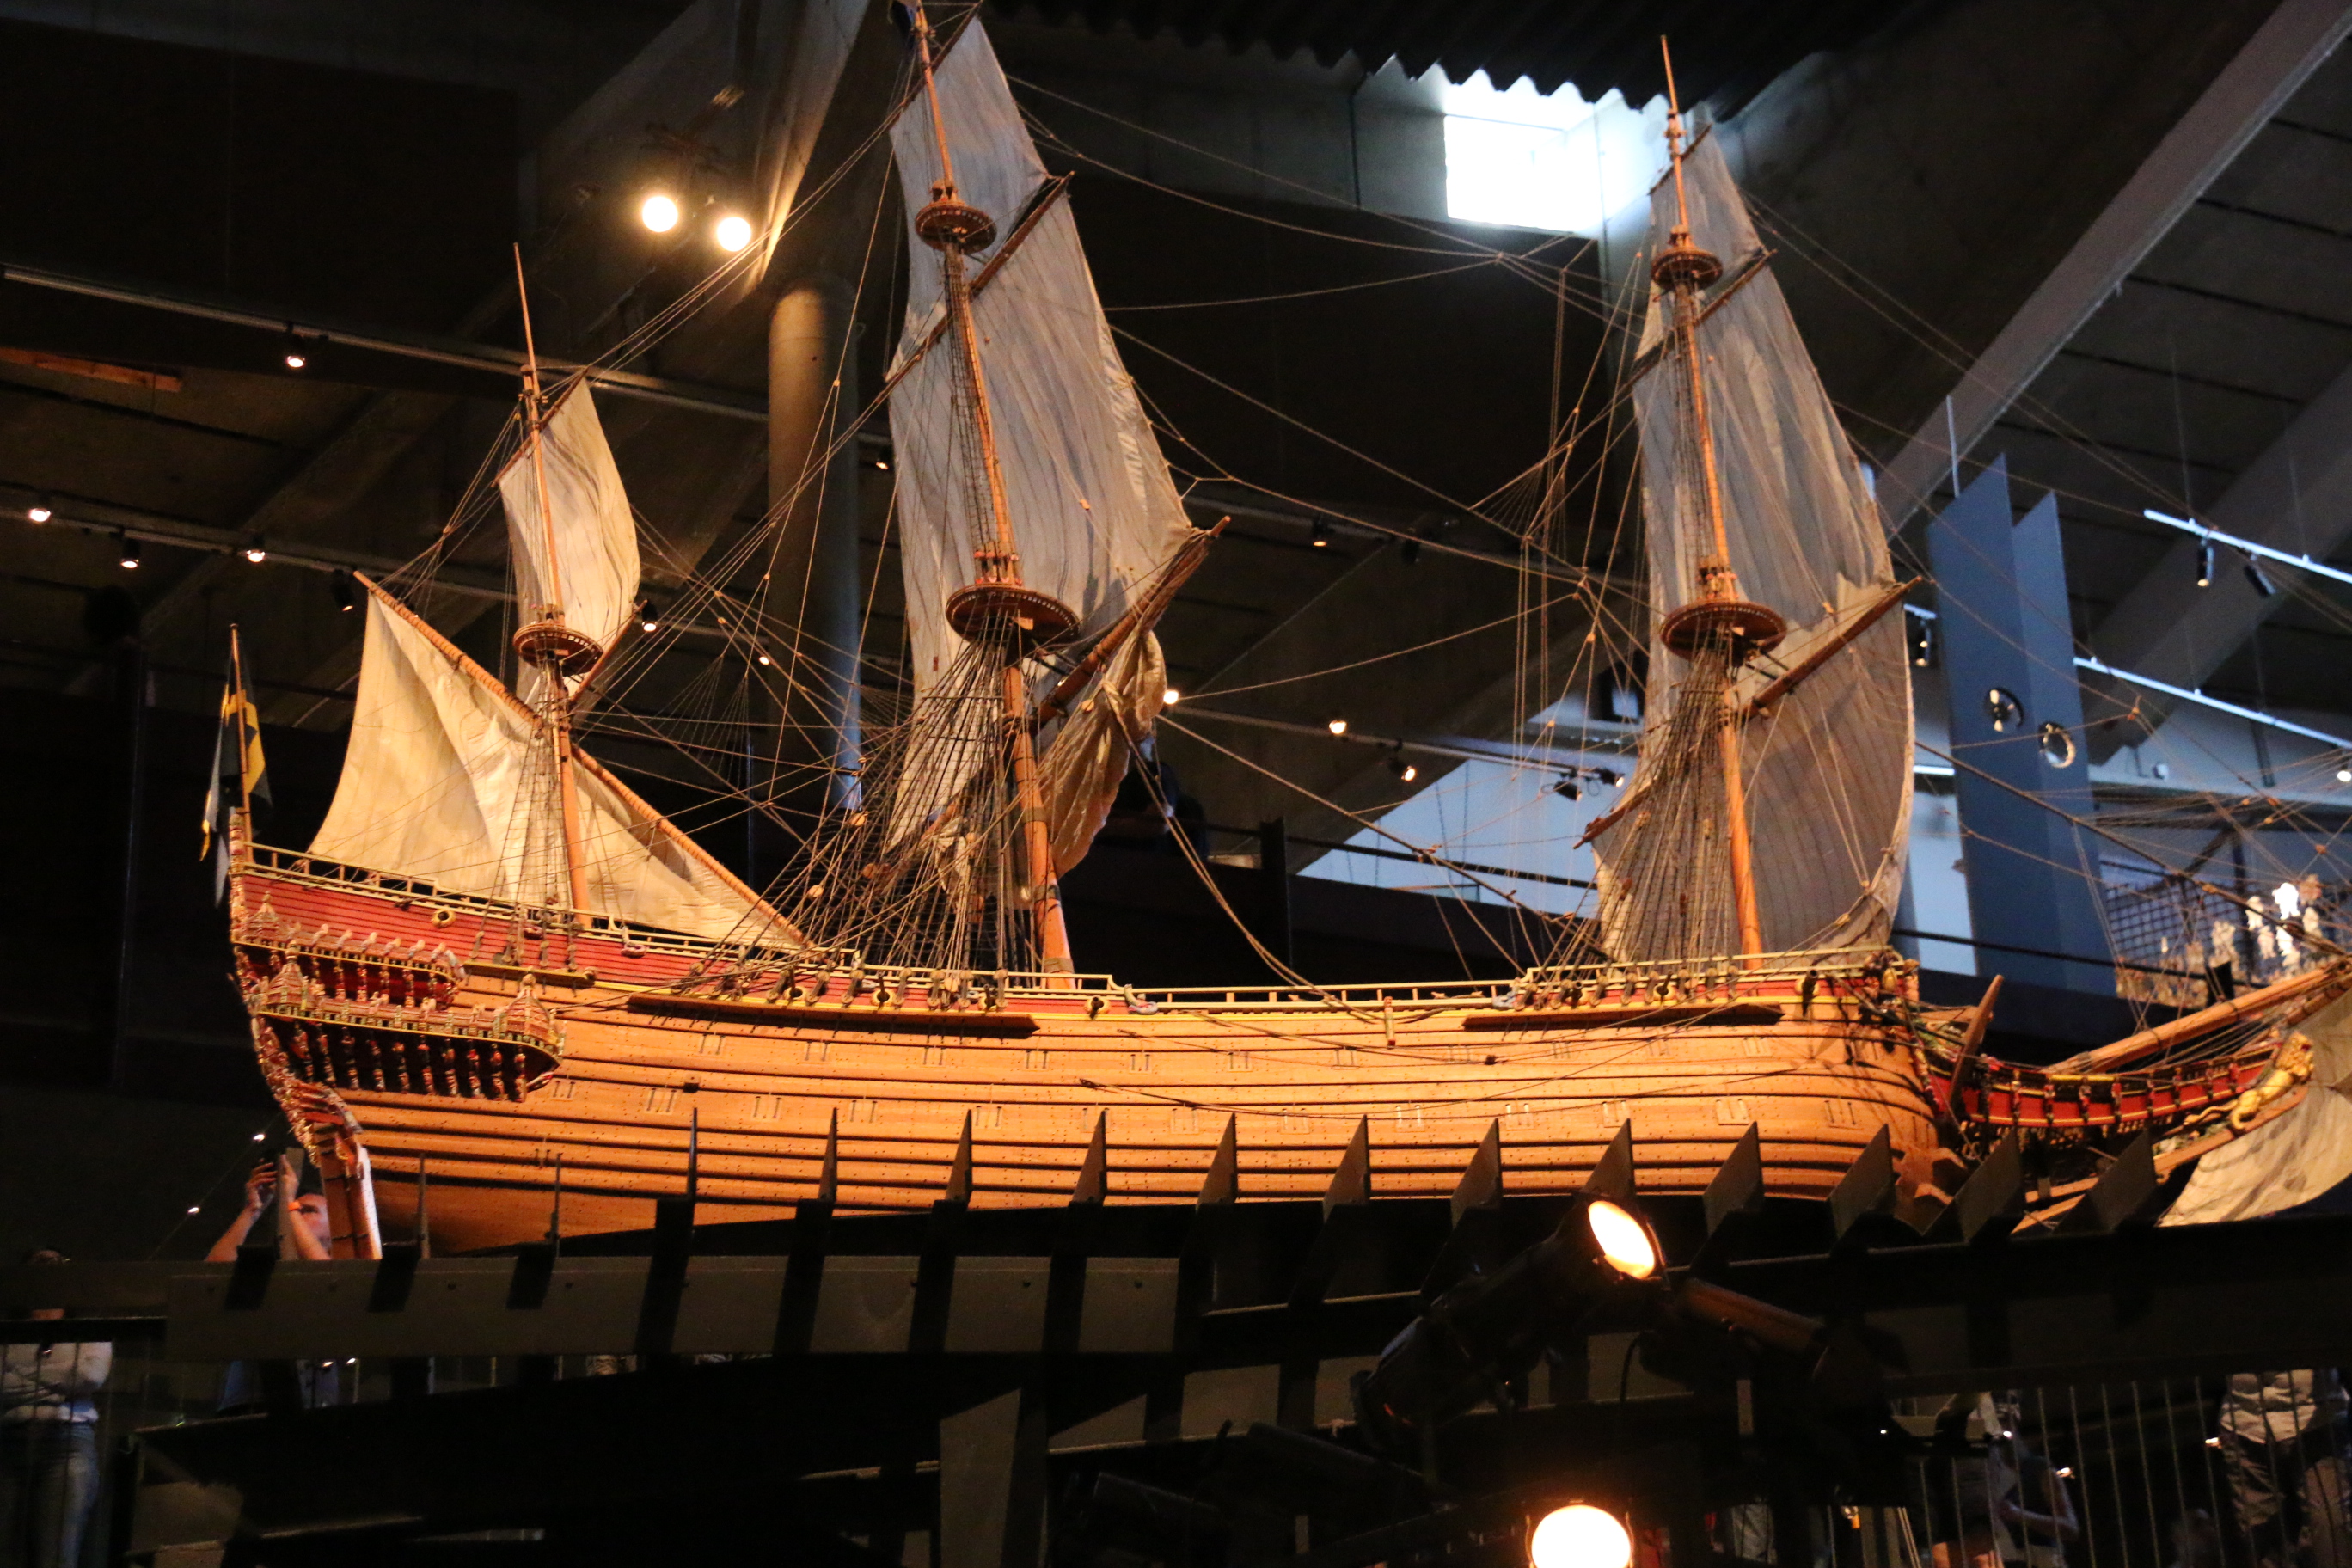
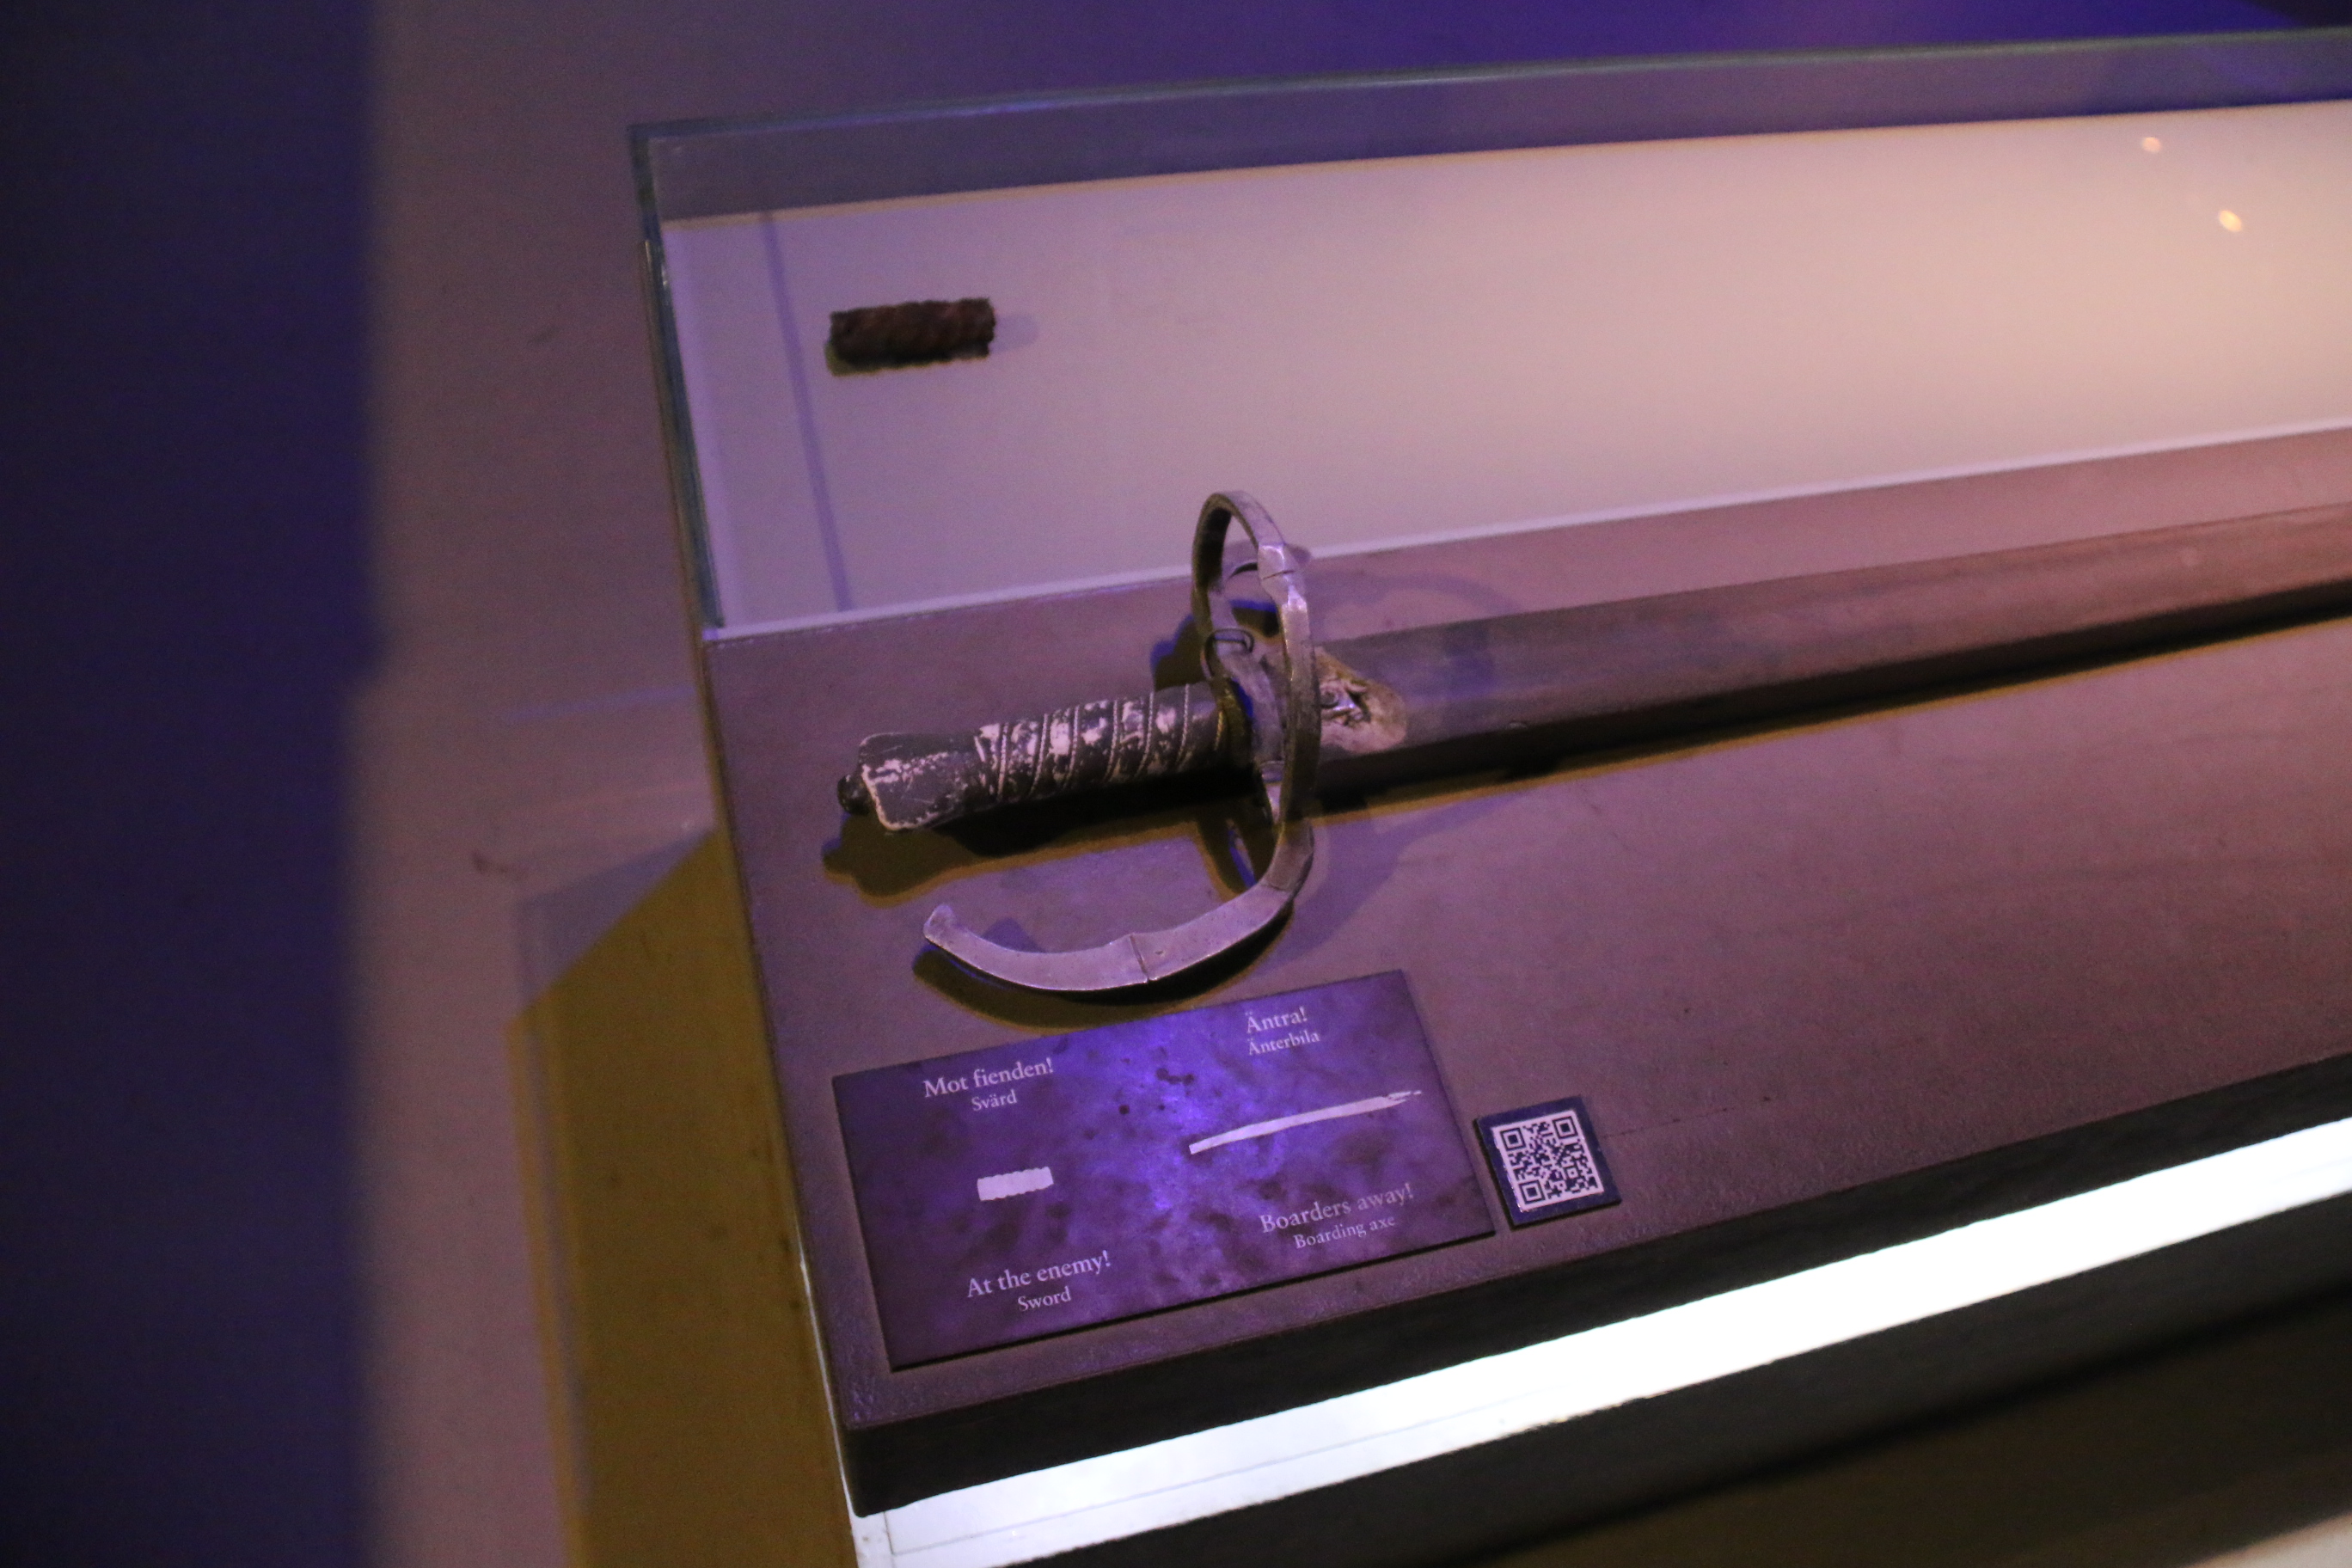
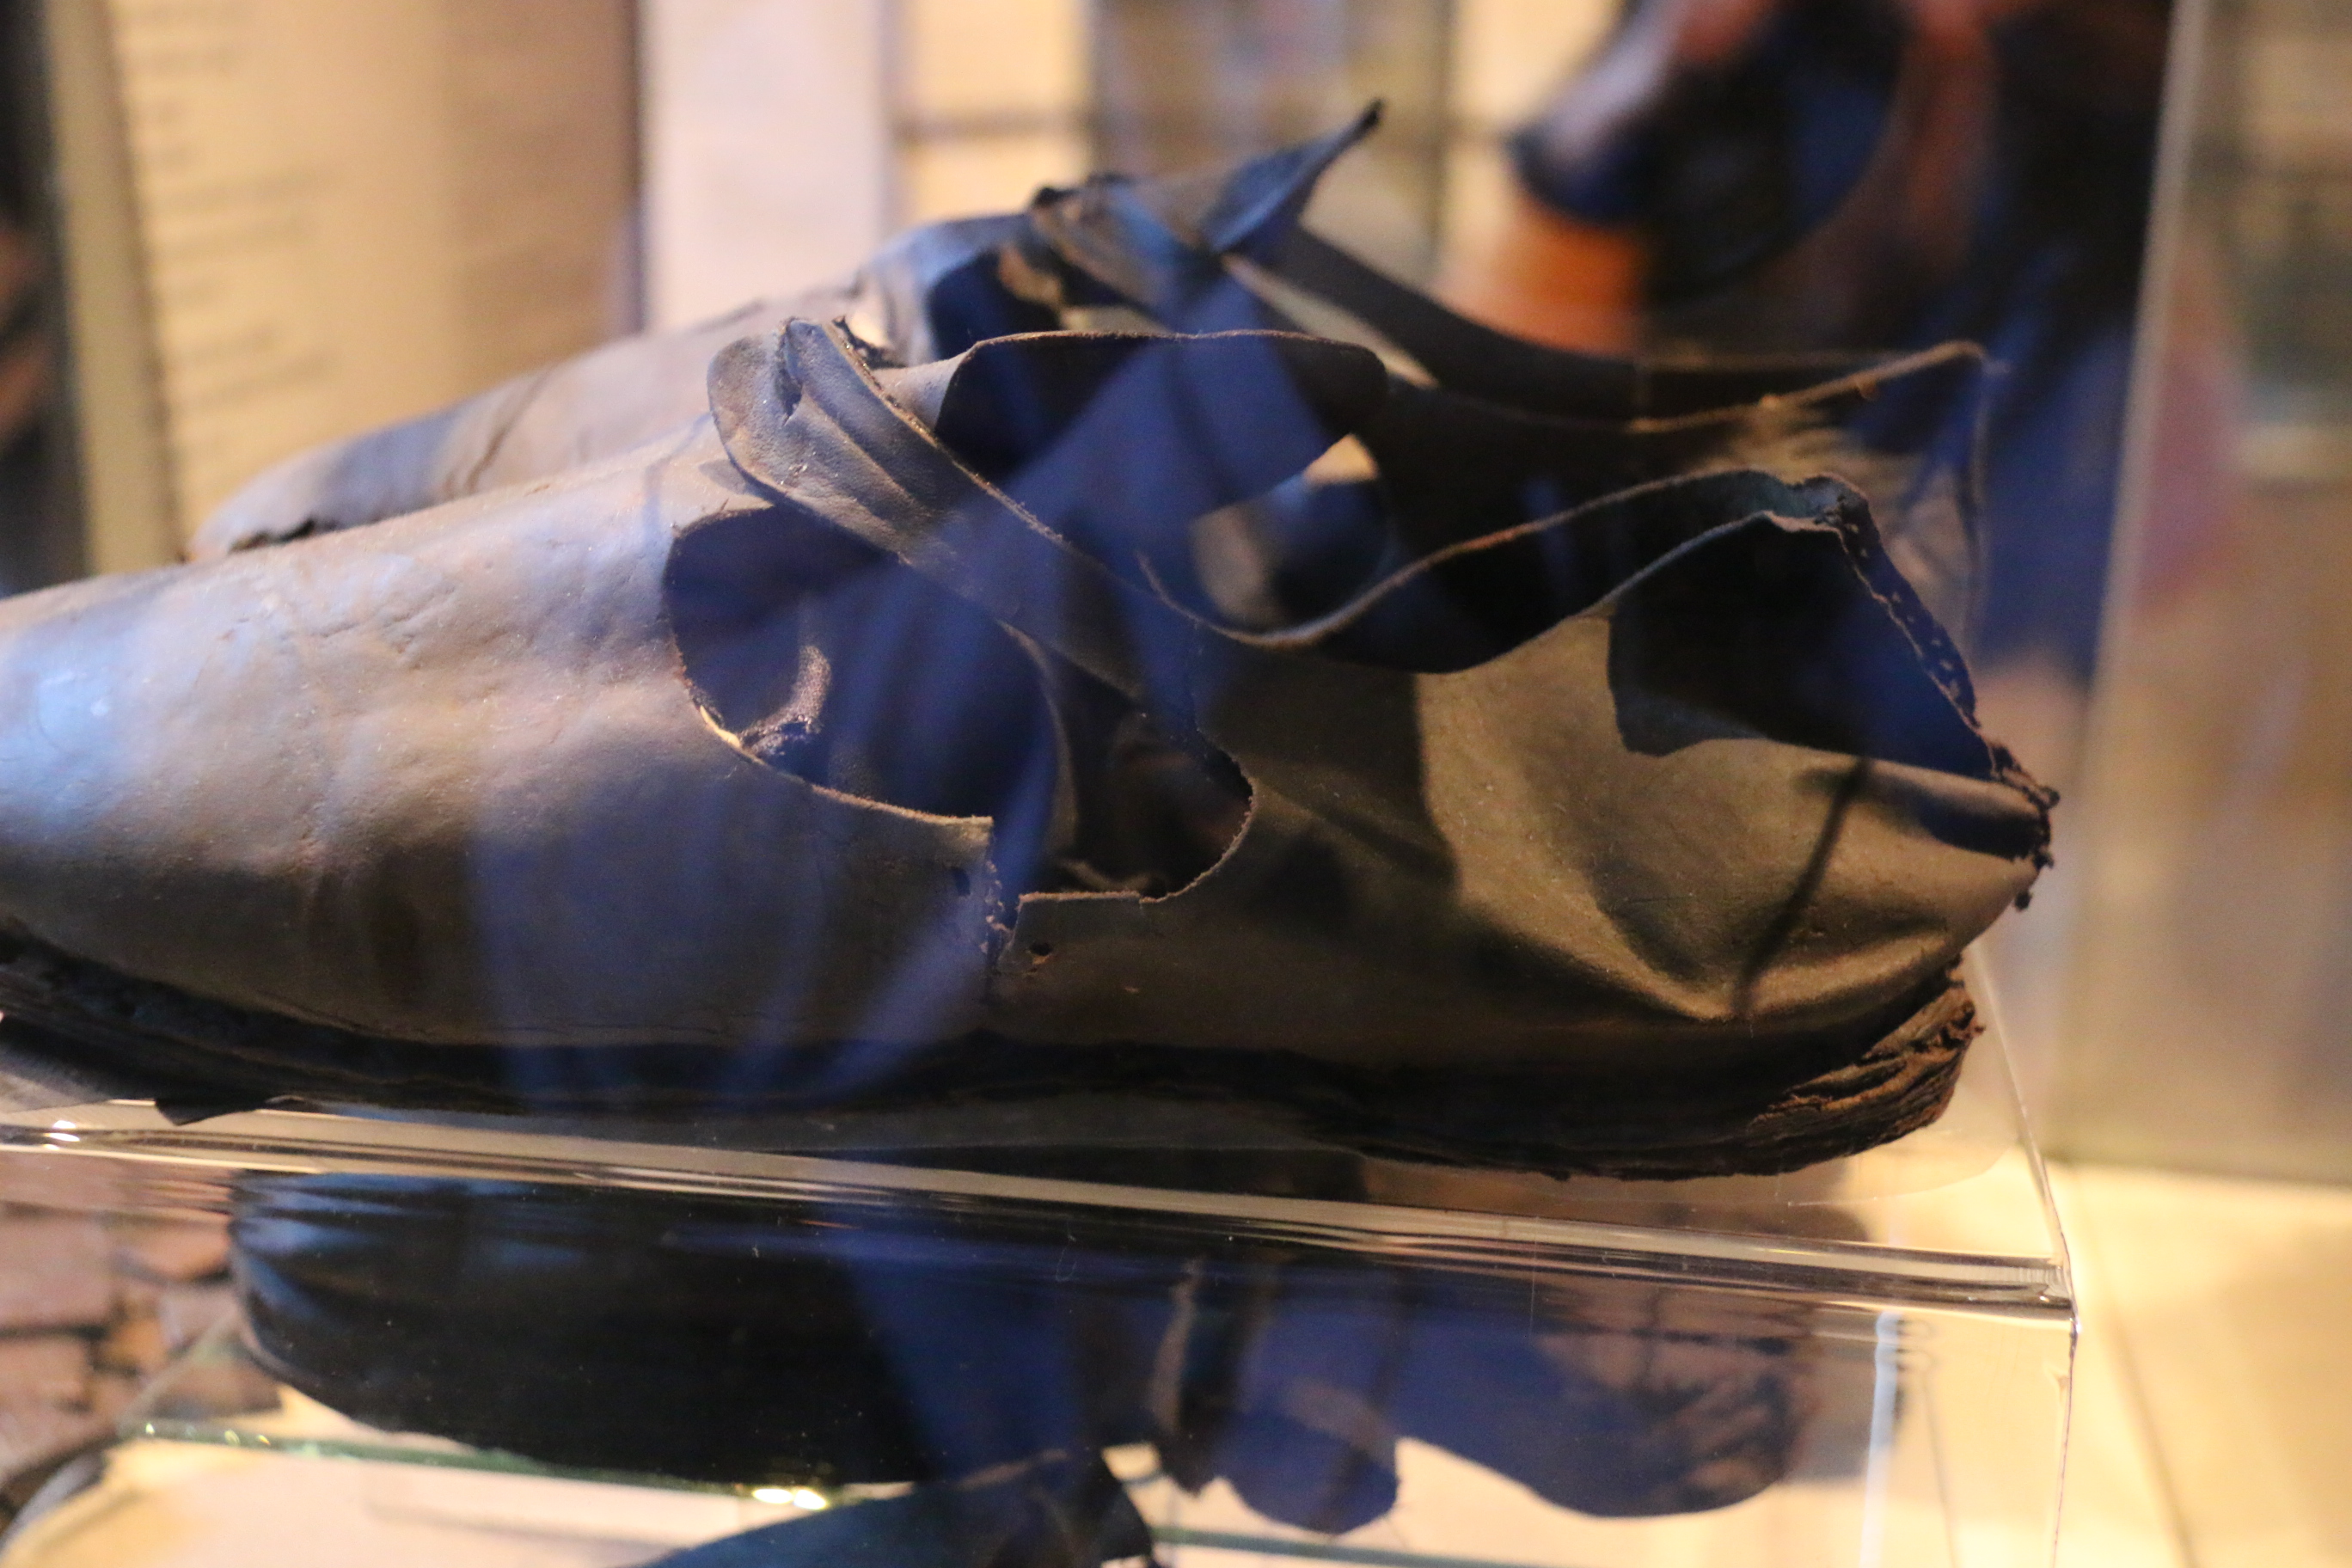
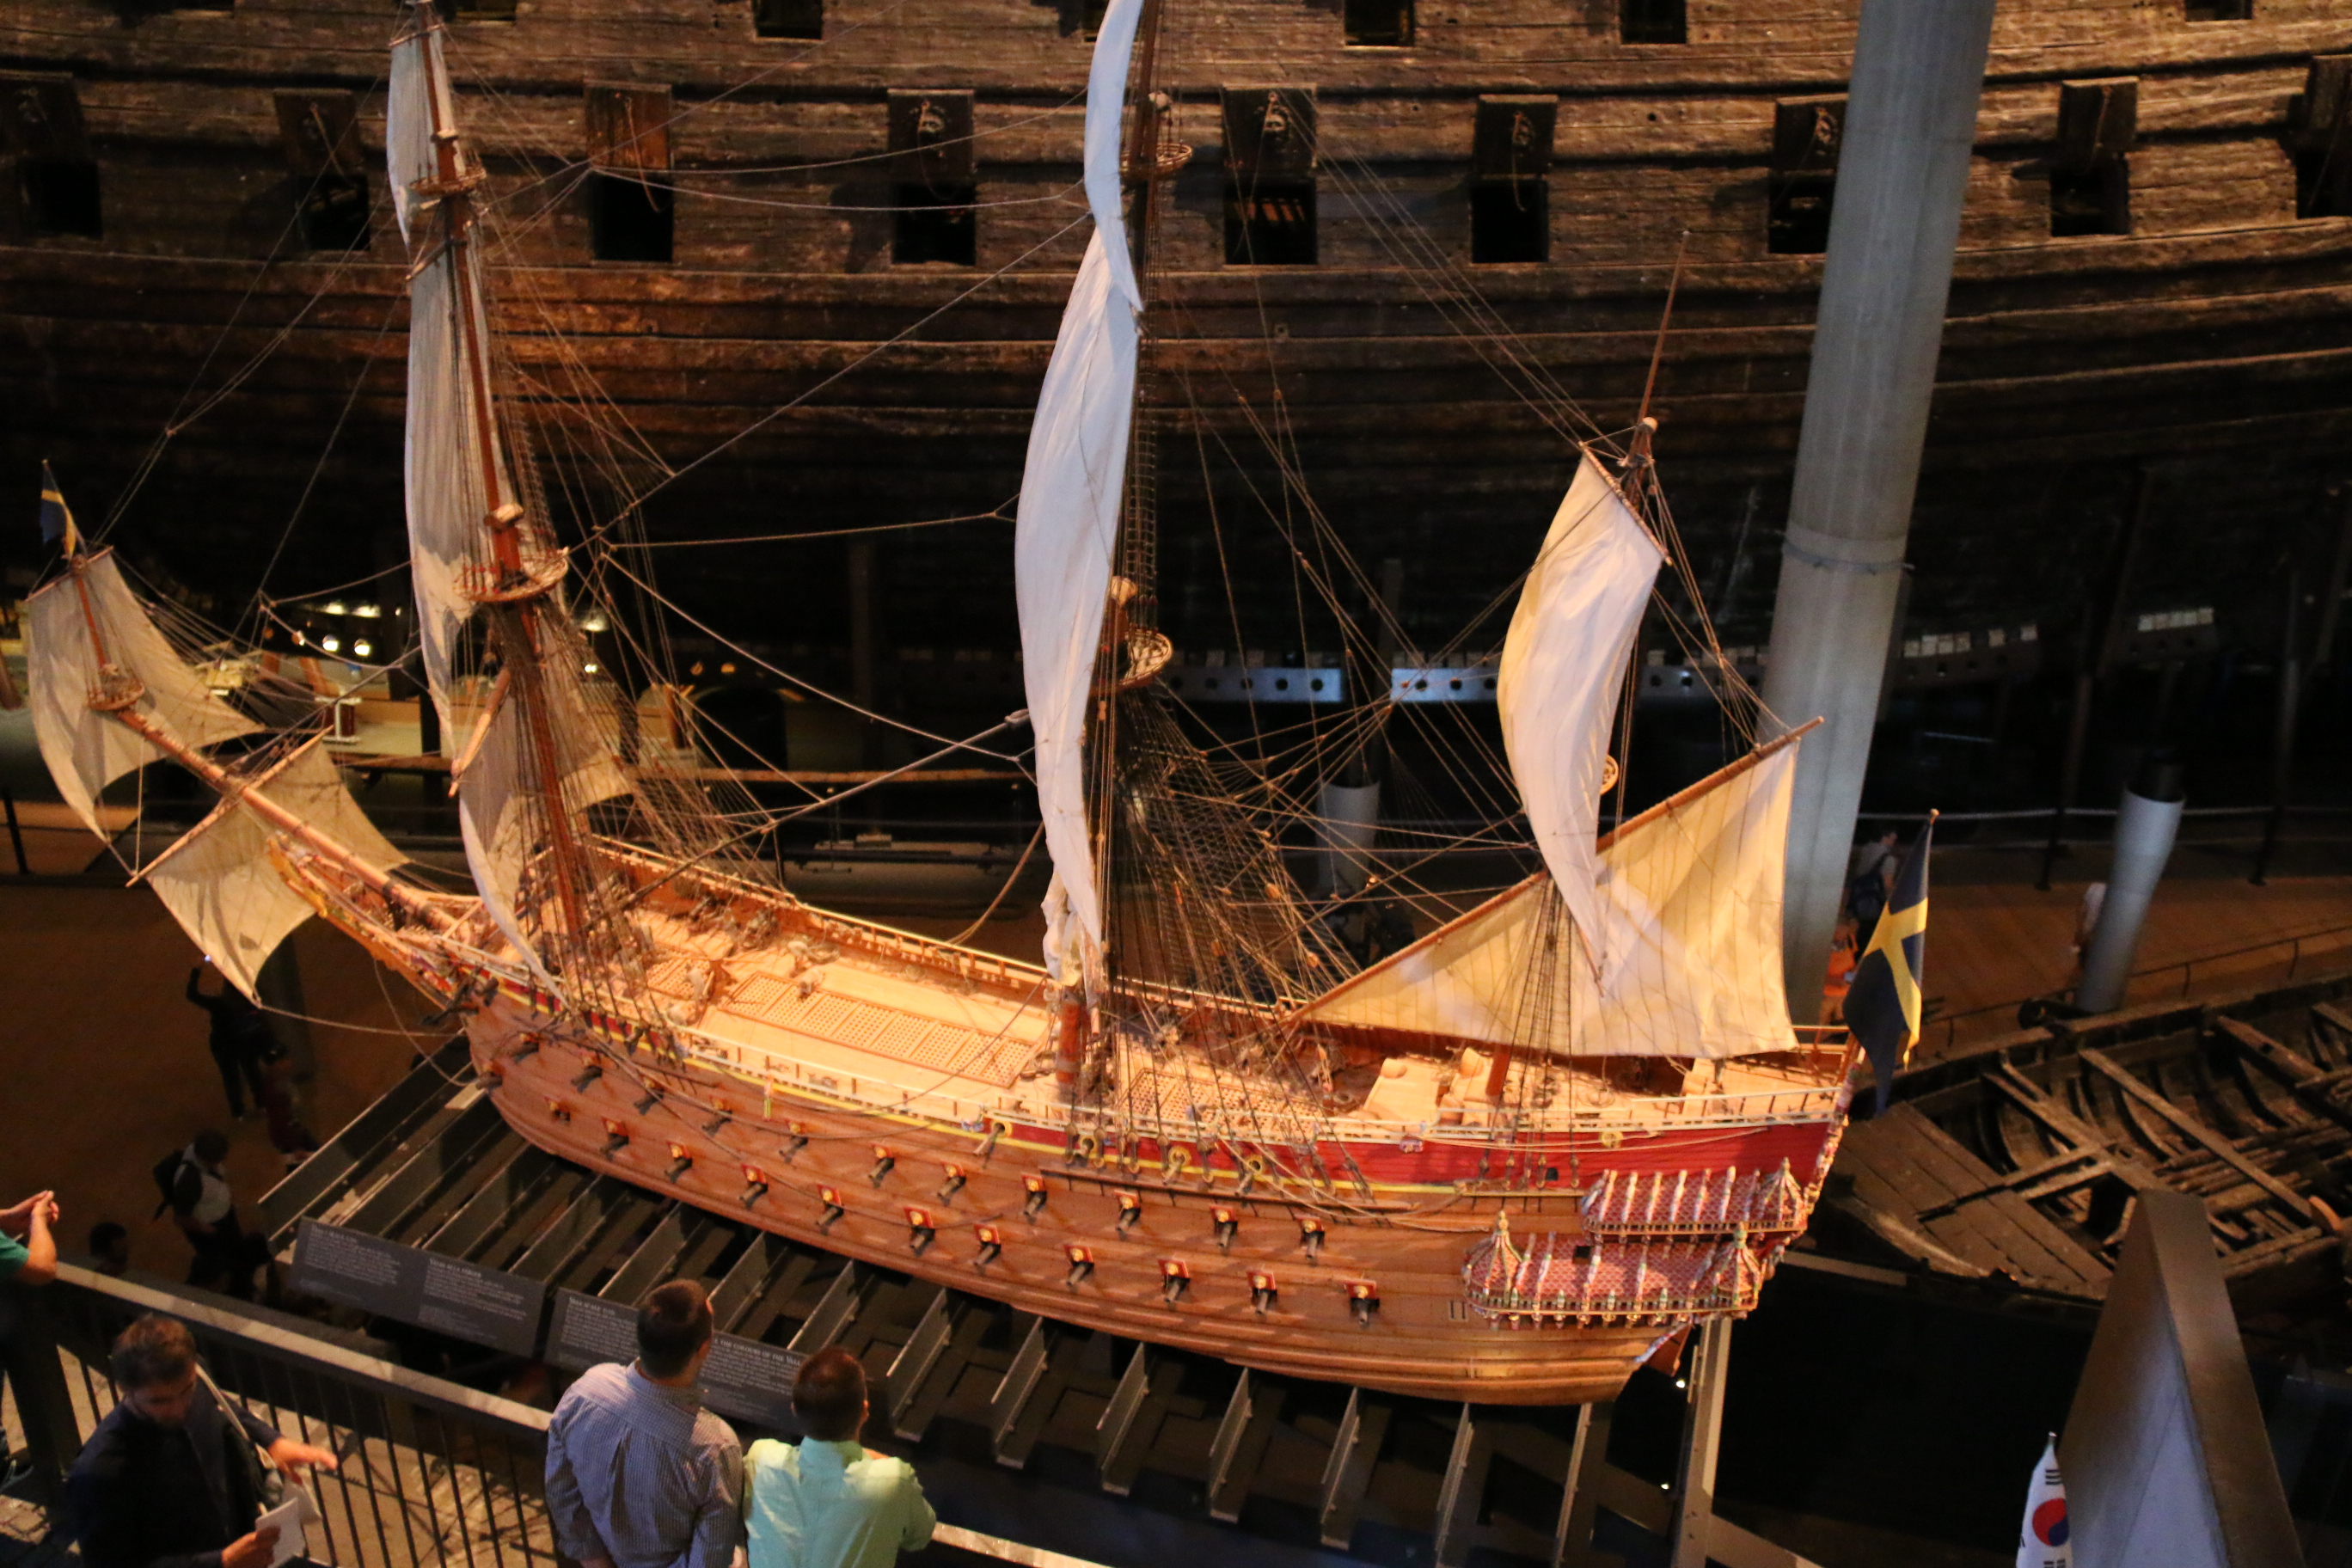
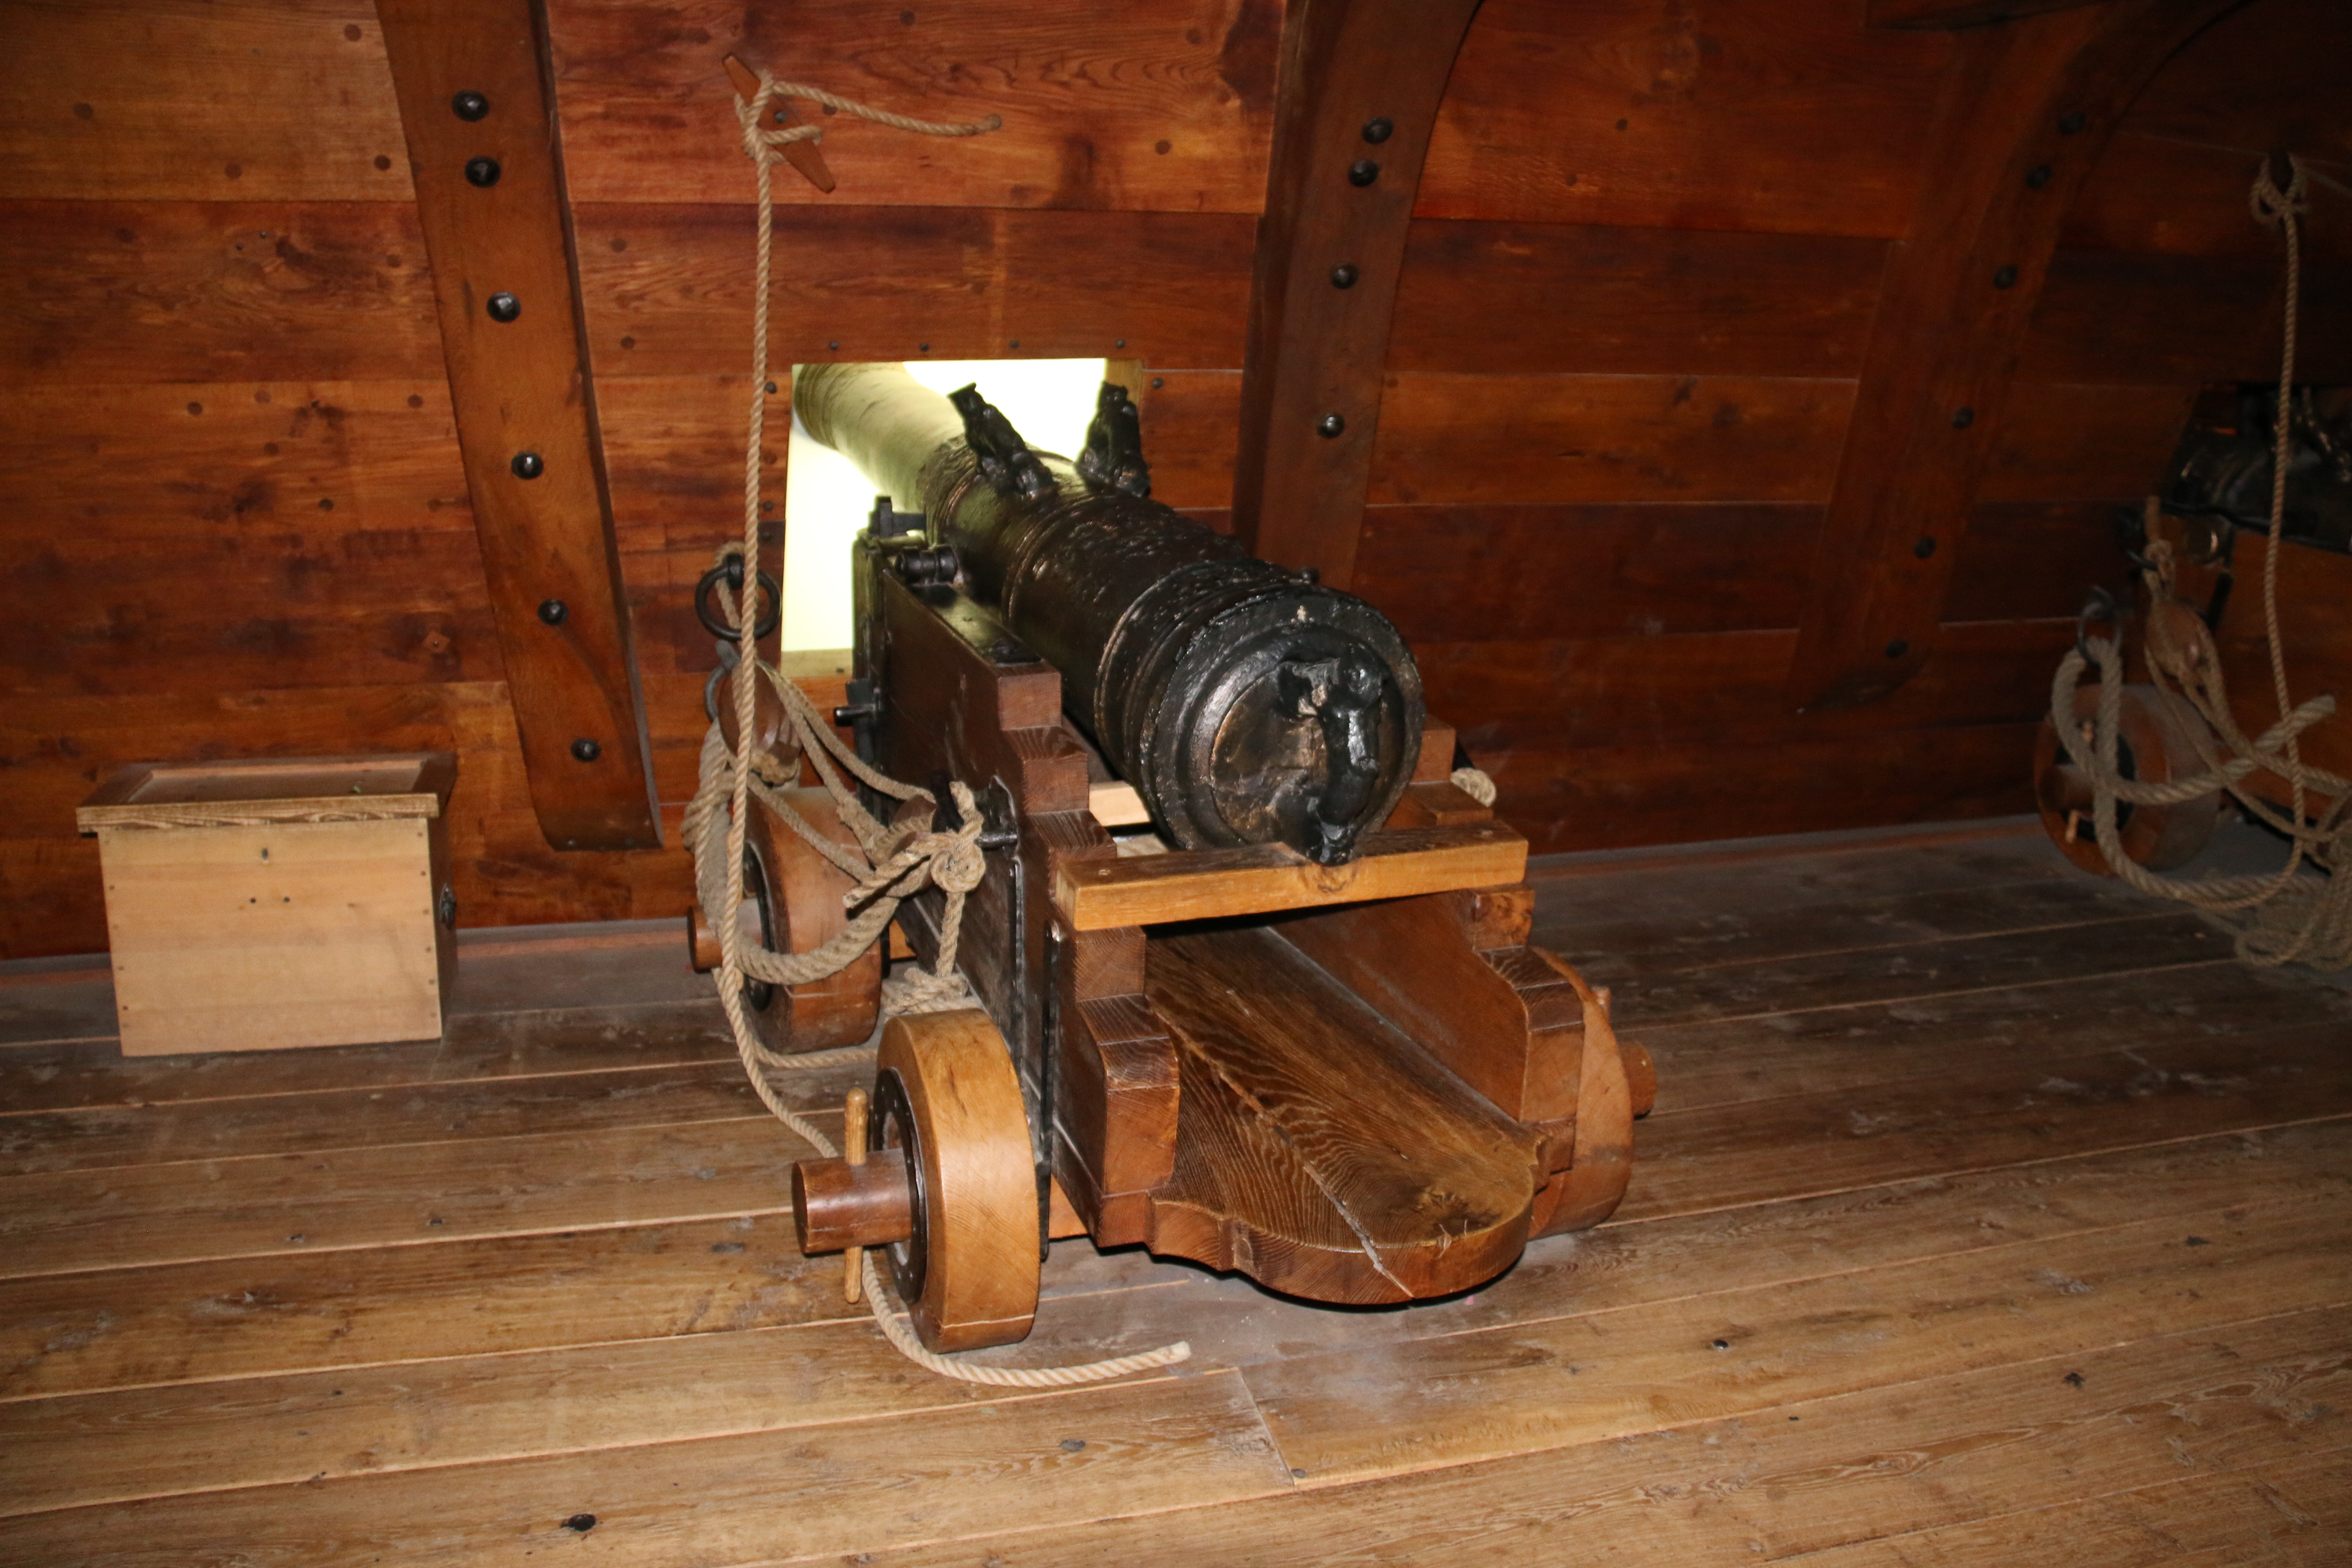
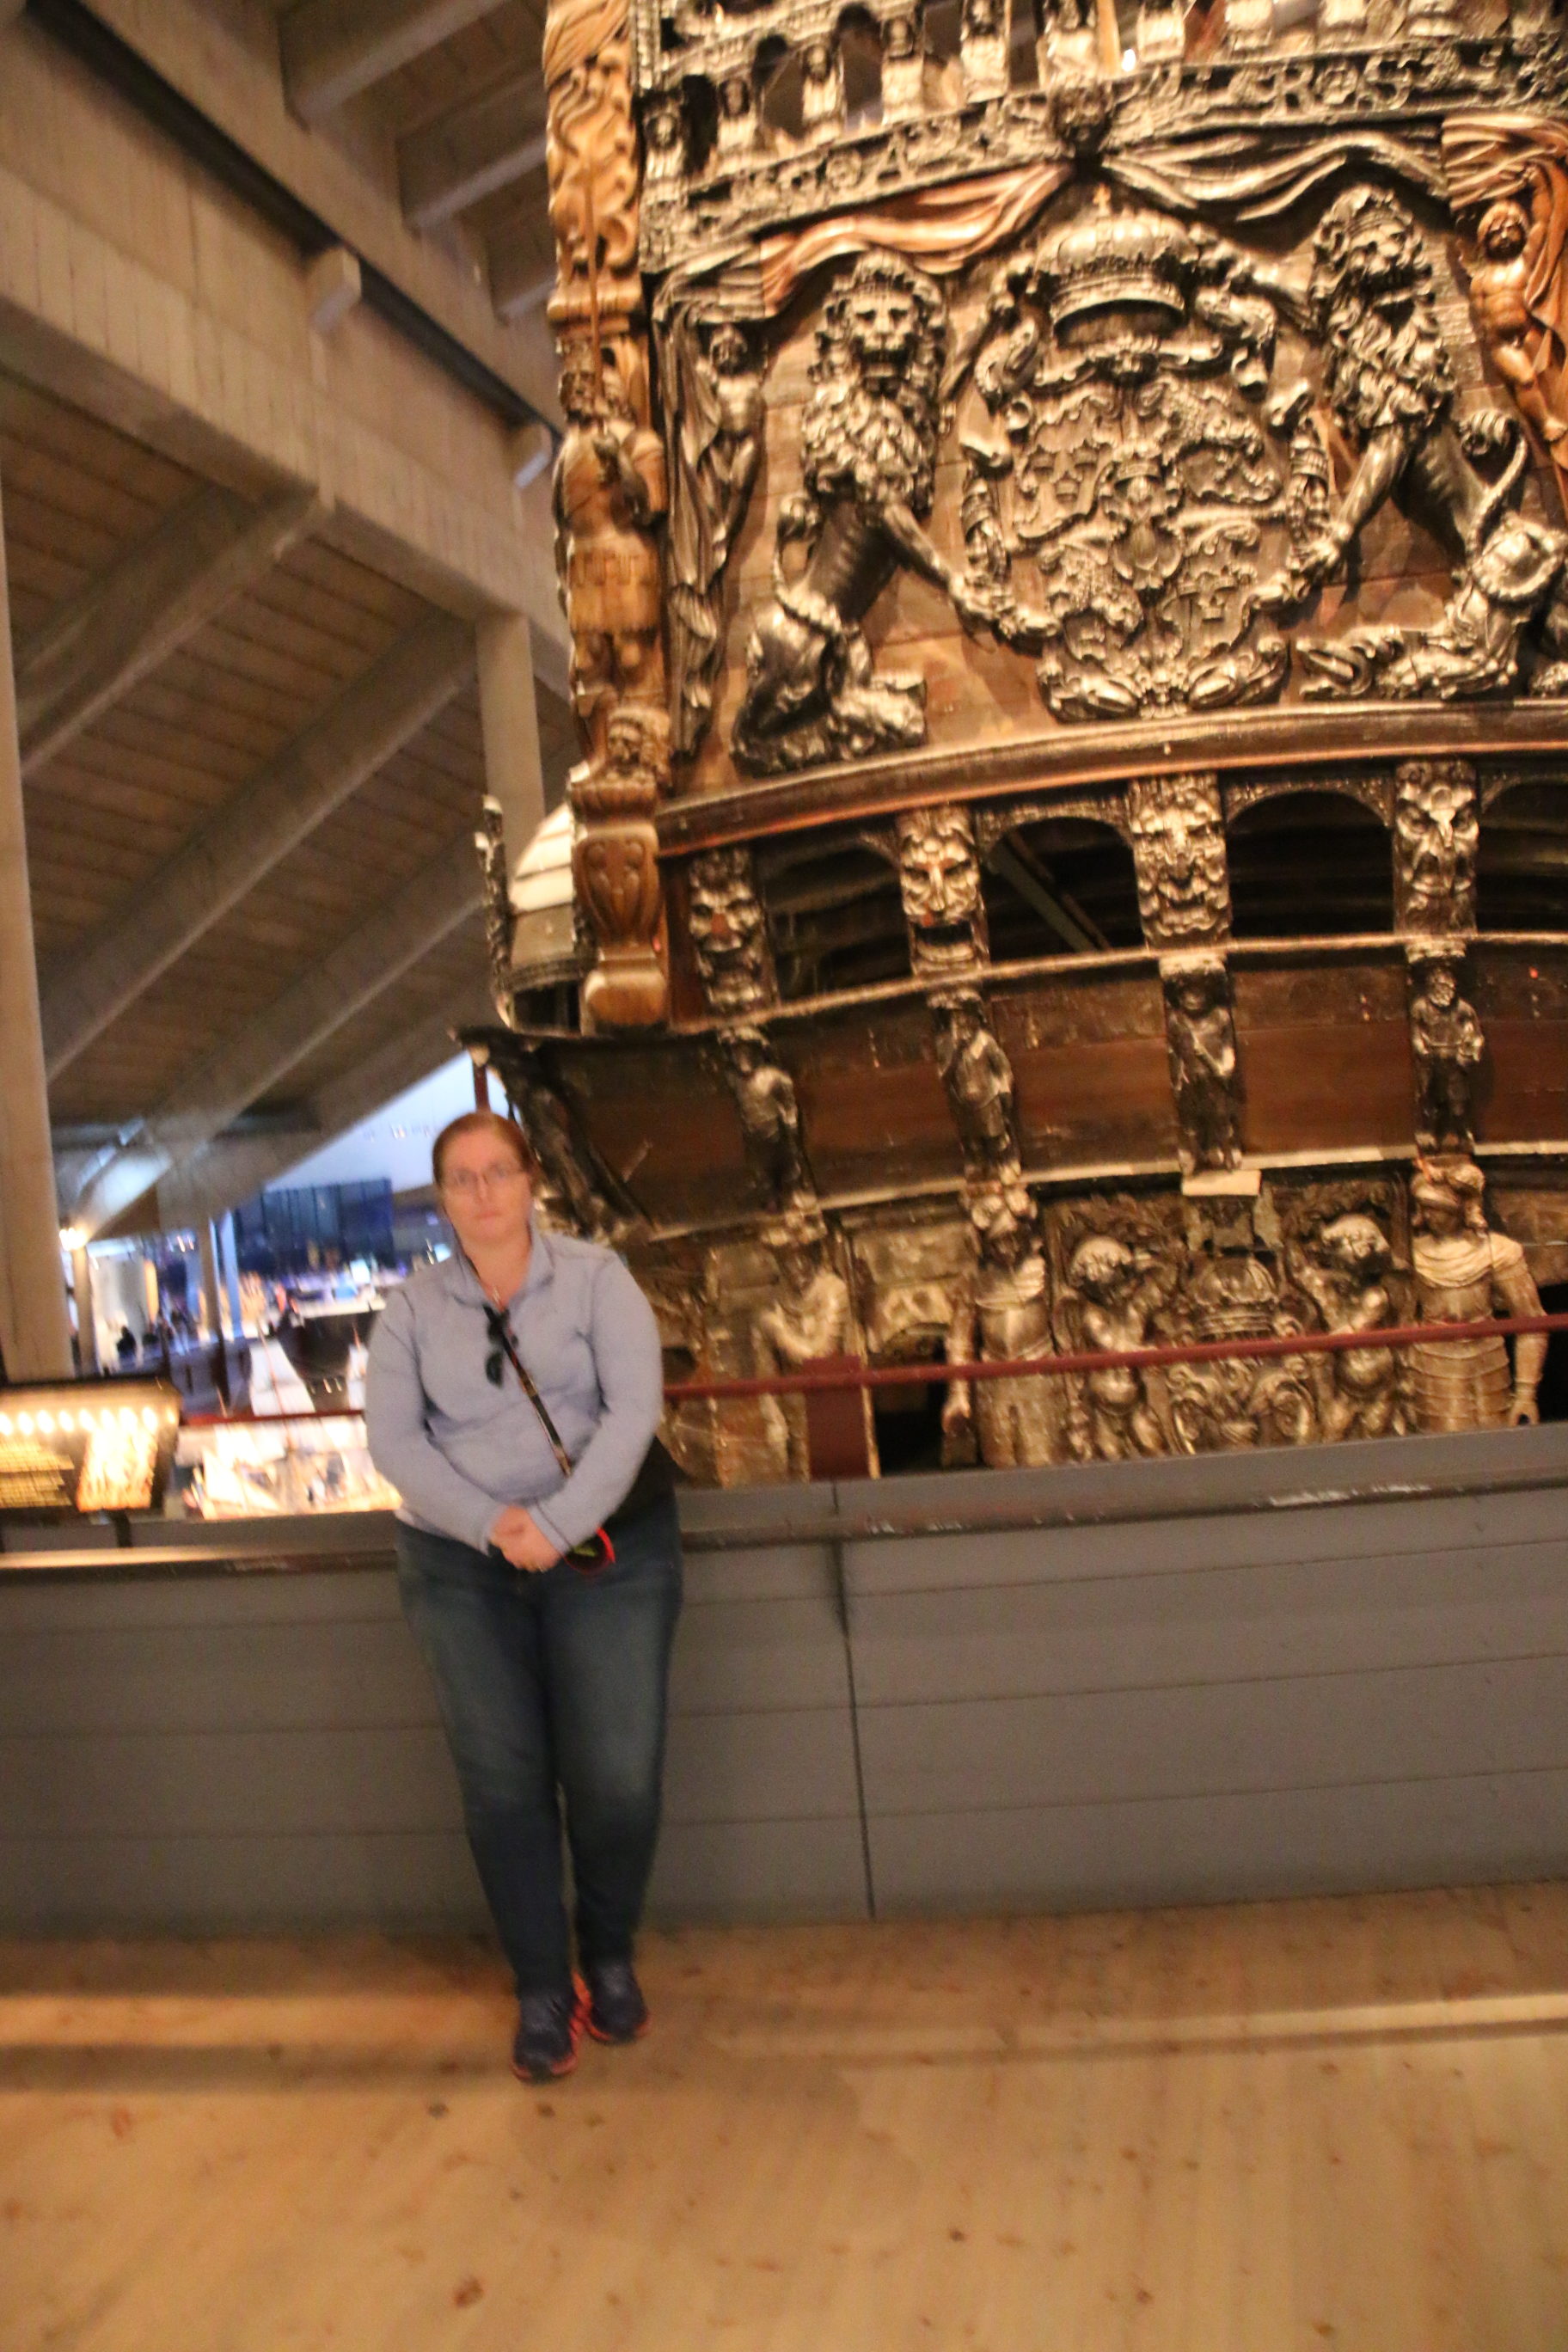
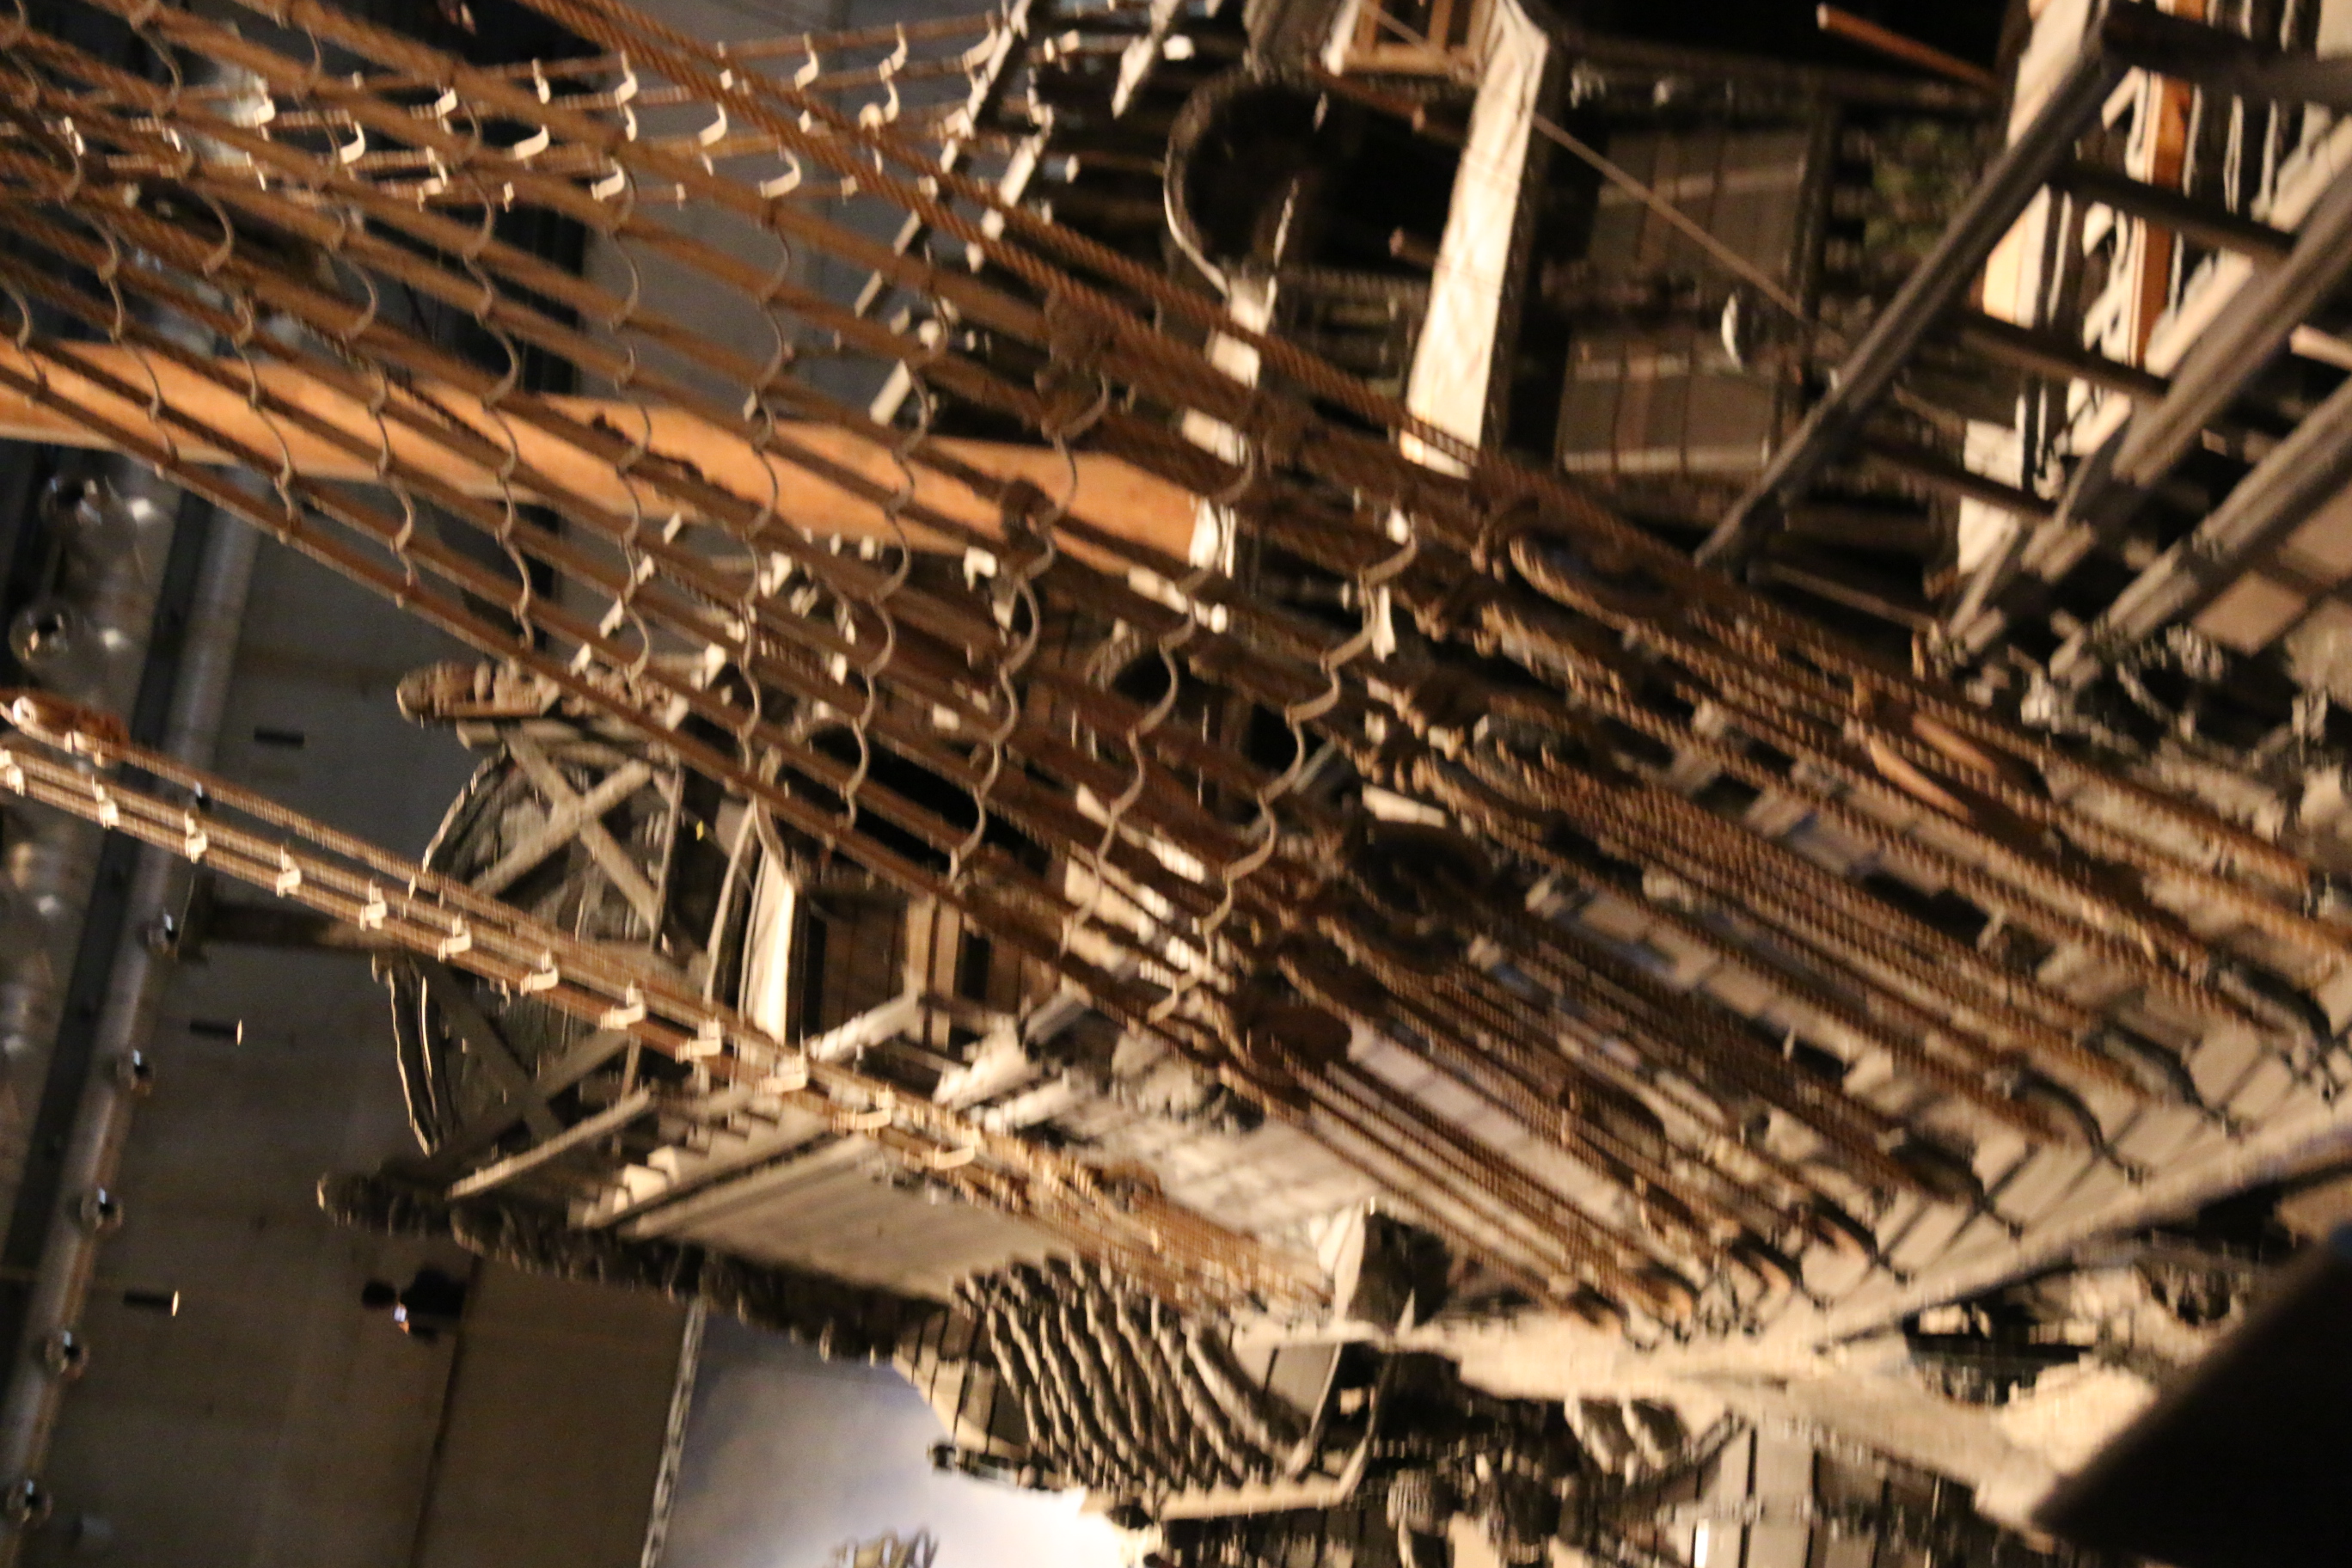
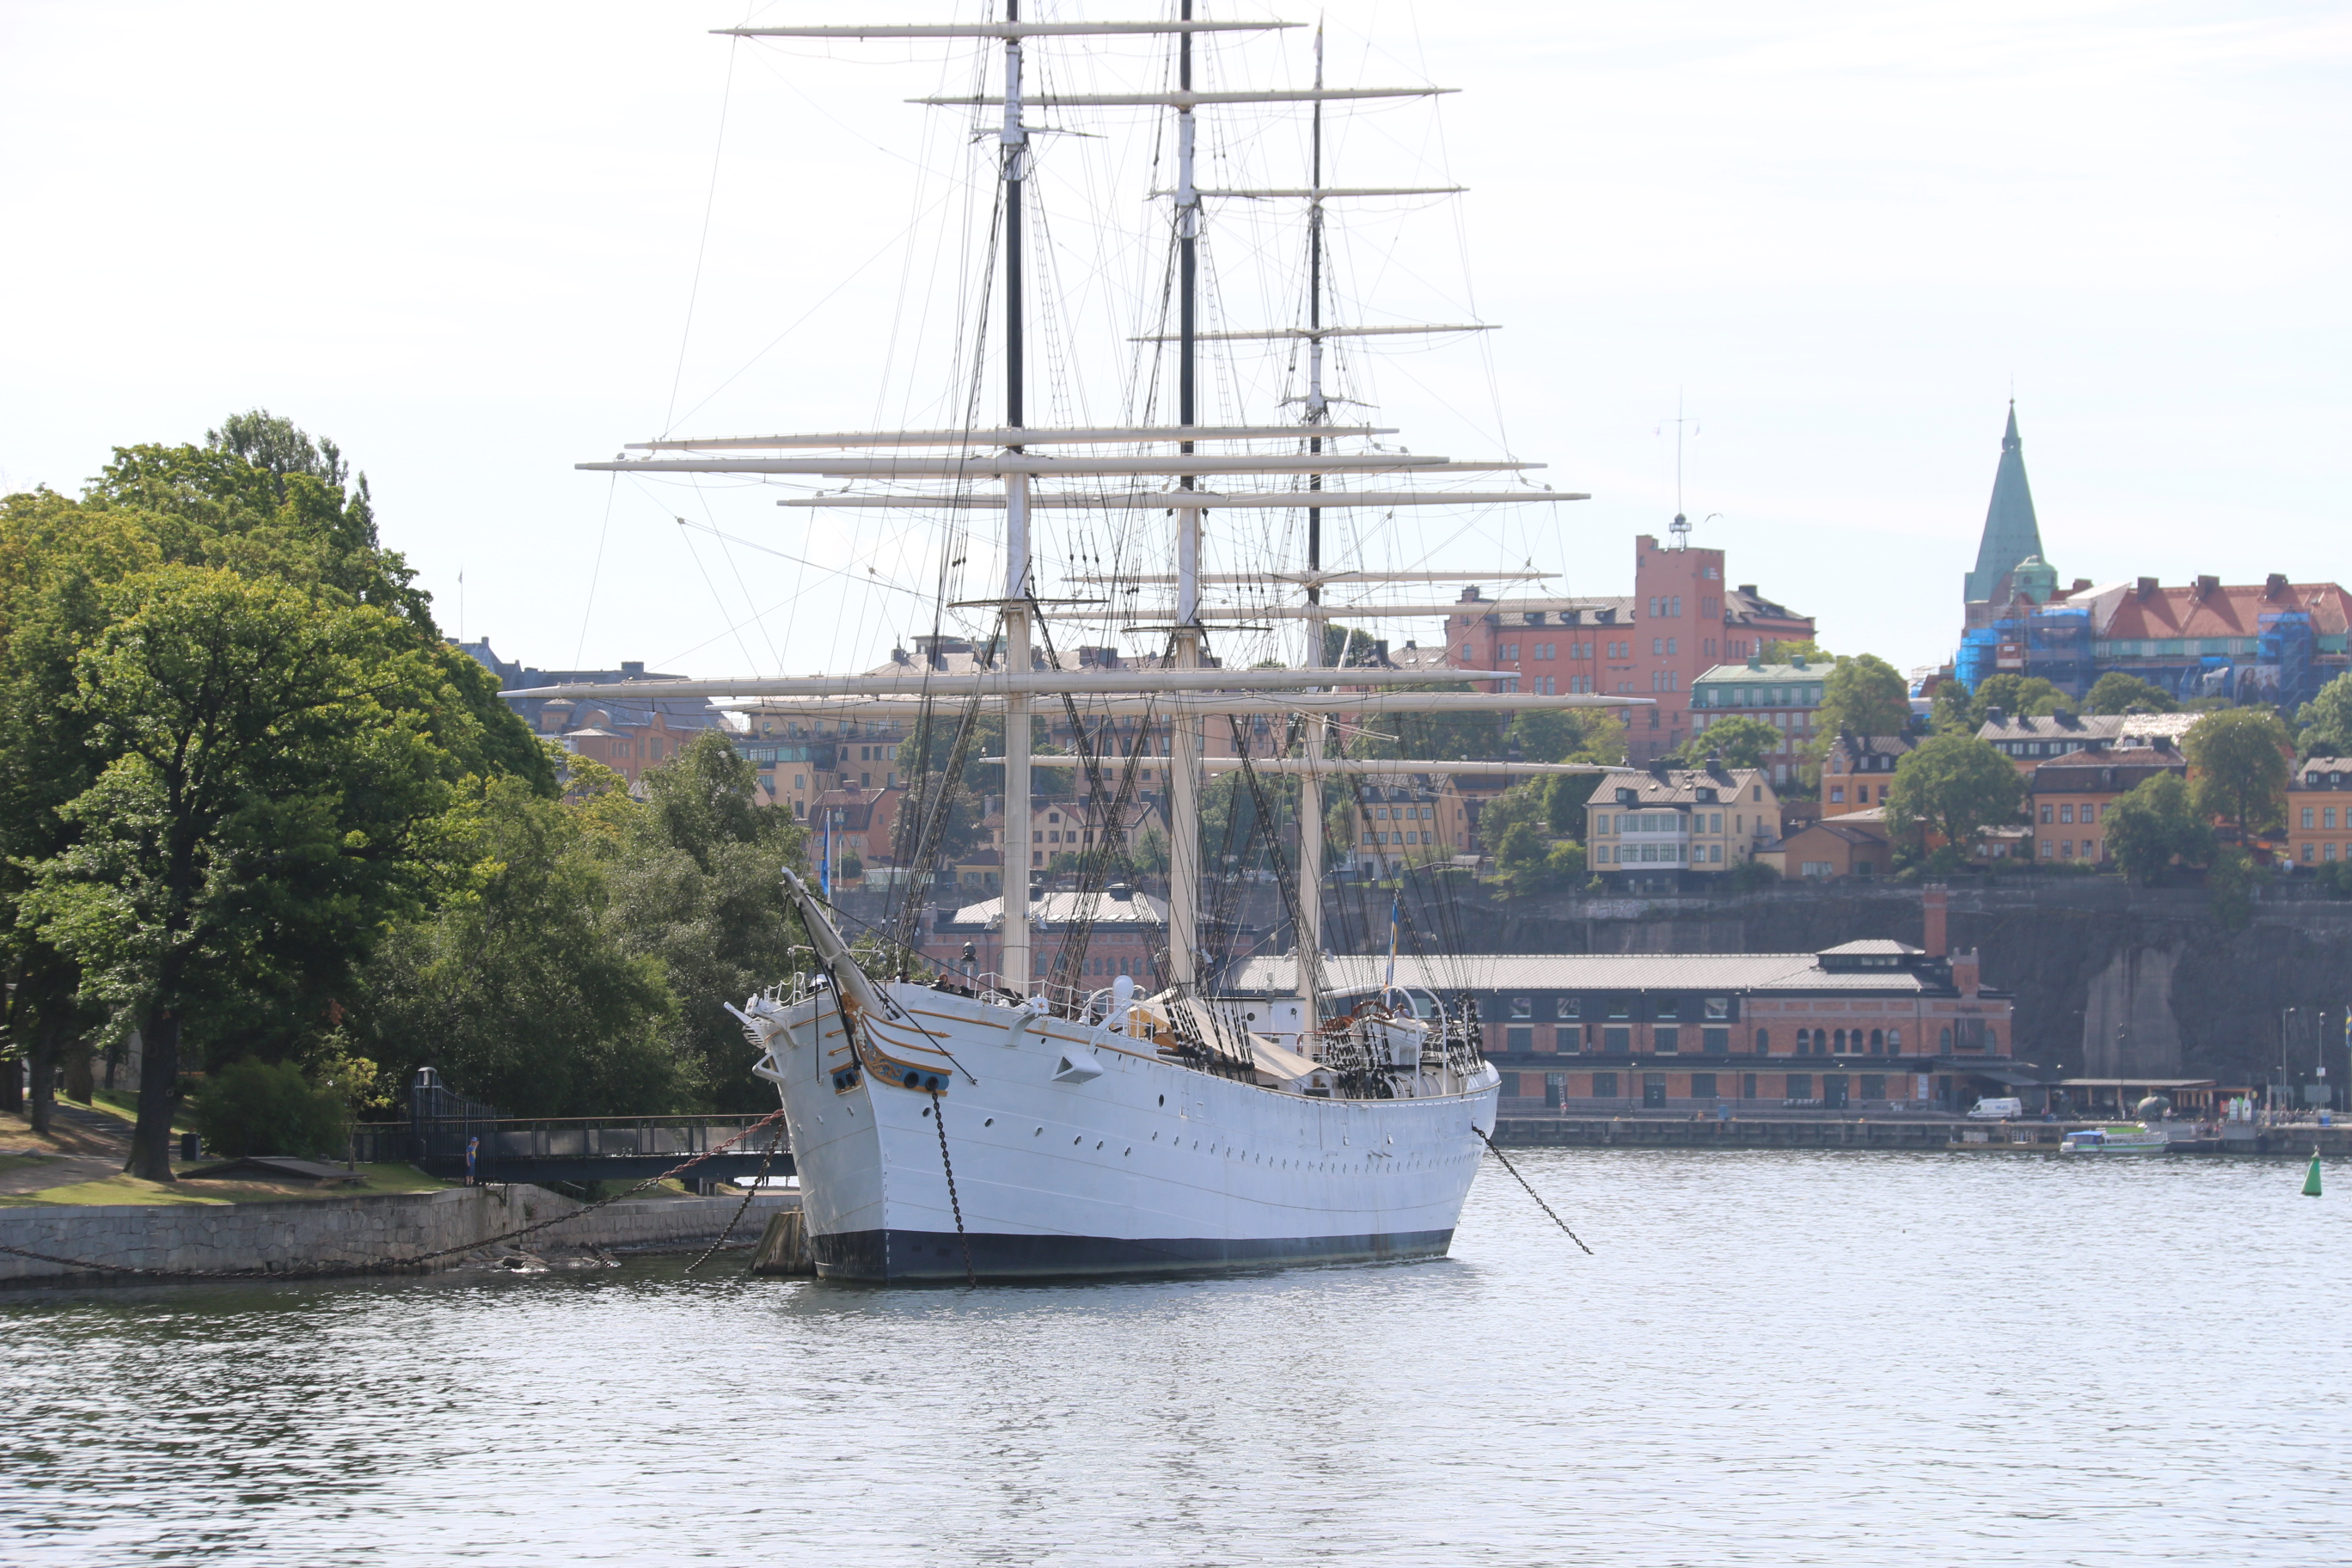
One of the highlights of our trip to Stockholm was going to the Vasa Museum to see the wreck of King Carl Gustav’s warship.
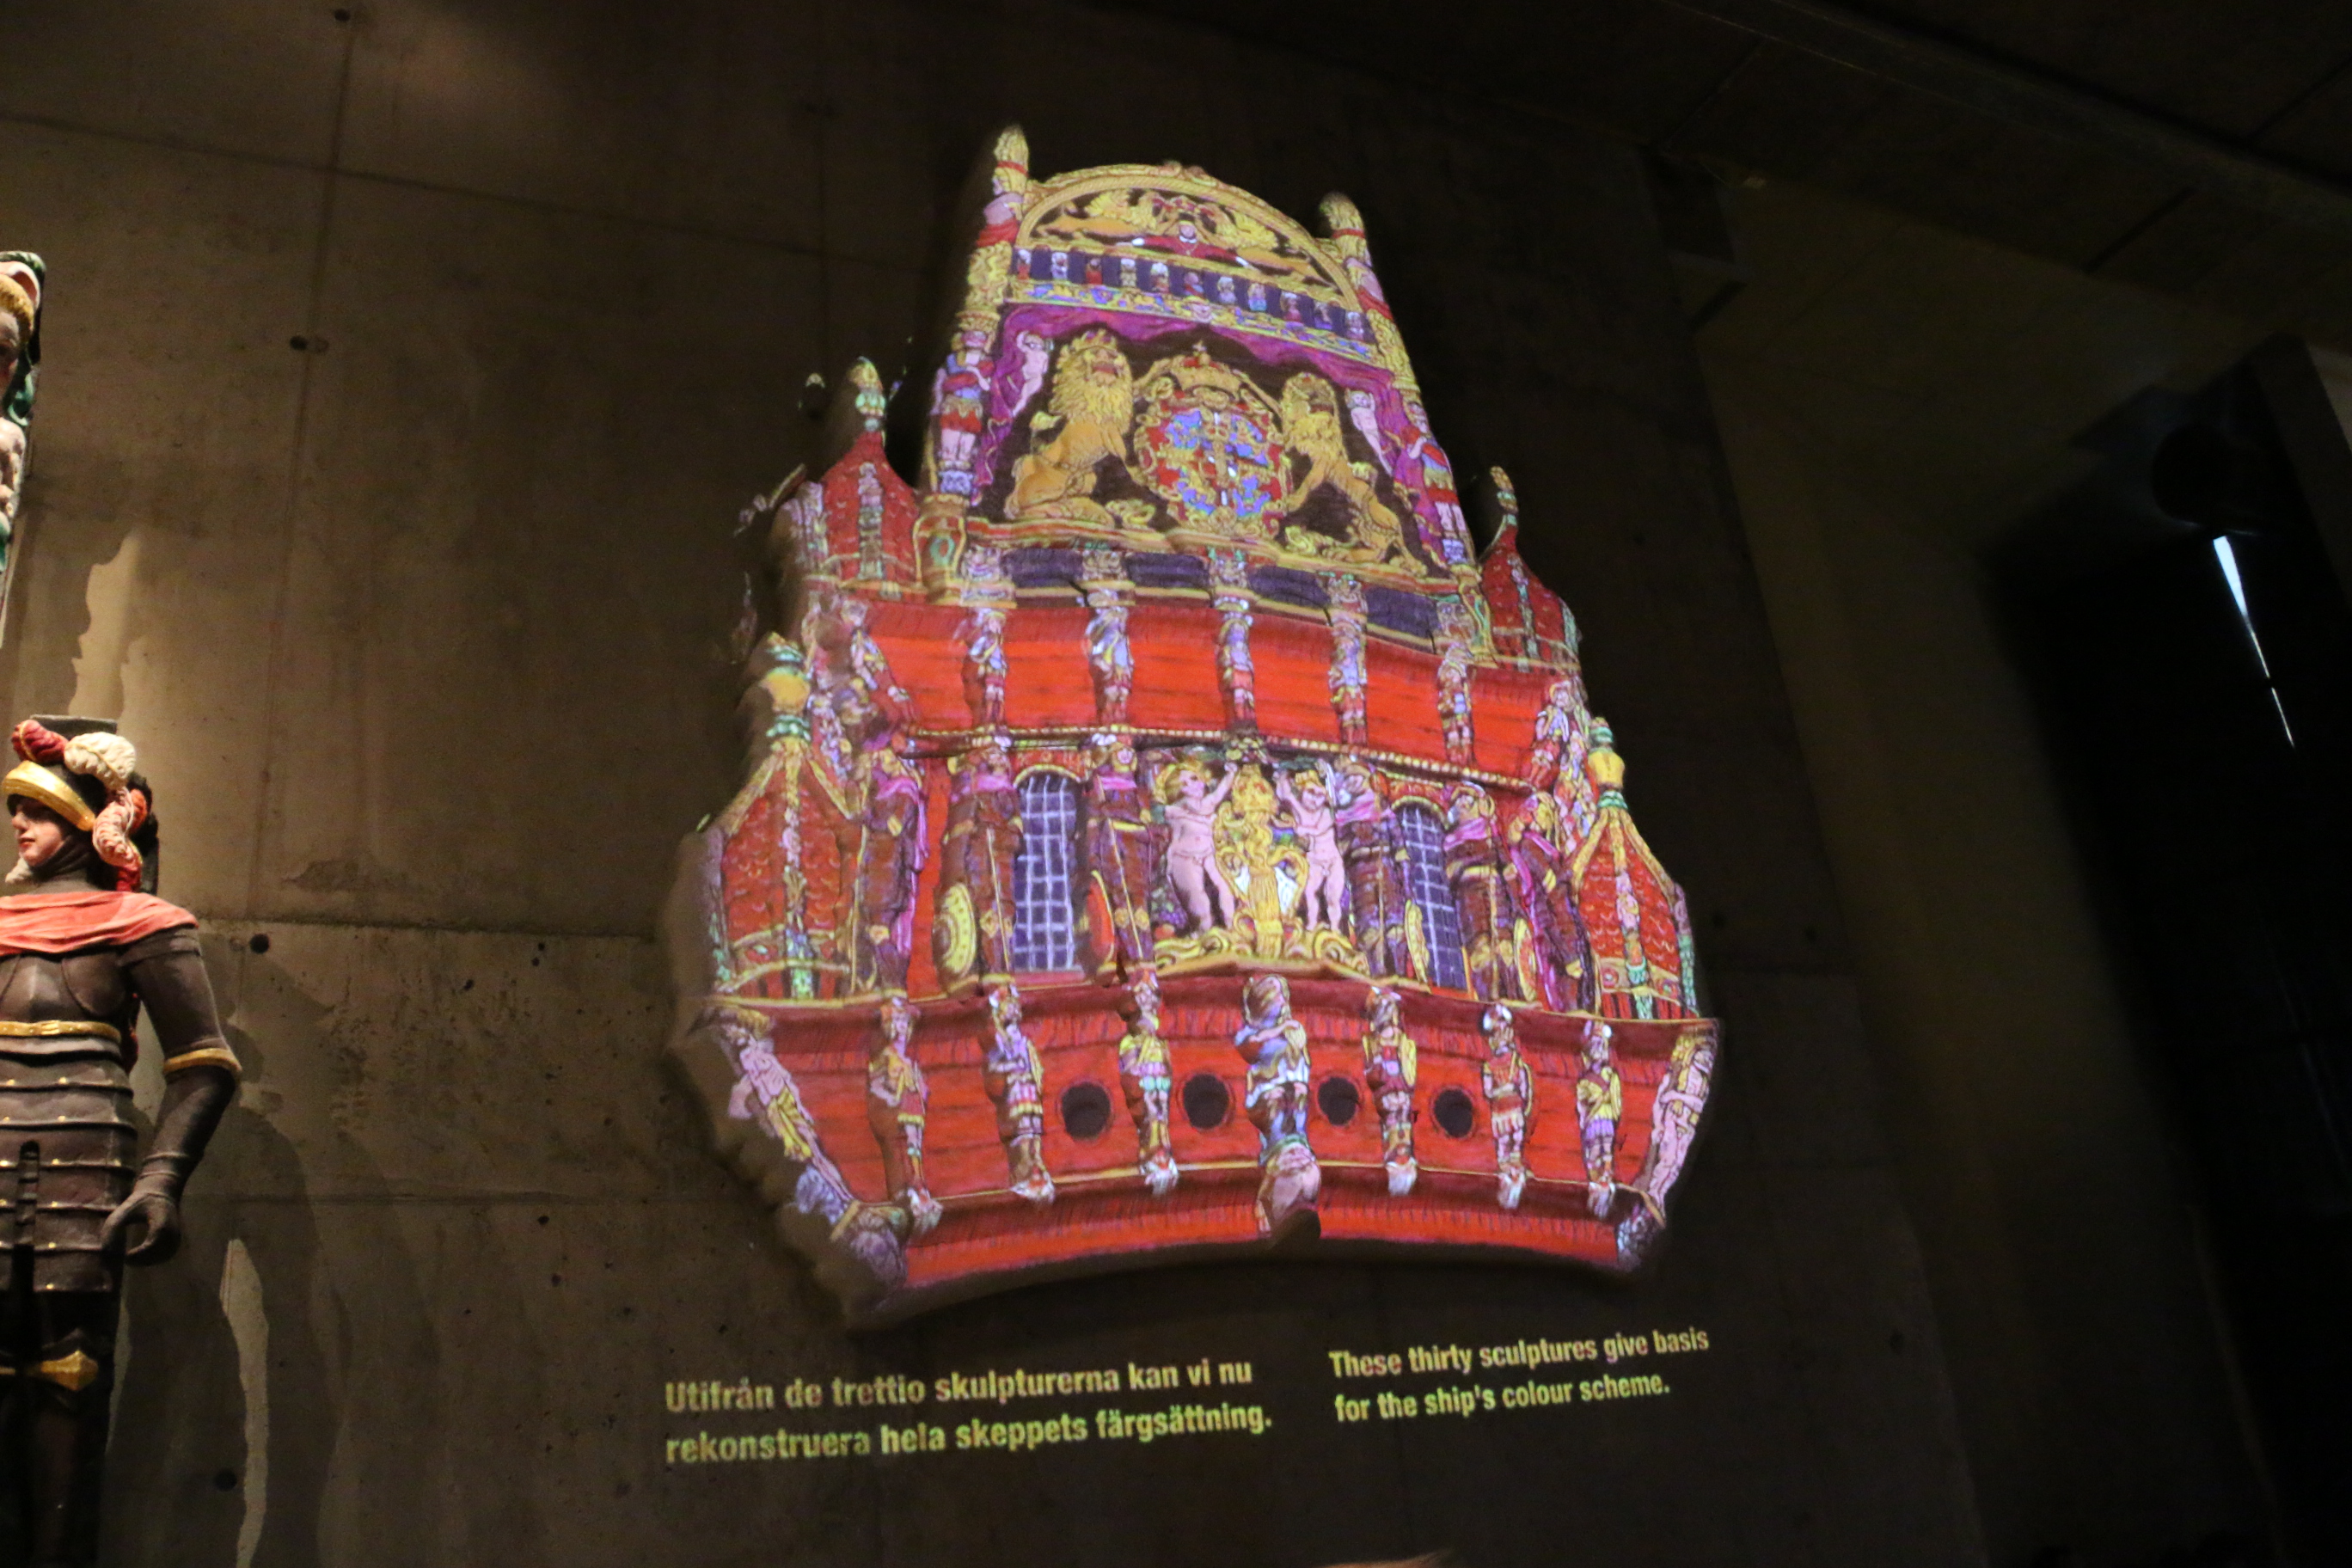
The ship sank on her maiden voyage — hadn’t even gotten out of the harbor — in 1628. She was found and brought up in 1963, in amazingly good condition. The sulfur content of the harbor water ended up decreasing the amount of oxygen in the water, and prevented degradation.
Museum technology has changed a lot since I was a kid. There is no one path for folks to follow. And the audio files that tell you about different sections of the exhibits are now downloadable in your language of choice. And unlike most museums, this one allows flash photography.
Analysis of the wreckage, as well as contemporary tales of the ship, made it clear that she was not only top-heavy (and did not have enough ballast), but all of the gun ports were open, so she capsized from water pouring in when she tipped.
Worldcon 75 – a trip to Helsinki, part 5
After the Masquerade, I was ready to sleep in! But we weren’t quite done yet.
We had a Masquerade Show & Tell scheduled for 2pm. The contestants all came and wore or brought their costumes from the night before. Several spoke about how they had made this or that piece. At least 2 had props that they were not taking back to the US, and offered them to the Finns.
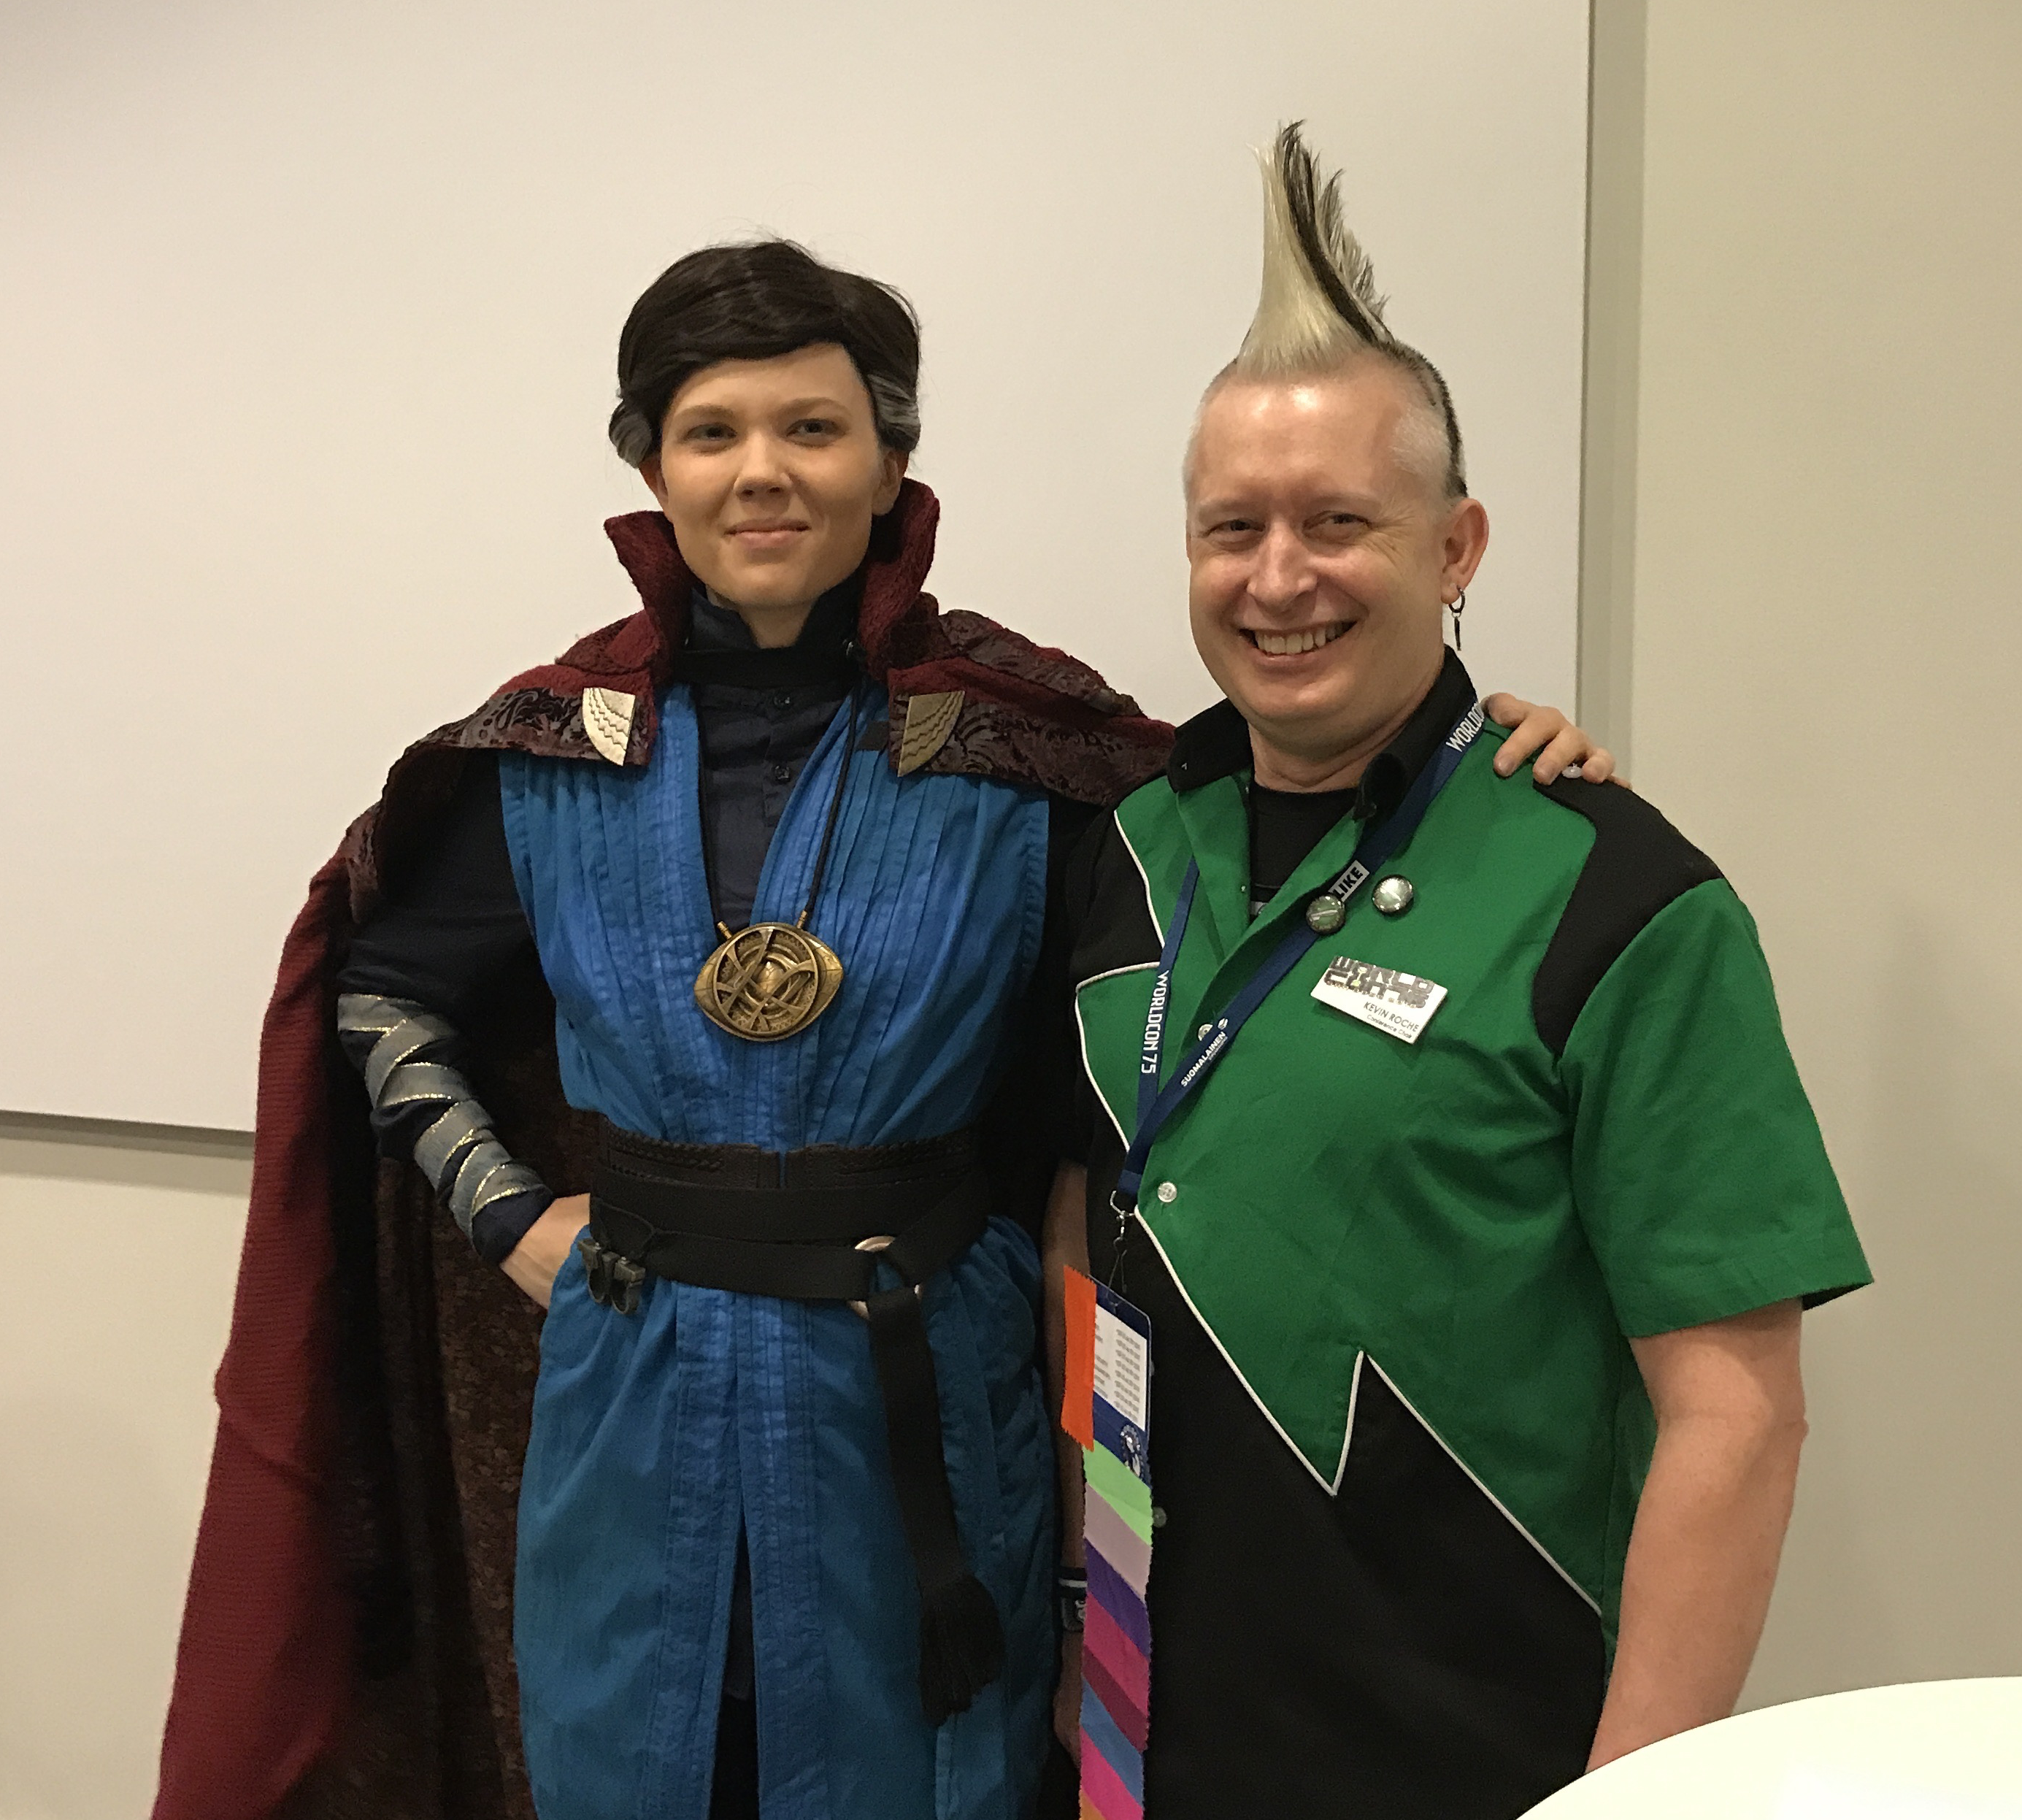 The winner of the Best Recreation costume, Kerttu Vähänen, was also awarded a membership to Worldcon 76, for her Doctor Strange costume. The Cloak of Levitation was totally hand-sewn, with 5 different fabrics. And she absolutely nailed the attitude both on stage and in the convention halls.
After that, we were off to Closing Ceremonies. Jukka noted that final registration was 10,516 Members (full week and day passes), and 7119 people on-site. This made us the second largest Worldcon ever (after Sasquan for 11,742 total members and Loncon 3 for 6,946 attending members). See the Long List for more details and history about Worldcons.
Kevin was handed the gavel as Jukka transferred things to Worldcon 76. We showed a short video about San Jose, done to a filk version of Do You Know The Way To San Jose, which had the crowd chuckling with the puns. It will eventually be available to the public, but not yet.
And then we had a chance to rest before repacking for our next stop: Stockholm.
Worldcon 75 – a trip to Helsinki, part 4 – The Masquerade
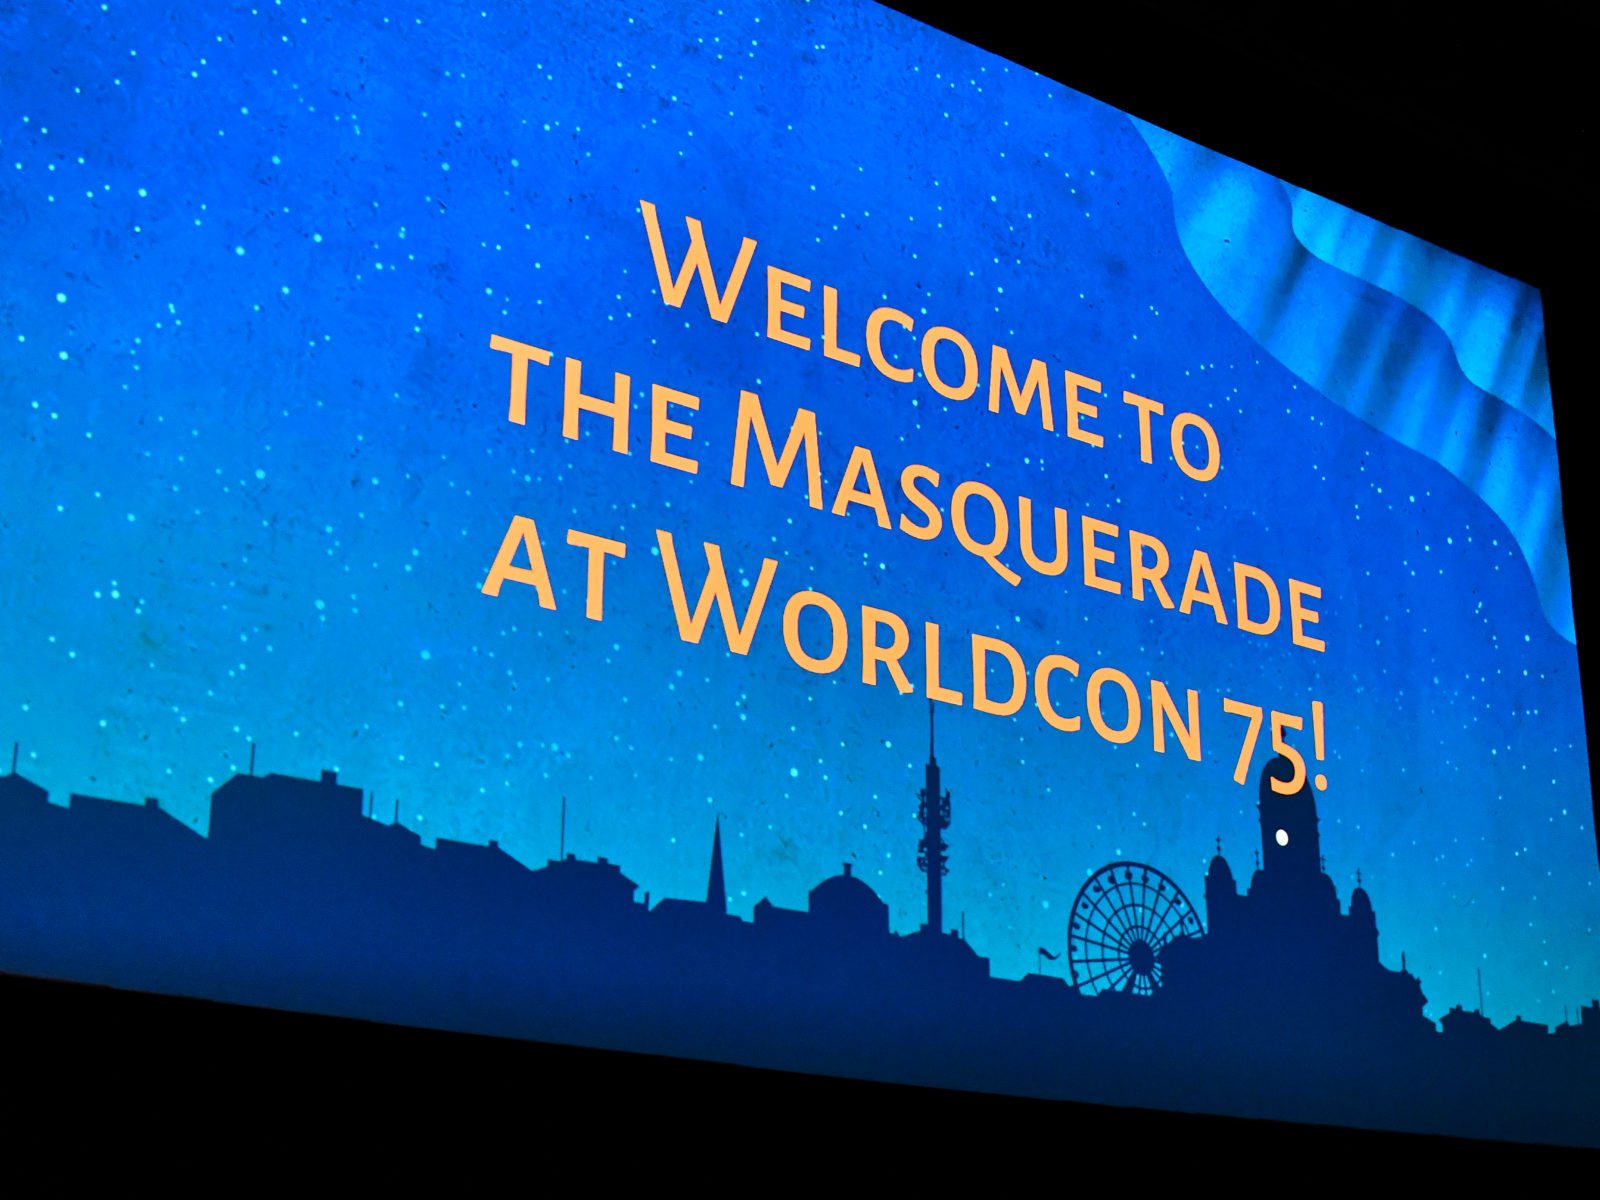
Here we are, the big event for me, the Worldcon Masquerade. I’ve been working towards this since before we got into town.
A Worldcon Masquerade is a major stage event, just like a play or musical. Except that we have one day to rehearse everything, make sure that the lights and audio are set, that everyone knows how to work on the stage, that the crew have all of their cues, for our one big night.

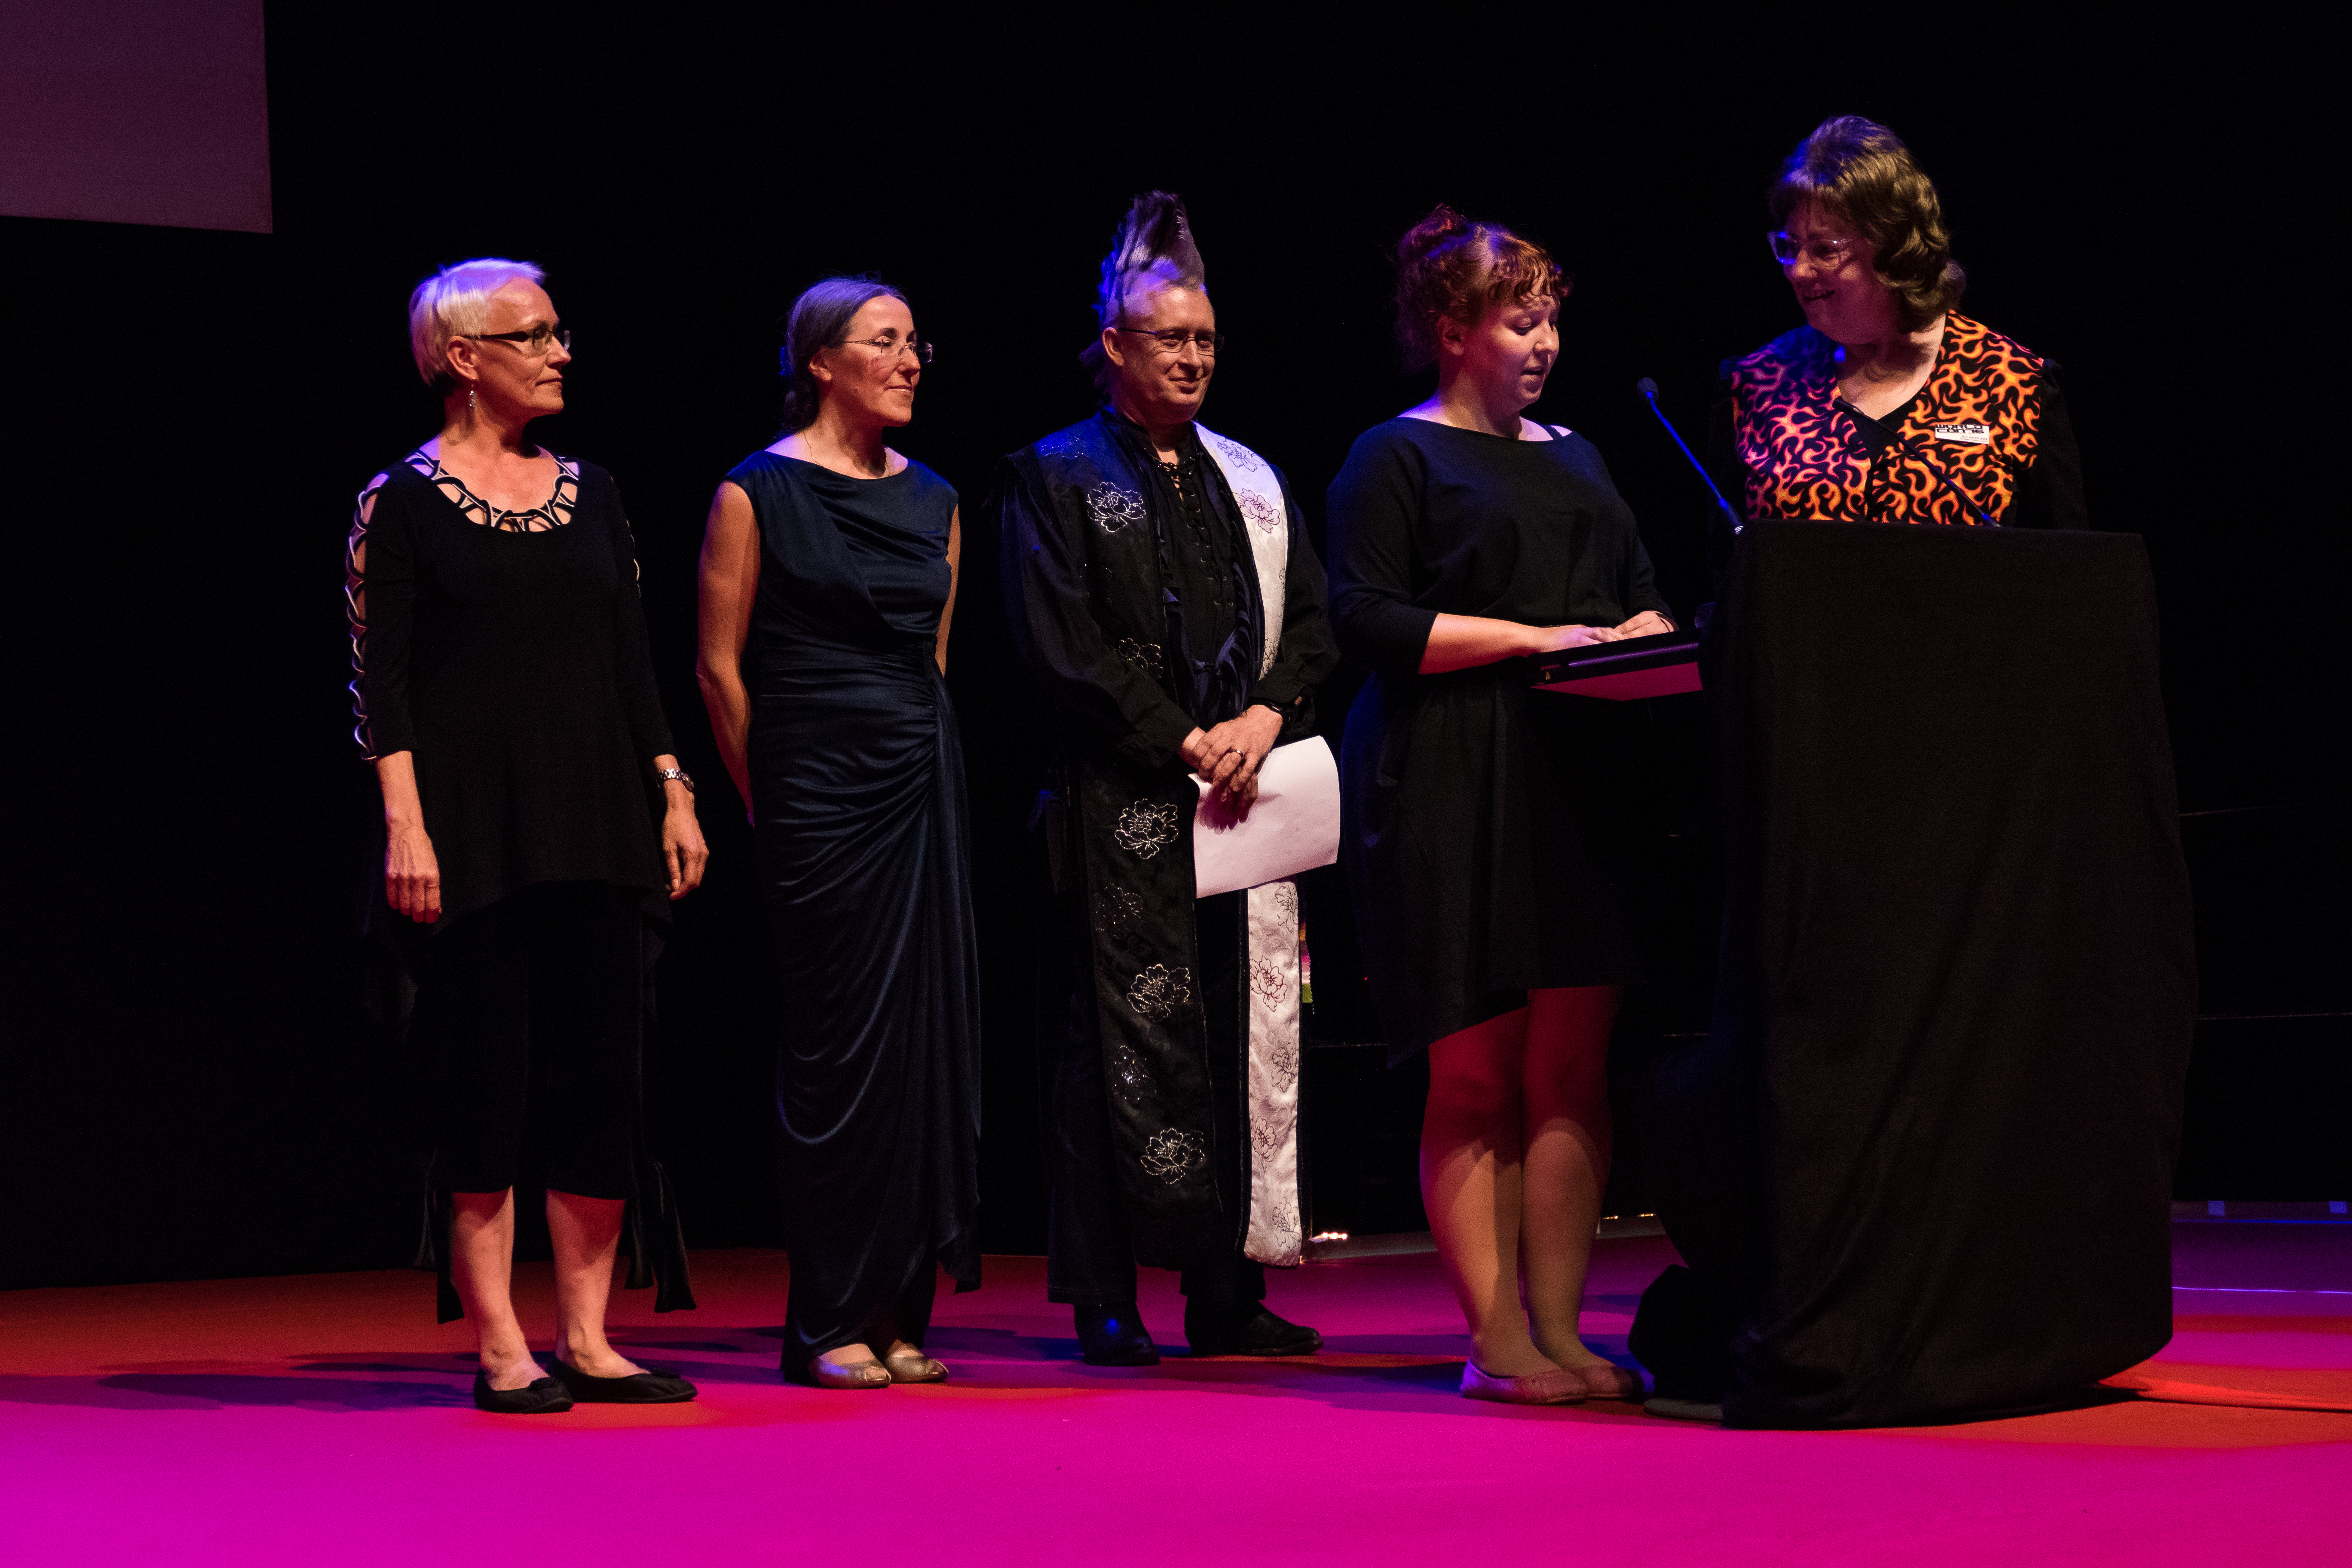
Chris Doyle (as Jyn Erso), Karen Lord, Debi Chowdhury
After my initial concerns about a small entry list, we ended up with 25 entries, most of whom were novices under the International Costumers Guild (ICG) rules. My Co-Director, Debi Chowdhury, convinced nearly everyone she saw wearing a costume to enter. We set the run order on Friday afternoon, trying to get a balanced mix of experienced and new, dramatic and humorous, etc. One of our two Young Fan entries withdrew, and the remaining Young Fan decided she wanted to participate as a Novice. Good choice, as you’ll see later.
The day starts with a 10am meeting for all of the participants. We go over the schedule for the day, walk through the stage and back stage areas, discuss missing audio files and other specific issues, and then break to start the tech rehearsal at 11am. Except that the tech crew didn’t think they needed to be there until noon. We hung around until we got someone who knew how to run the lights and audio board, but once we started, we moved along fairly quickly.
My biggest problem was differences in expectations. Many anime conventions expect a full skit/presentation — more like a variety show with song/dance/etc. A Worldcon Masquerade expects a 60 second or so presentation. The only person with a microphone is the Toastmistress. So folks need to record their script or provide it to the Toastmistress. I ended up as Karen Lord’s surrogate as she was scheduled for several panels during the day. Using my best stage voice, I introduced folks, read (and edited) scripts, made sure that everyone had some sort of audio to play in the background if they didn’t already have something, and helped them figure out their staging. My absolutely invaluable helper was Lori Meltzer, who is an experienced Masquerade stage hand. She coached participants on movement and attitude on stage and explained how we would help cue them during the actual event.
We planned to open the auditorium at 7pm, and start just after 7:30pm. I got the Press Room to print out the revised script at about 6:30pm. And then realized that I hadn’t print out the intro for Karen Lord. Husband to the rescue — I e-mailed the file to the Press Room and got Stephen to pick it up for me. And then when he walked in to give it to me, I grabbed him to become the “Voice of God” — the person behind the curtain who does opening announcements — because all of the Finns felt they had too much accent.
 Our judges included a mix of US, British and Finnish costumers. Both workmanship and presentation judges complained that they had too many good costumes and costumers to pick from. But in the end, they were able to make their awards. Best in Show Workmanship went to Leena Peippo as Dwalin the Dwarf. And Best in Show Presentation went to Olivia Flockhart (the Young Fan who switched to Novice) as When Halley Came to Jackson in 1910 (Halley’s Comet).
We handed out a total of 20 awards. The full list along with links to lots more photos is here on the Worldcon 75 website.
Worldcon 75 – a trip to Helsinki, part 3 — The Hugos
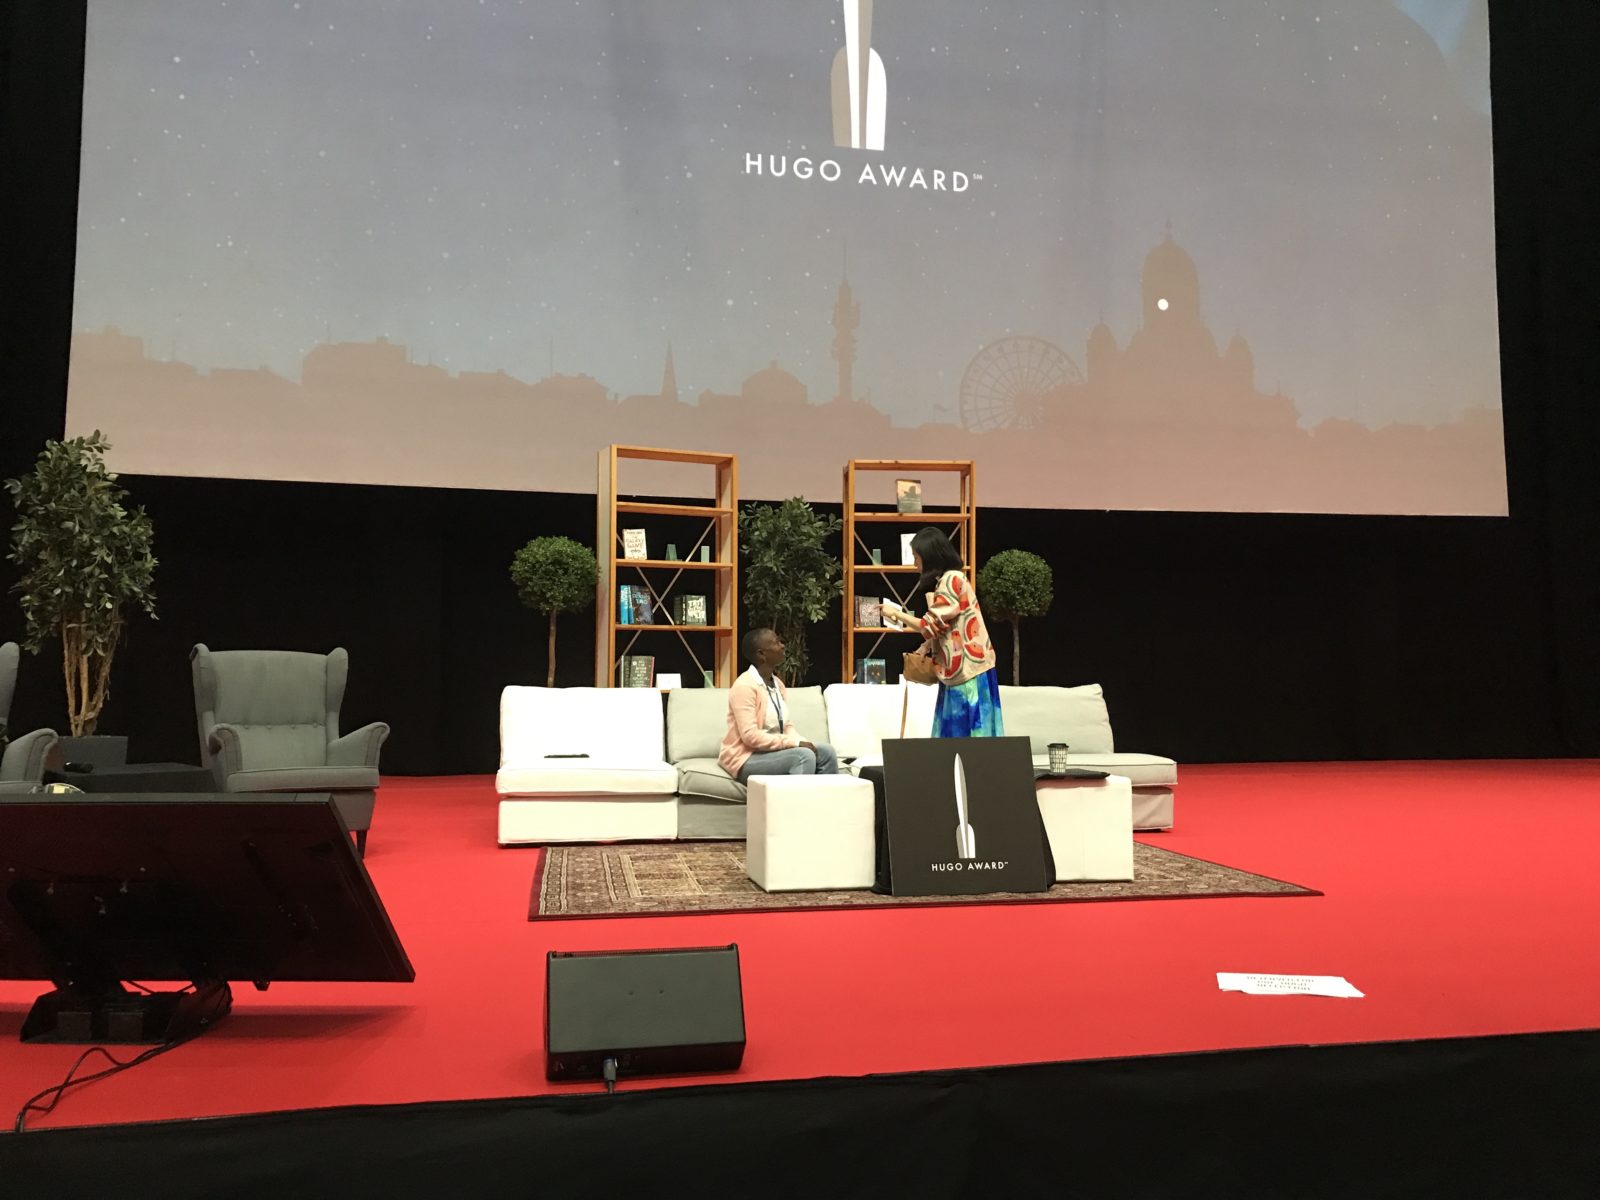
The Hugo Awards are one of the main events at a Worldcon. They have been given out annually since 1955, and are one of the primary purposes of the World Science Fiction Society (WSFS). Retro-Hugos may be awarded on the 50th/75th/100th anniversary if none were originally given that year. There were no Retro-Hugos in Helsinki.
 This year, our friend Chuck Serface (aka “Two Buck Chuck”), was one of the finalists for Journey Planet, a fanzine he co-edited along with 6 other friends, including Christopher J. Garcia. Chuck asked Stephen to be his designated acceptor, should they win. This meant that we were invited to the Pre-Hugo reception. We had an opportunity to talk with folks we knew, and folks we had just met. We had a nice chat with Ada Palmer, who subsequently won the Campbell Award. I was also talking to folks about Worldcon 76 next year, since I’m running the Program.
We ended up seated in front of Amal El-Mohtar (who won for her short story, see the post here), and Michi Trota and Julia Rios (who won along with co-editors Lynne M. Thomas and Michael Damian Thomas for Uncanny Magazine). It was loud behind us. But great fun.
We were also invited to the post-ceremony Loser’s Party. Winners may attend, but will be mocked and made to wear silly hats. Worldcon 76 co-hosted with George RR Martin at a local place Steam Hellsinki. Great decorations, great food & drinks, great company. Unfortunately, I had an early day with the Masquerade on Saturday, so we didn’t stay that late.
Worldcon 75 – a trip to Helsinki, part 2
Remember that advertisement about Worldcon? Our expectations had been for a convention of 3500-4000. In the last week, though, memberships surged. The crowds on Wednesday were so bad that many members couldn’t get in to see the panels and presentations. The hallways were full of folks trying to get to the events.
It got to the point where the convention Chairs made the decision to close membership and limit the number of day passes. See the post here. It generated a lot of discussion on-line, but generally folks were positive about the way it was handled. The worst of the crowds died down around the Info Desk and Registration Desk, but the panel and presentation rooms were still packed. The Ops staff ended up posting a sign on each door once the room was filled, so that folks wouldn’t keep trying to get in.
Our Outreach/Press Relations Area Head was actually a local news agency reporter, so had pre-existing connections into all of the Helsinki area outlets. Here’s a permalink to her writeup in the JOF list on Facebook. My suspicion is that her excellent PR skills lead to the tremendous local interest and the surge of attendees.
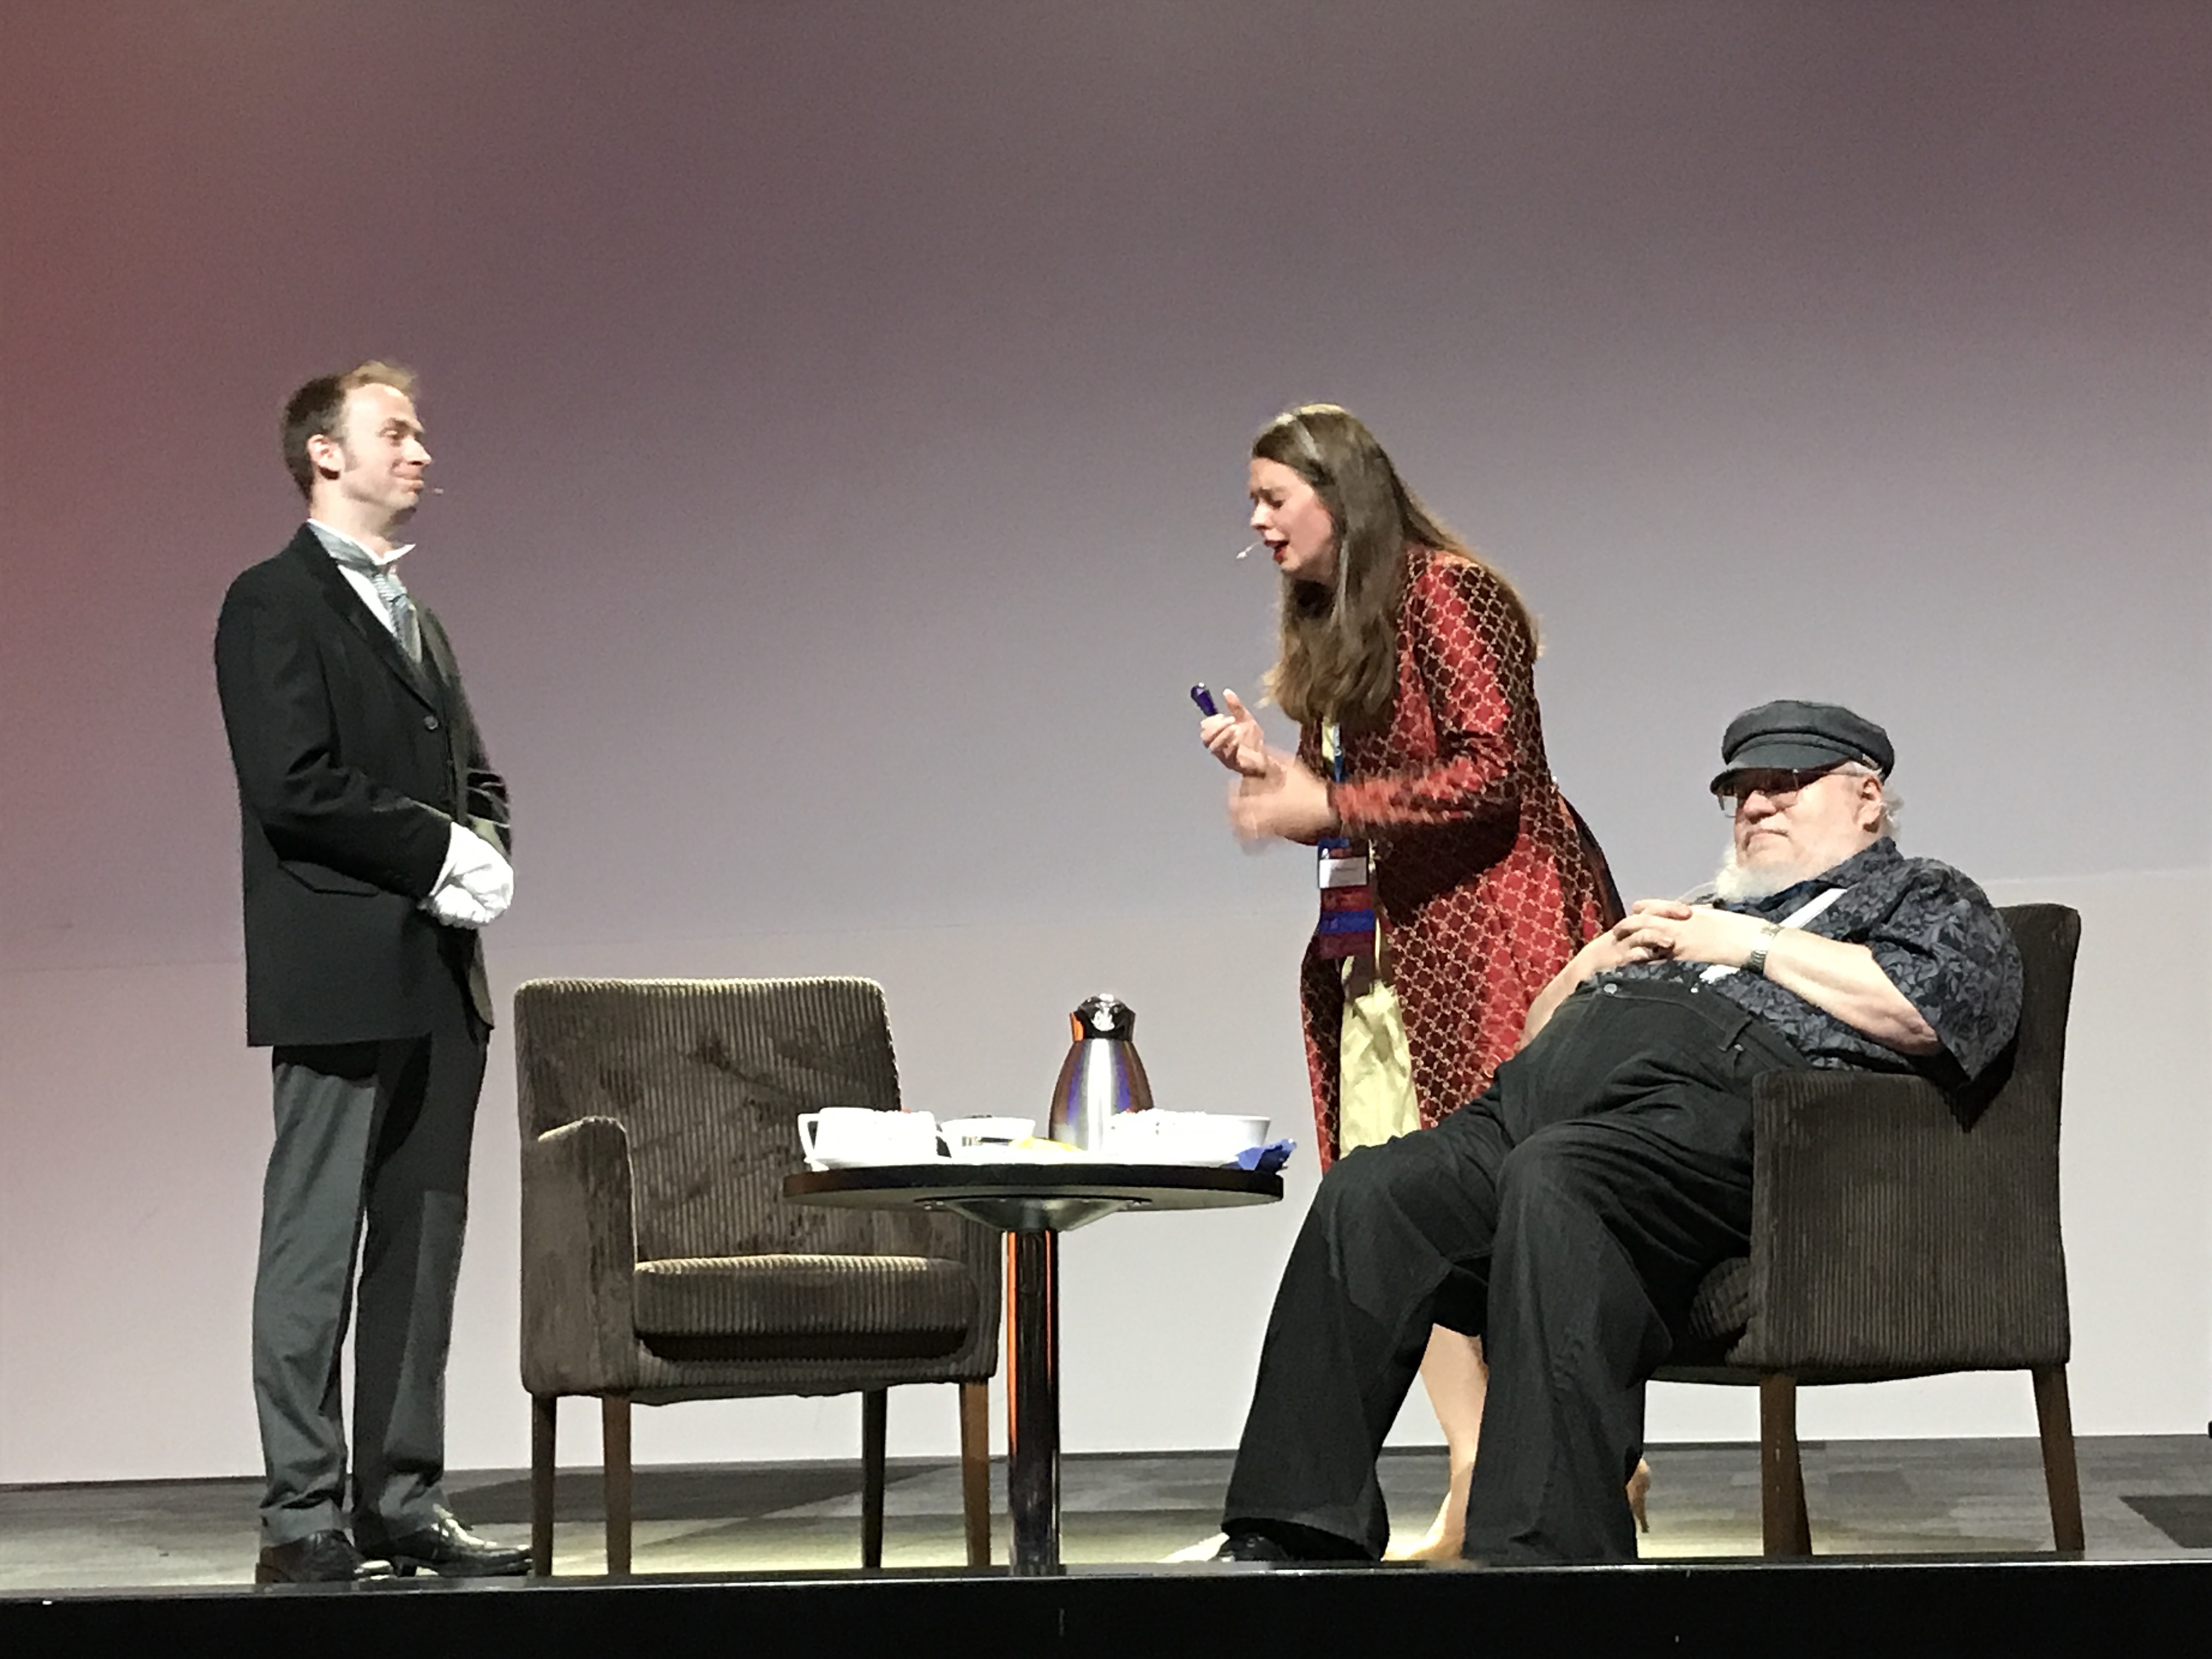 As I was busy with Masquerade prep, and in the midst of the crowding, I only got to see one event on Wednesday, but it was absolutely fabulous. Tea and Jeopardy (Emma Newman and her husband Peter) did a live podcast recording with author George R.R. Martin. Guests on the podcast get “a nice cup of tea, a cheeky bit of cake, and a spot of mild peril” as they visit the tea lair. In this instance, after a delightful chat, GRRM drank the potion guaranteed to produce nightmares and the audience had to do their best death howls to wake him up. Both Emma and Peter have pieces in the new Wild Cards book (which he is still editing). And Emma avoided mentioning Game of Thrones completely.
As Debi Chowdhury and I were manning the Masquerade Sign-Up table, we kept seeing folks in some great costumes. Debi was working the crowd and convinced many of them that they should enter the Masquerade. My concerns about a small and short event became less and less as Wednesday became Thursday.
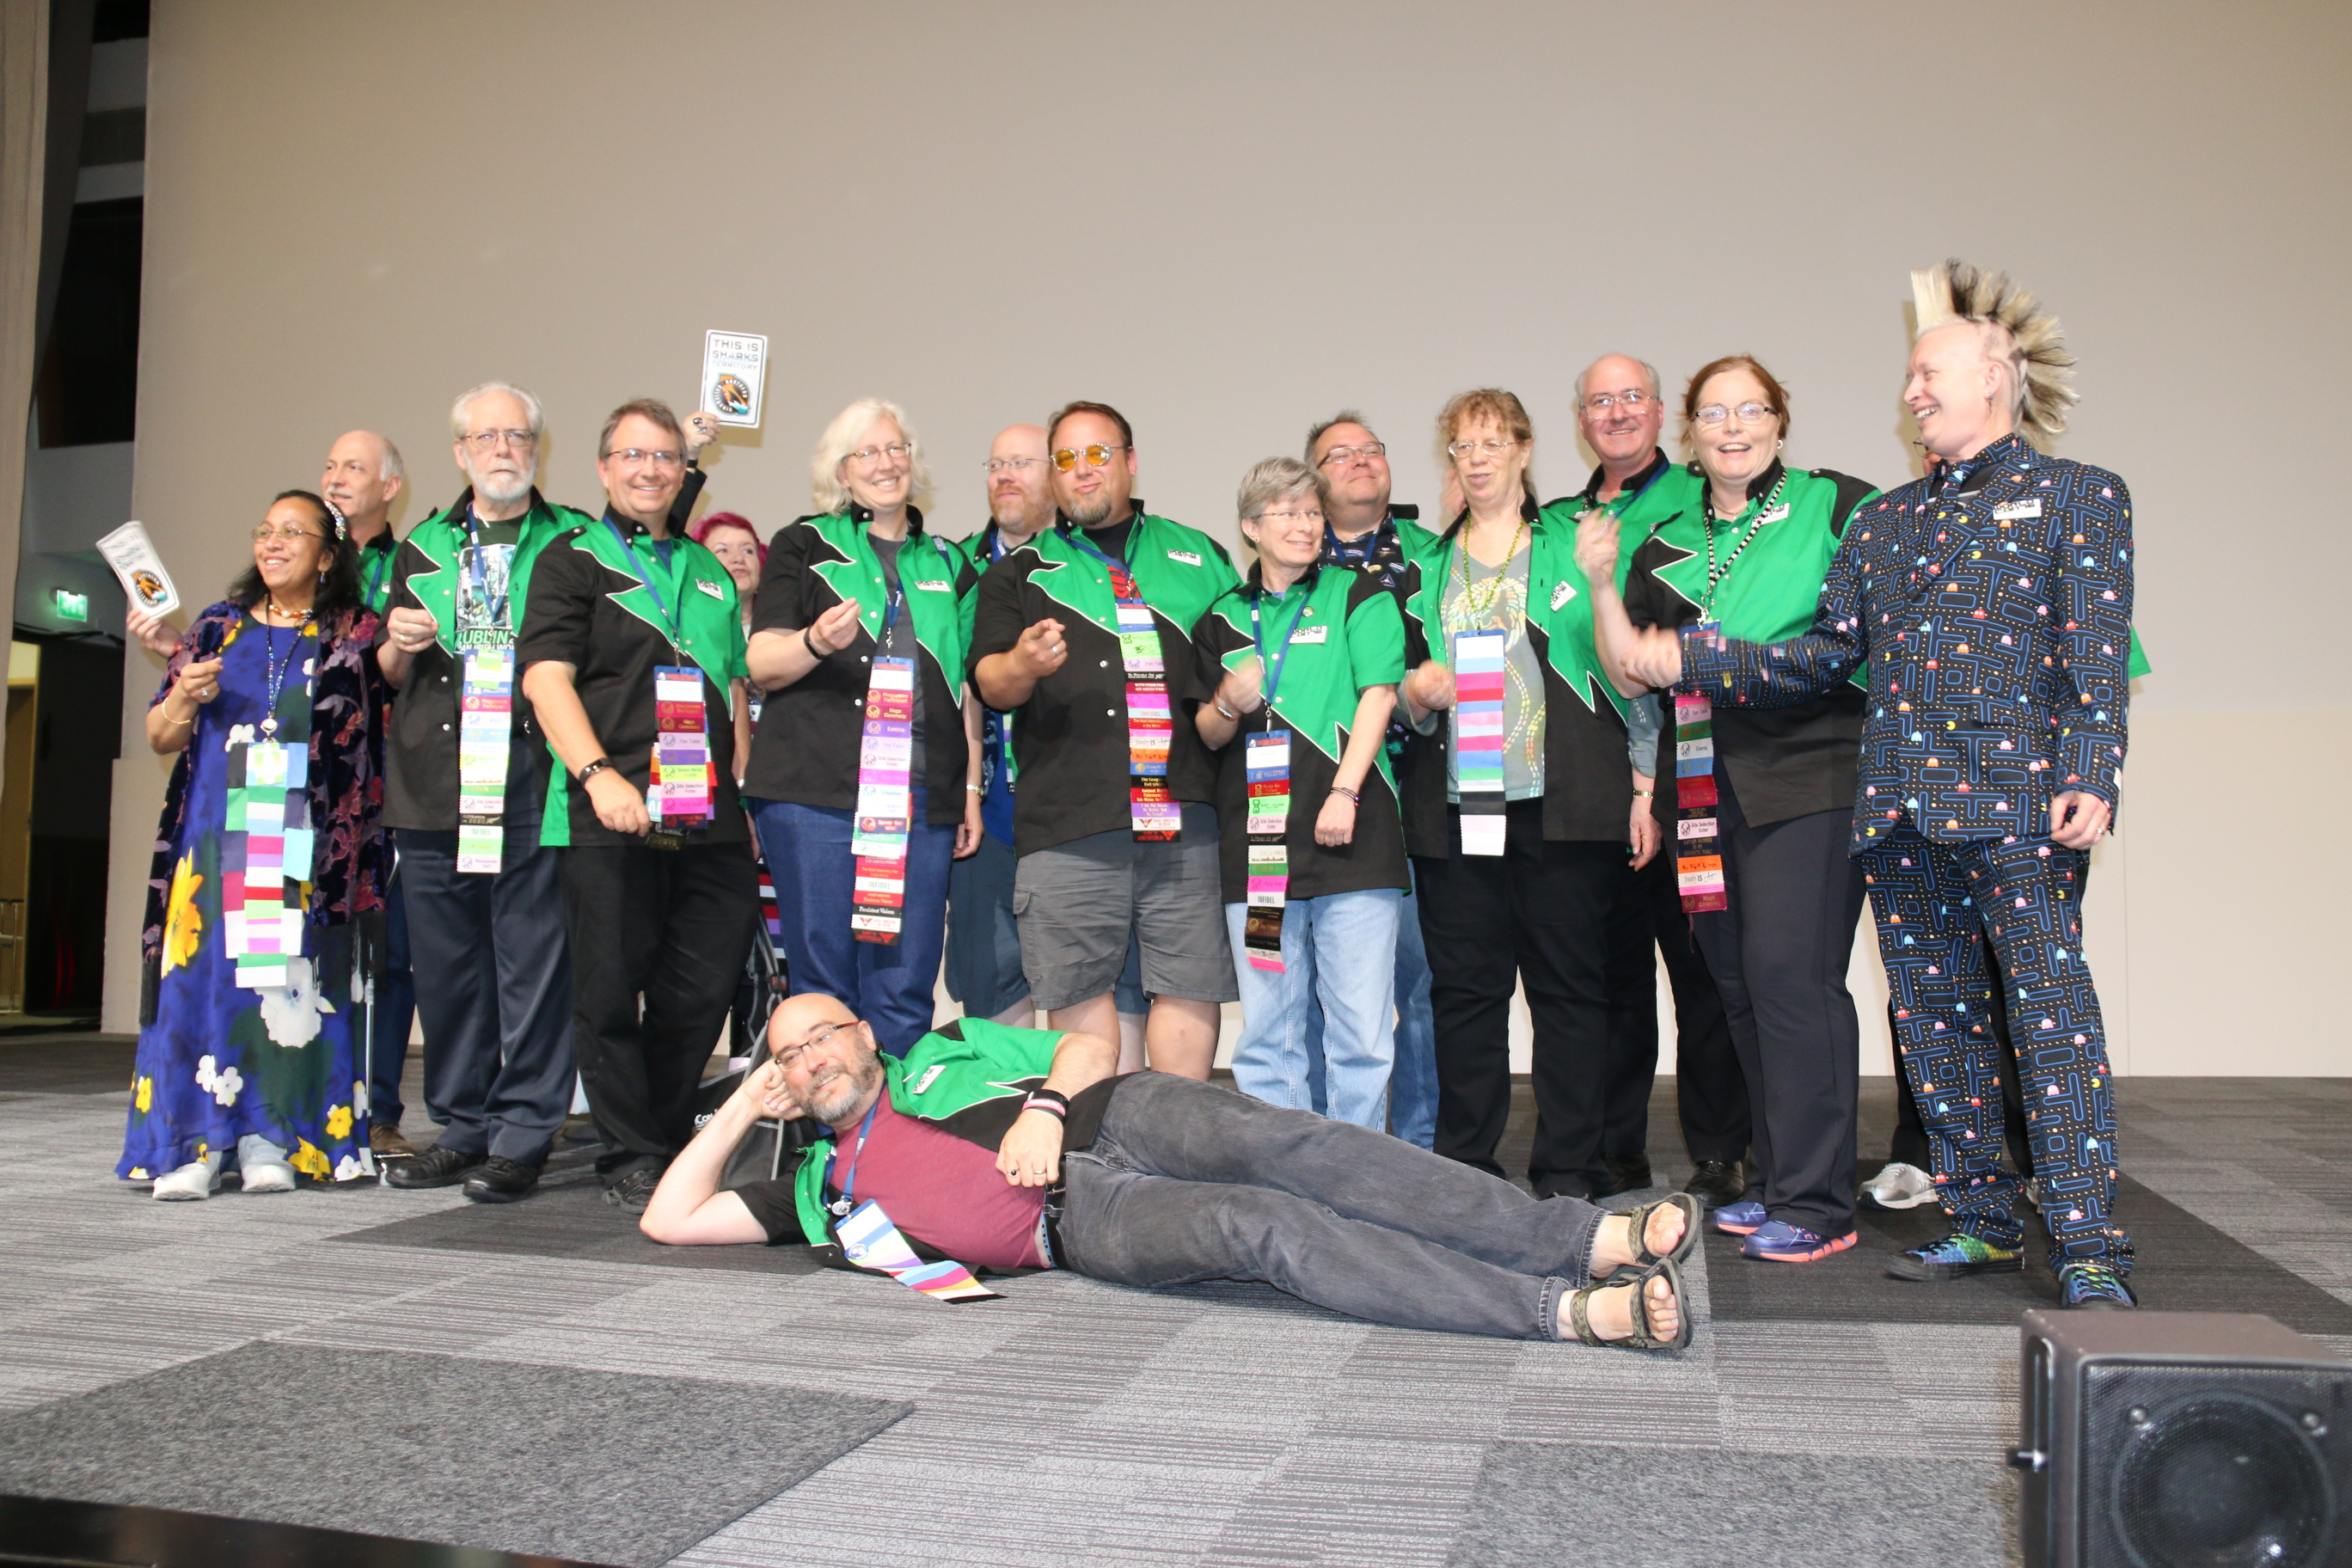
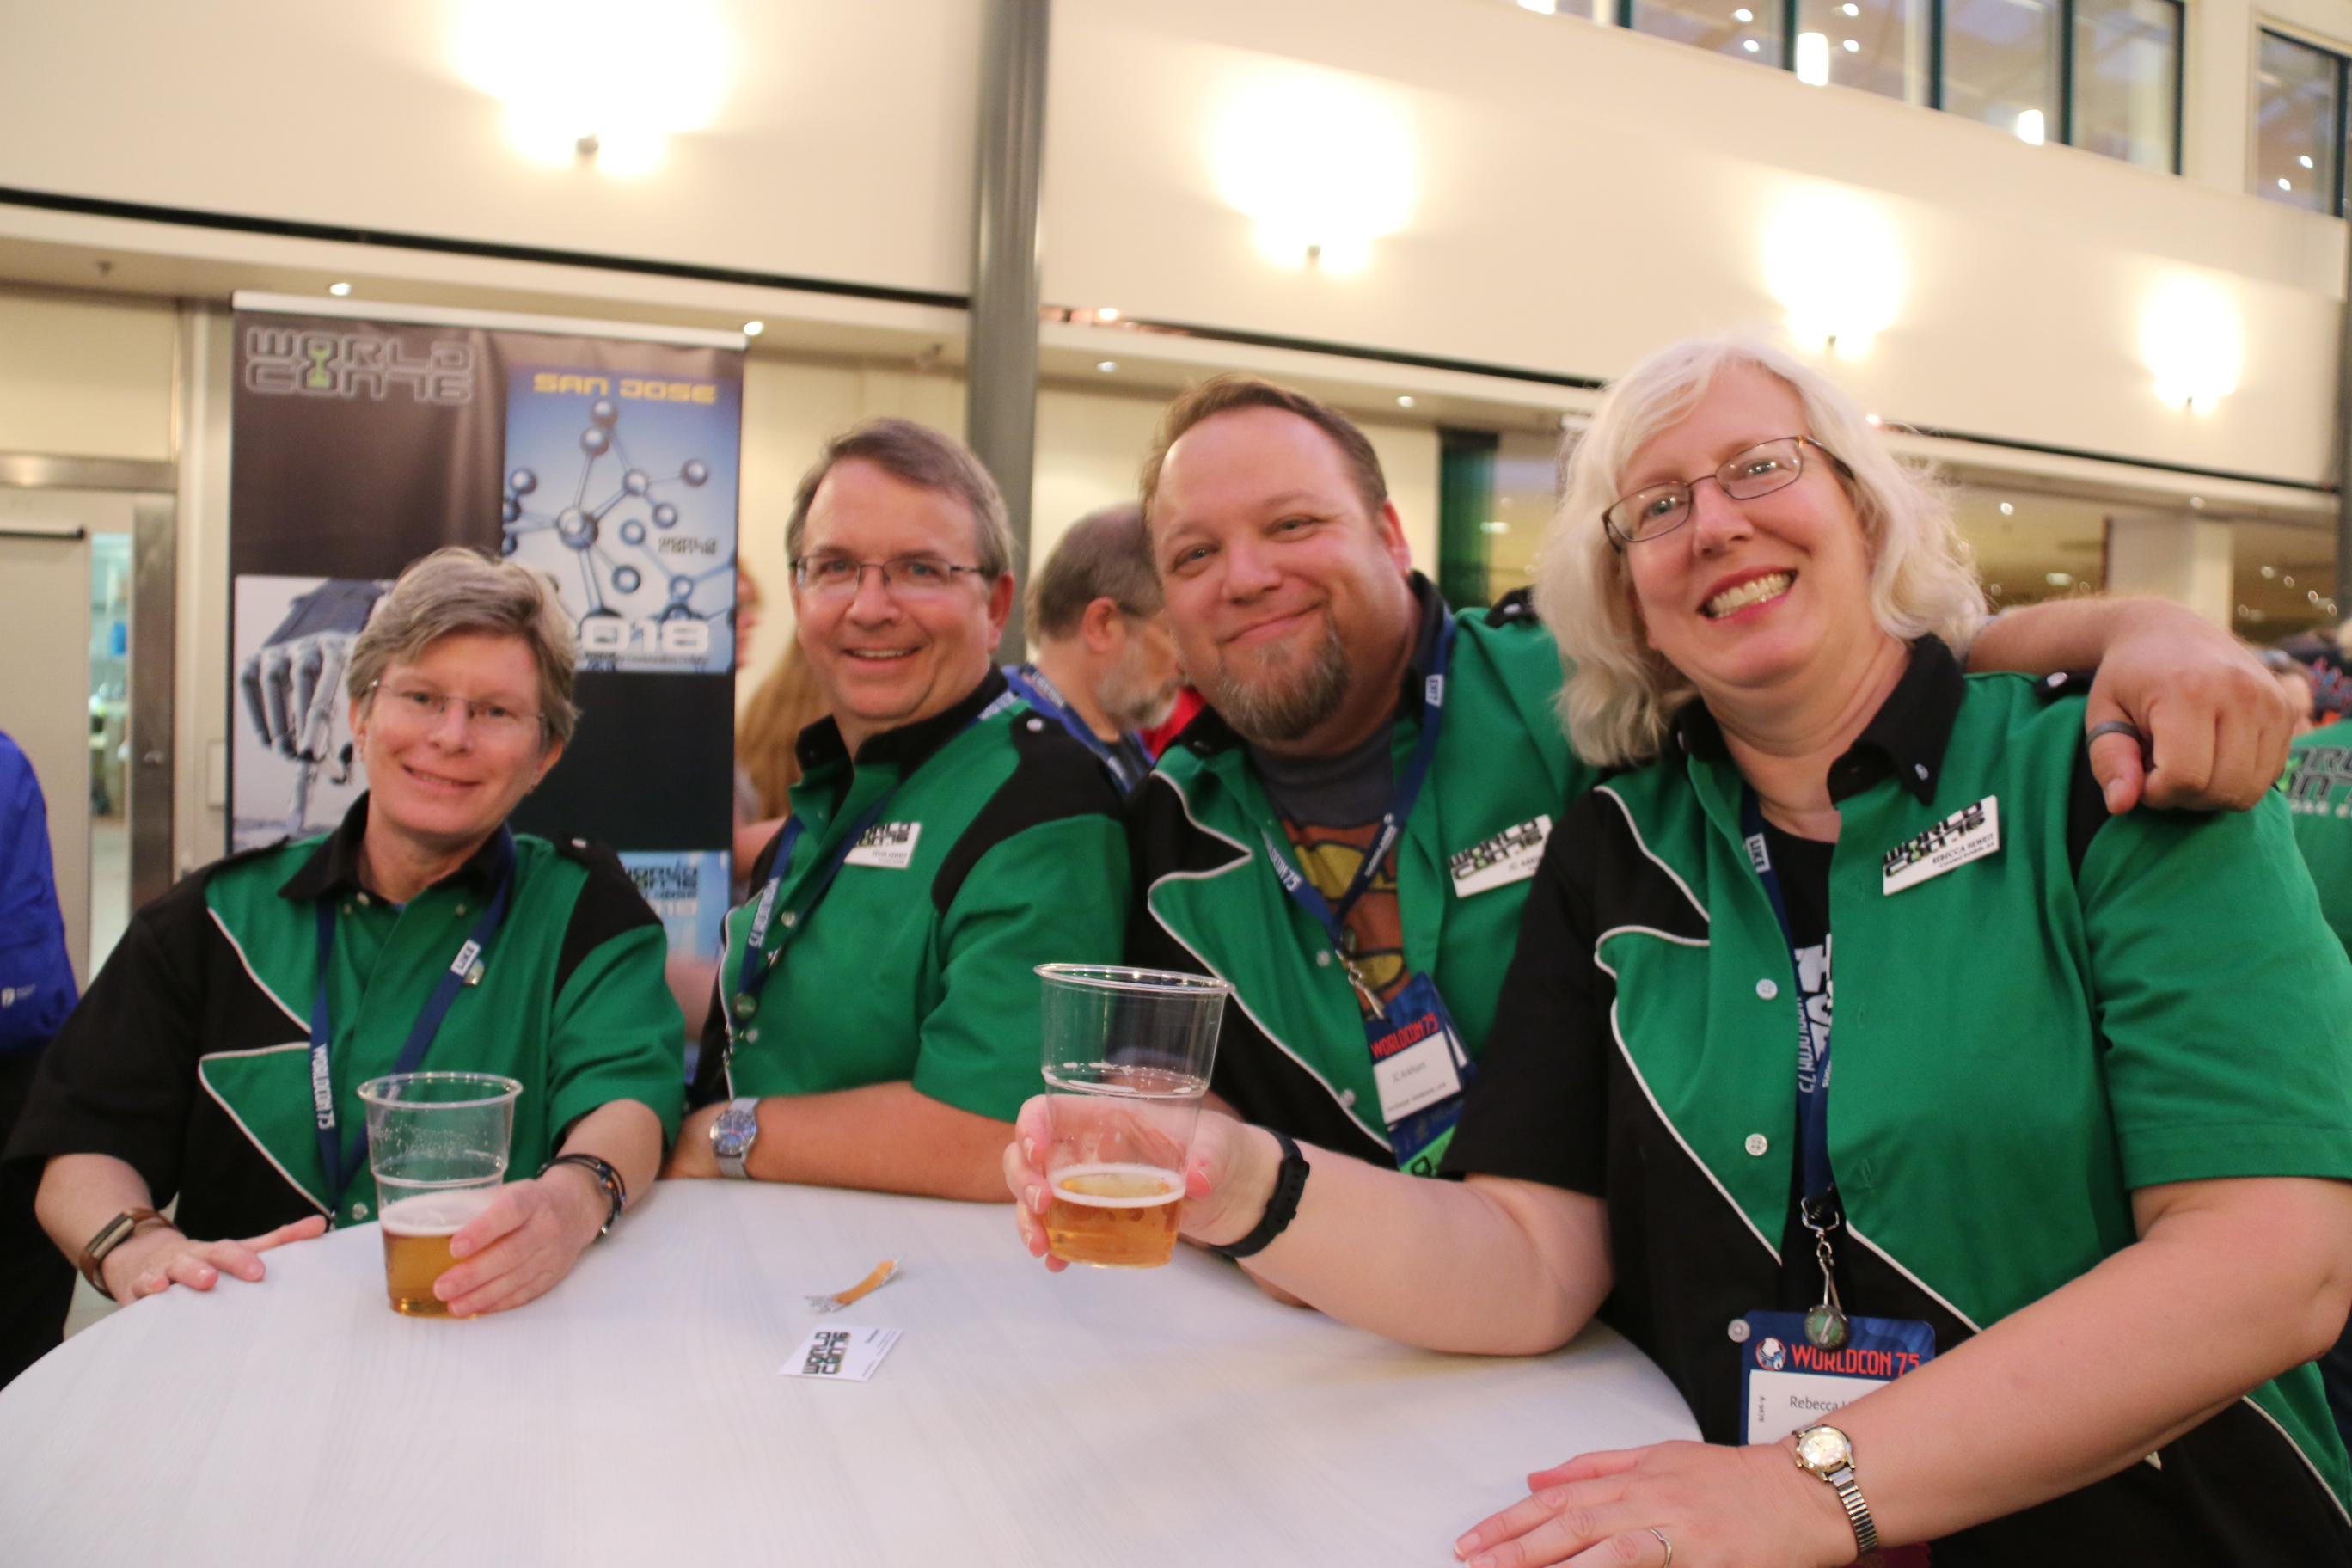 Worldcon 76 had a fan table and a display in the Exhibits hall. We had several new pop-up banners, which we ordered from a printer in Estonia. They did a great job and cost us about half what the same thing would have cost if printed in the US and shipped to Helsinki. Kevin Roche, the Worldcon 76 chair, gave a great presentation at The Fannish Inquisition on Thursday afternoon. He announced our two additional Guests of Honor, John Picacio (artist) and Frank Hayes (musician). The Worldcon 76 crew also sponsored a party, along with several other potential future Worldcon sites, on Thursday evening. We received pass-through funds from MidAmeriCon II and celebrated Andy’s birthday with cake. And people started to see the green shirts we were all wearing during the week.
Worldcon 75 — a trip to Helsinki, part 1
While we were in Kansas City last year, for MidAmeriCon II (Worldcon 74), I was asked if I could help run the Masquerade. I said sure, and figured it would be a good opportunity to visit Scandinavia. Stephen had been before, but I’d never been to that part of the world.
We researched flights, looked at the various hotels that had rooms associated with the convention, talked with our friends, and then made a plan. The plan took us from San Jose to Helsinki to Stockholm to Chicago and then back home.
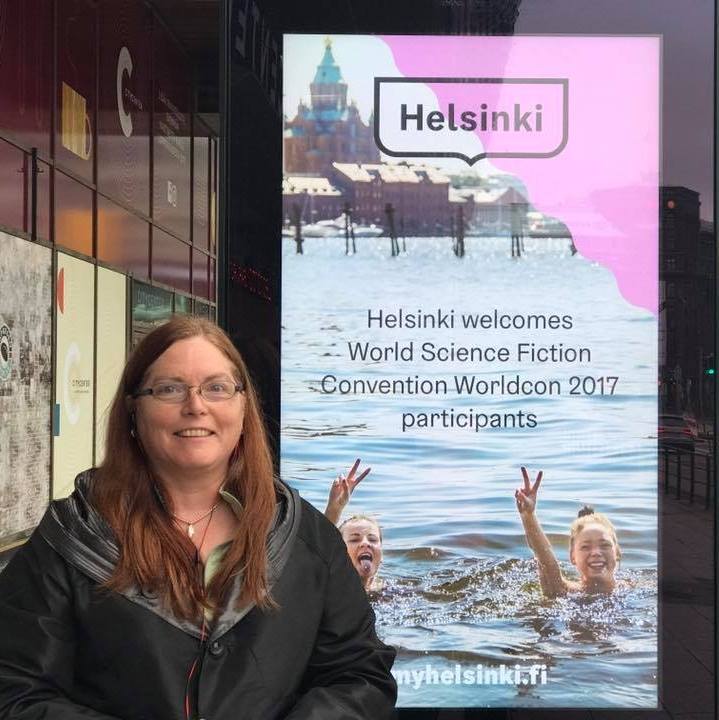
 We arrived at Helsinki’s Vantaa Airport about 3pm EEST (5am Pacific), jet lagged and dehydrated. We caught a cab at the airport, and were extremely impressed with the efficiency of the process. Well placed signage, in multiple languages, and plenty of TaksiHelsinki vehicles to get us to our hotel, the Original Sokos Hotel Vaakuna. The hotel was built for the 1952 Winter Olympics. It’s been well kept over the years, and I would say it’s more of a European business hotel than a tourist hotel. That said, we were warmly welcomed and felt quite comfortable there. They had plenty of power outlets for our converters, and we had a balcony room, which was a wonderful way to help us conquer jet lag. So was the sauna, which is an expected feature for Helsinki hotels.
Monday we decided to do a walking tour of sorts, and play Ingress. The mission set “Explore Helsinki” started right outside our hotel and took us around the downtown area. We took our time to see the sights along the way, stopped in for coffee at one place, lunch at another. We saw an advertisement for Worldcon in front of the tram stop (more about that later). Tuesday we went to visit GE’s Helsinki office and meet some of the folks behind our operating room monitors and anesthesia machines. And learned about the efficient and inexpensive public transportation system, as we took a bus and tram to get to/from the hotel.
Wednesday was the first day of Worldcon75. I was there early, to meet with a couple of folks about tech, and generally help out. The Masquerade Sign Up desk was part of the Info Desk, so I was extra staff for them. We were not prepared for the deluge of people who bought memberships, most of whom were attending their first worldcon. Despite best-laid plans, our signs couldn’t be seen easily, and line management was a challenge. One lady who was asking about the schedule was visiting from Colorado and was there just for the day — she had been traveling to Helsinki for a completely different reason, heard about the convention from someone on the plane and decided to drop in!
Mounting grab bars
Mom decided that she wanted a grab bar on the two-step transition from the front hall to the back hall/laundry room, and another one at the bottom of the main staircase. (Wow! she’s letting me change her house!)
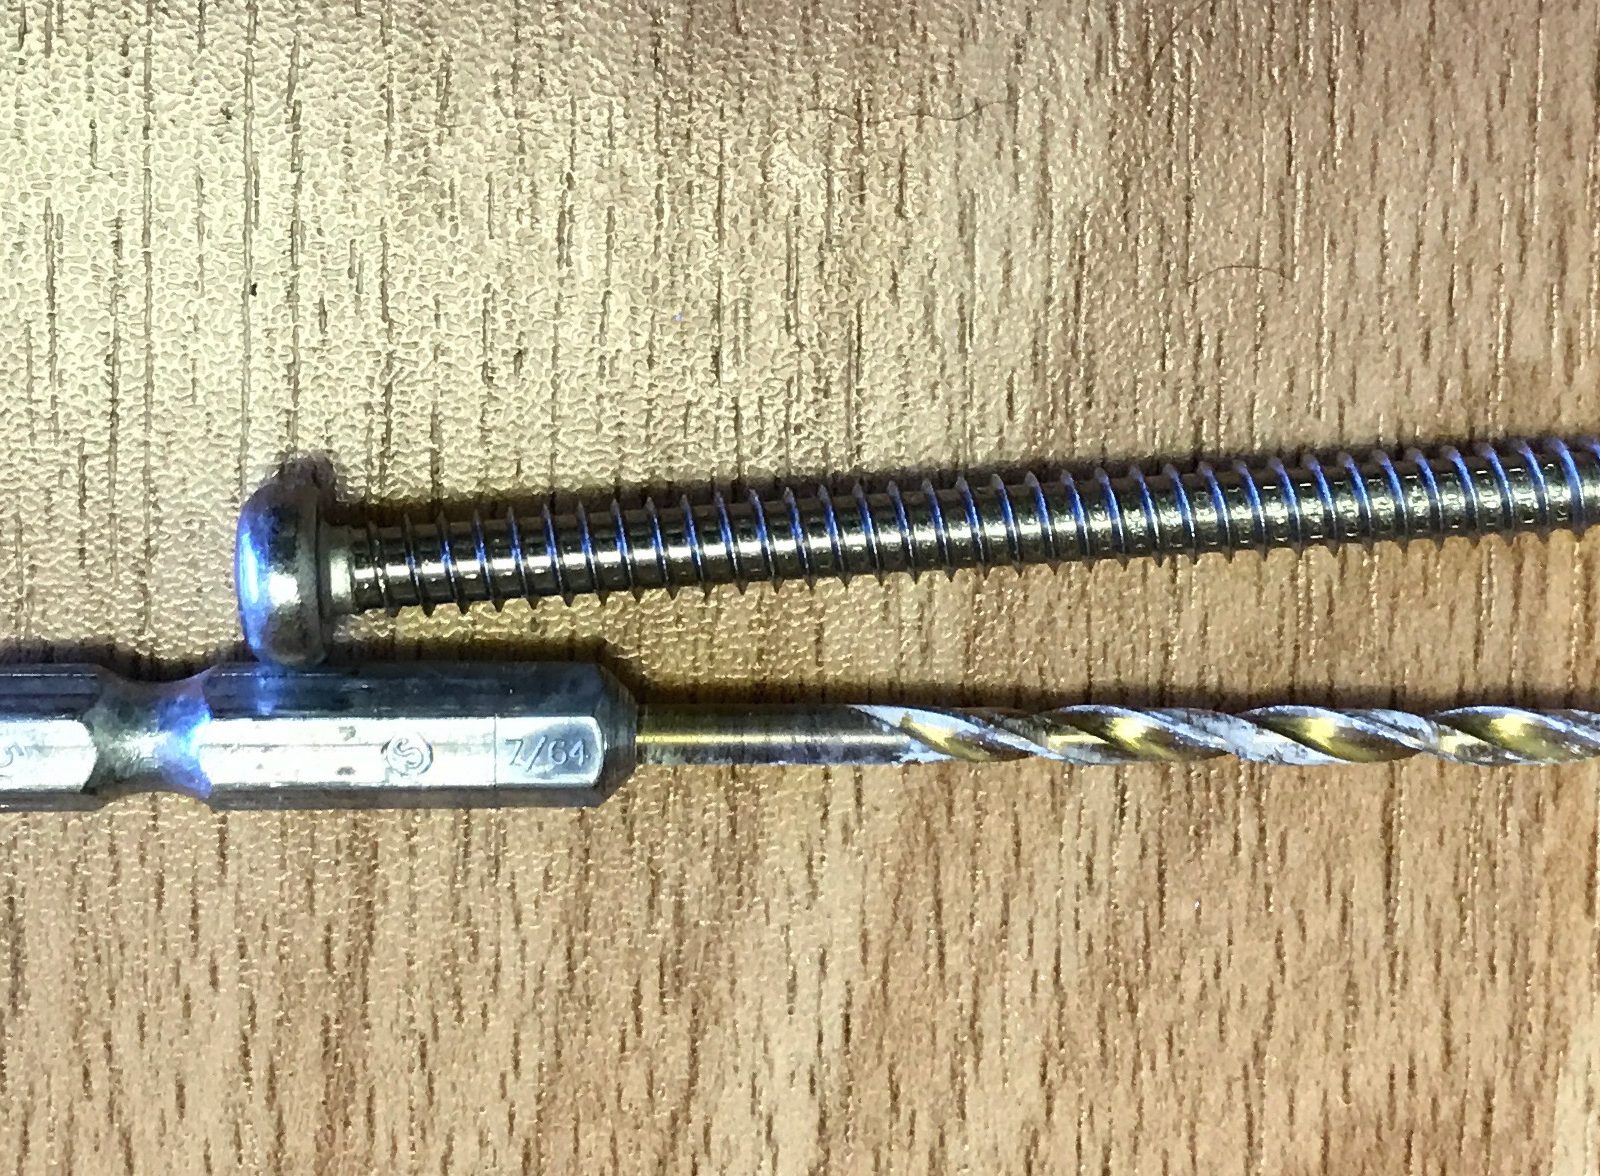
After shopping a bit, it looked as if nearly everything was going to be by one of the major faucet/plumbing manufacturers. Delta had a couple of different styles and colors that she was willing to let me get. We got one like this – concealed mount, stainless, fairly basic.
 Installation is a pain — it may well be worth hiring someone with experience to do this. I was not dealing with tile, just plaster. They tell you what size drill bit to use (a plus), but fail to tell you how deep you need to drill your holes in the wood studs (a major minus). The screws are longer than the drill bit by a good 1/2″ — which means that you will be putting a 3″ long screw into wood without the benefit of a pre-drilled hole at the very end. Where you have to use the most torque to get that screw to advance.
I can see why they specifically say not to put in the screw with a powered screwdriver or drill, you’ll just over-torque and mess up the screw head. What I can’t see is why they don’t provide a drill bit that is appropriate for the screws. I’ve purchased many products over the years that do exactly that, to make sure you use the right size/length.
My hand hurts, and I don’t even have 2 screws fully placed. 🙁
Swapping out Sargent Locks
Continuing the saga of house improvements for my mother…
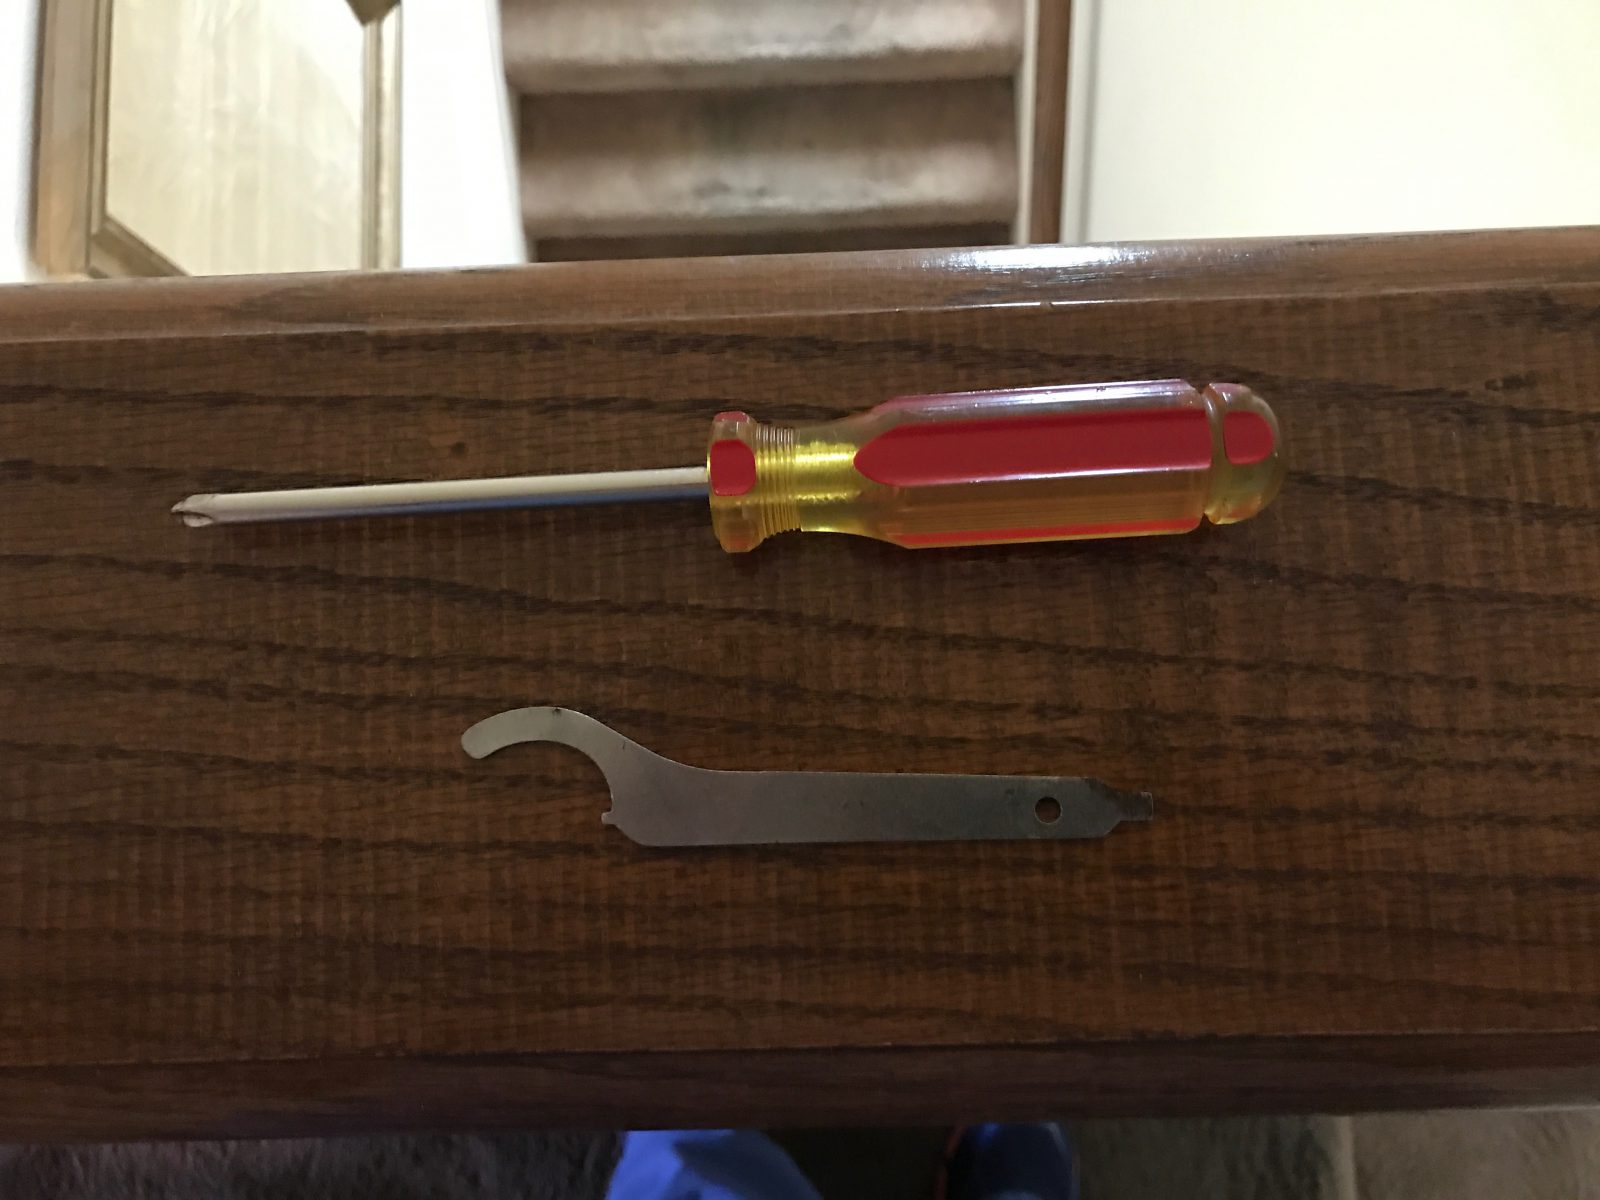
After her fall, we knew that she needed someone in the house with her full time. But she had spread her papers (financial and otherwise) all over the house. I didn’t have time to actually sort and clean it all up, so opted to lock up the rooms until I was able to get to it. When dad built the house in the 1960s, he opted for Sargent locks. They are extremely well made with lots of security features (not surprising, they do high-end commercial locks). But that means that they are not easy to remove.
After some searching, I found this video. But using a vise grip or wrench damages the finish. What other options exist? I remembered a weird tool in dad’s collection, searched a bit on the Sargent Lock website, and realized that I had the necessary wrench. With that and a phillips screwdriver, I was good to go.
Unfortunately, although I wanted to replace these with new Sargent locks, it wasn’t to be. They are only doing commercial sales now, and the couple of local dealers I spoke with weren’t interested in a small sale. It’s too bad, as they have some really cool options for key code (push-button) locks, proximity sensor locks, etc.
I ended up changing out the interior locks on the bedrooms and basement doors to Schlage lever-handles. They’re nice, but mom doesn’t really like them.