Upgrading a ceiling fan – DIY is never that simple
When we first bought the house, we installed a ceiling fan in the kitchen. That fan ended up in my office, and has been really great… but it finally stopped working. Newer devices have options for remote controls, integrate with smart home technology, etc, so it was worth the upgrade.
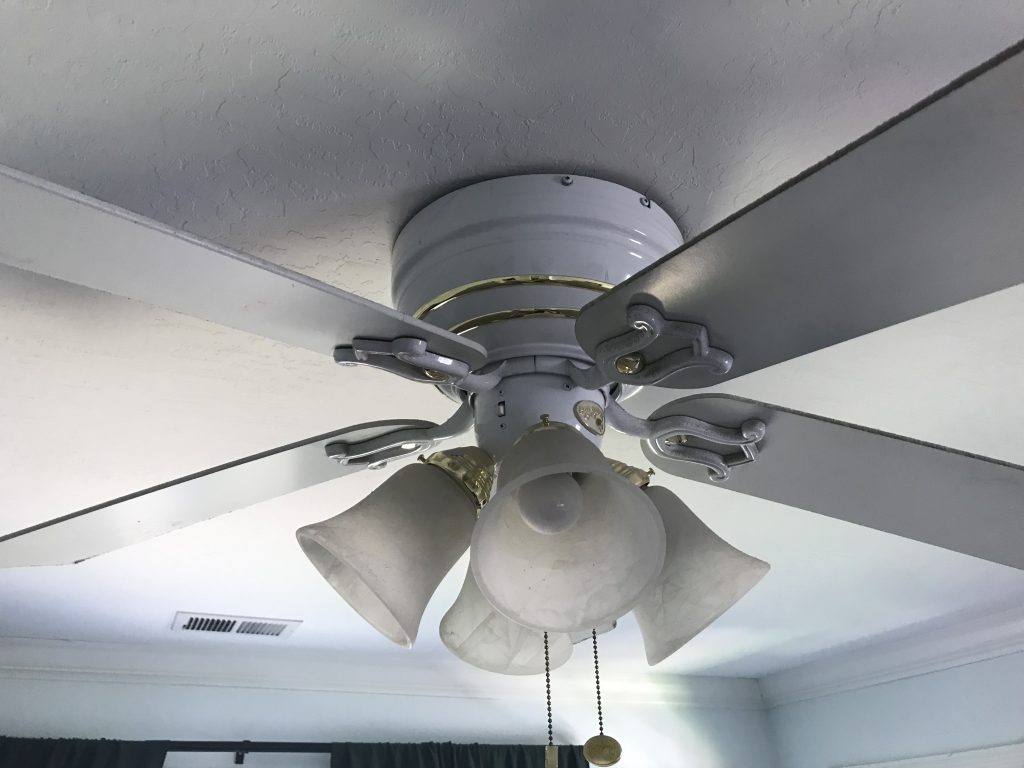
Step 1: Figure out how to disassemble the existing fan and take it down. Of course, we first put it together and hung it up nearly 20 years ago, so we don’t have the manual any more. Total time: 90 minutes.
Step 2-A: Swear at the manufacturer who provides you with 3″ long screws, but doesn’t also provide you with the appropriate size and length drill bit*. Regular drill bits in the 9/64″ size are about 2″ long… which potentially leaves you driving in a full inch of that screw by hand (because a drill driver will just strip the head). All done while on a ladder, and working over your head. We tried, but couldn’t get that last half inch screwed into the joist. Take out the first screw before you totally mess up the Philips head. Use the second screw. Do the same. Decide it’s time to quit for the day, while leaving off the circuit breaker.
Step 2-B: go to Home Depot to get the special 12″ long drill bit, and more screws.
Step 2-C: Bend one screw. Remove it. Break one screw. Shift the bracket location and drill a new pilot hole.
Step 2-D: Return to Home Depot, get more screws. Also get a nifty ratchet screwdriver. Hope that I don’t get blisters on my palm from all of this.
Step 2-E: Finally get the mounting bracket installed. Total time for this first part (not counting dinner and sleep): 6 hours.
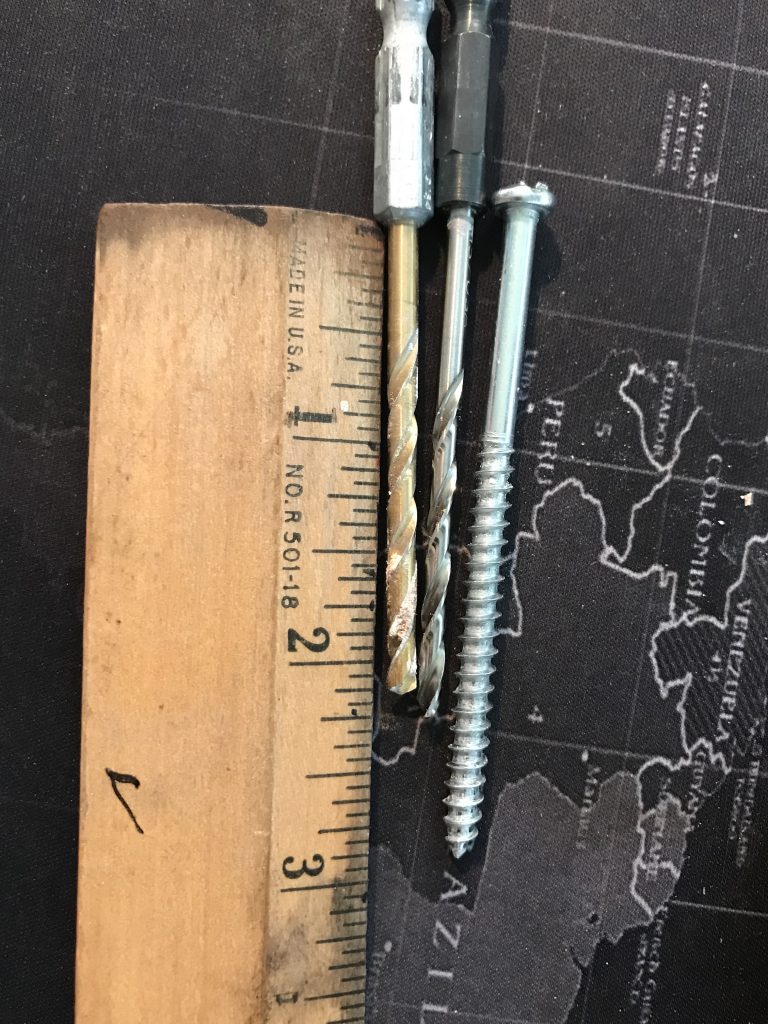
Typical drill bits vs provided screw 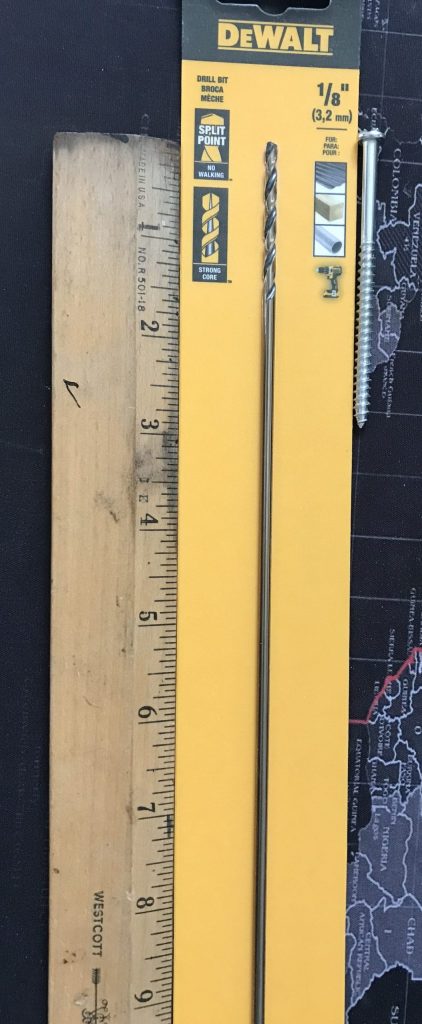
12″ long special drill bit 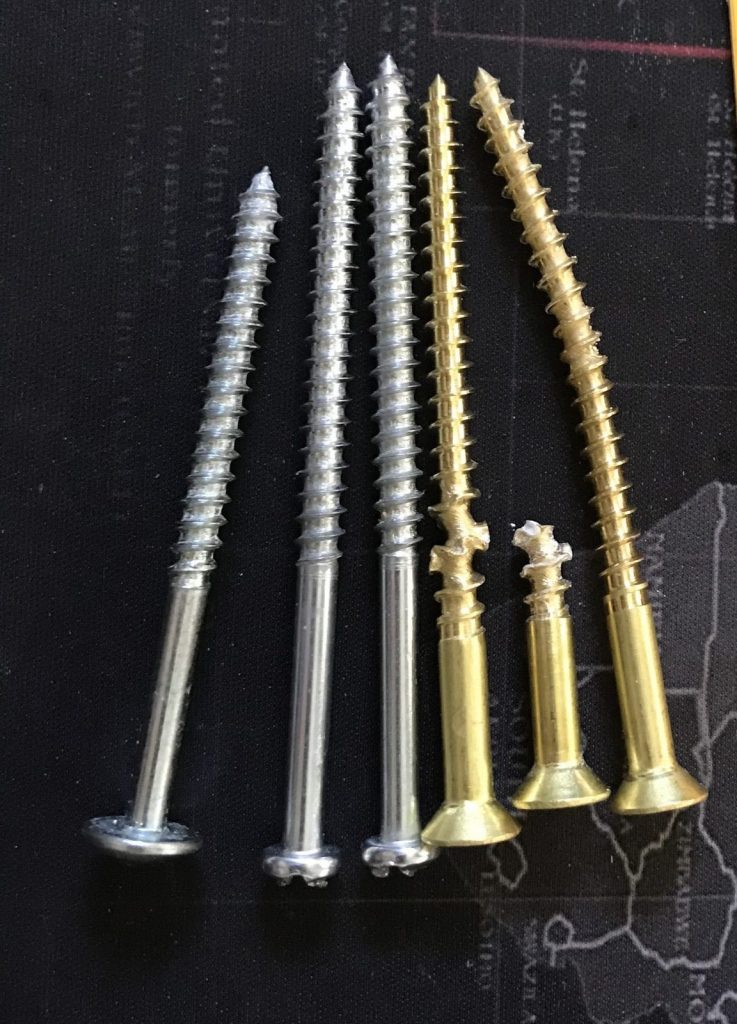
The ones who failed
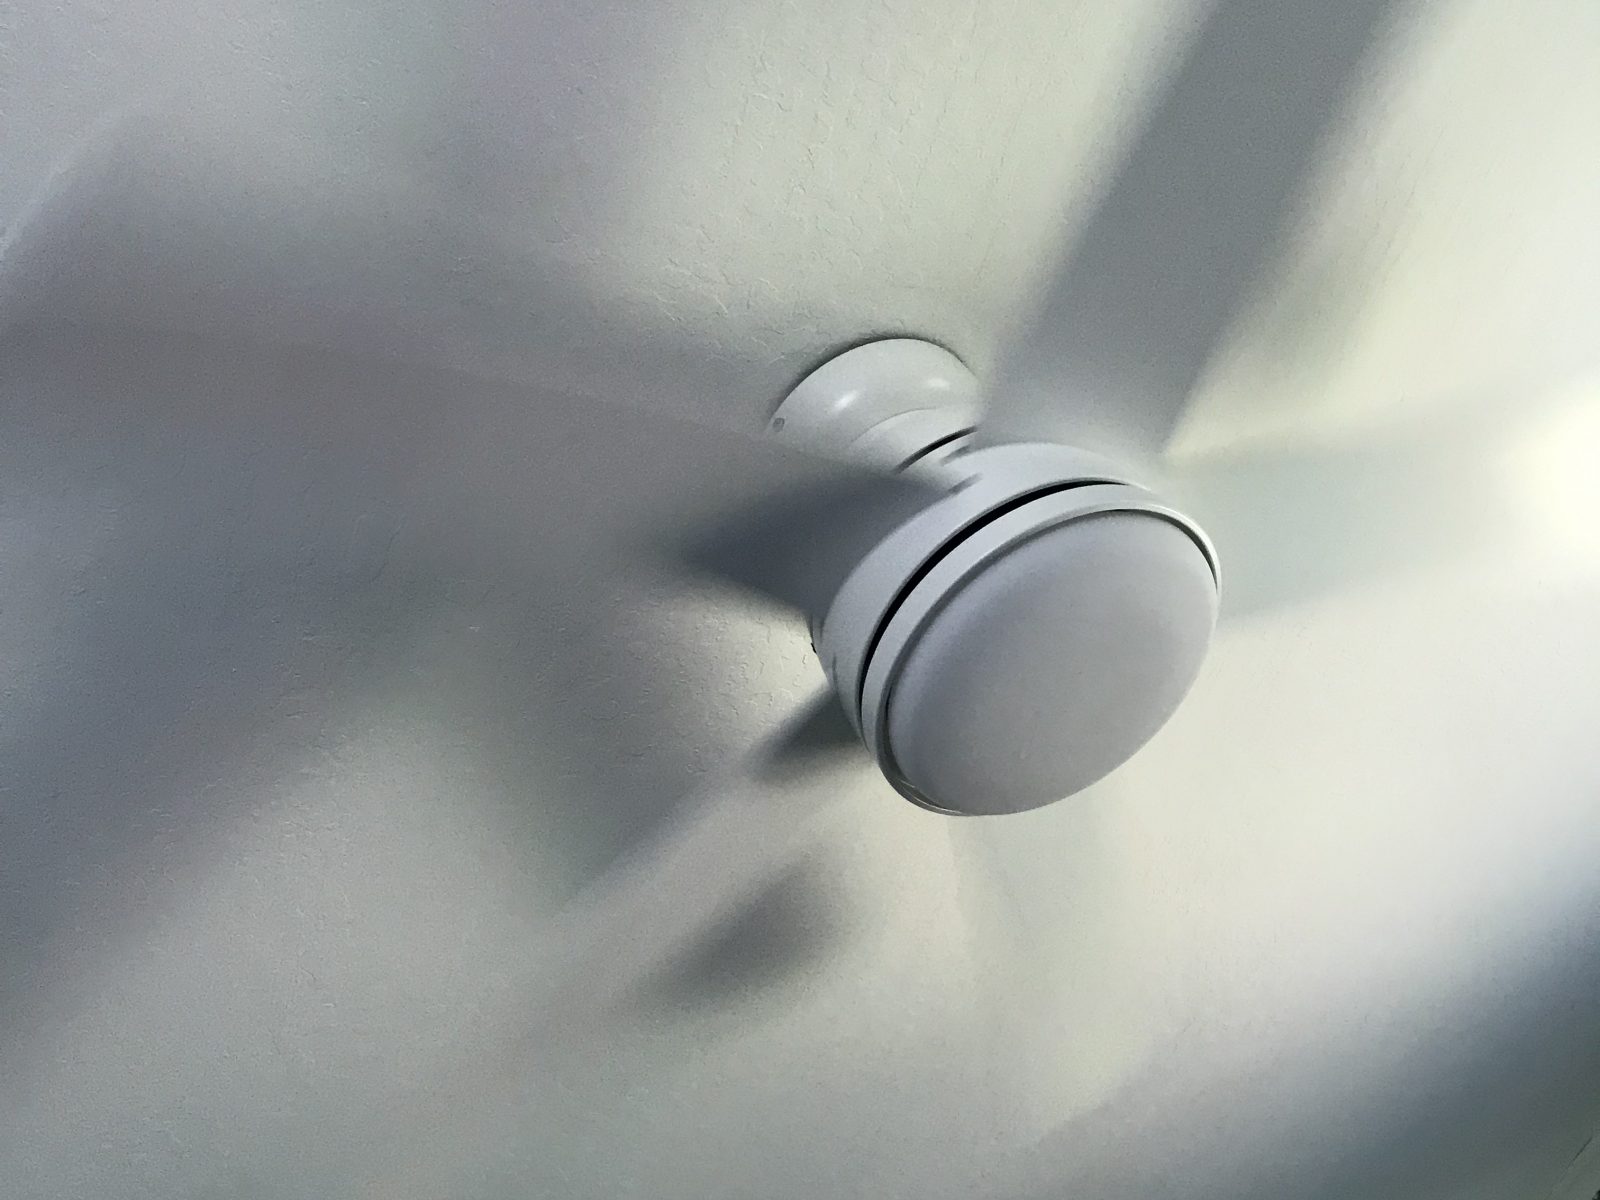
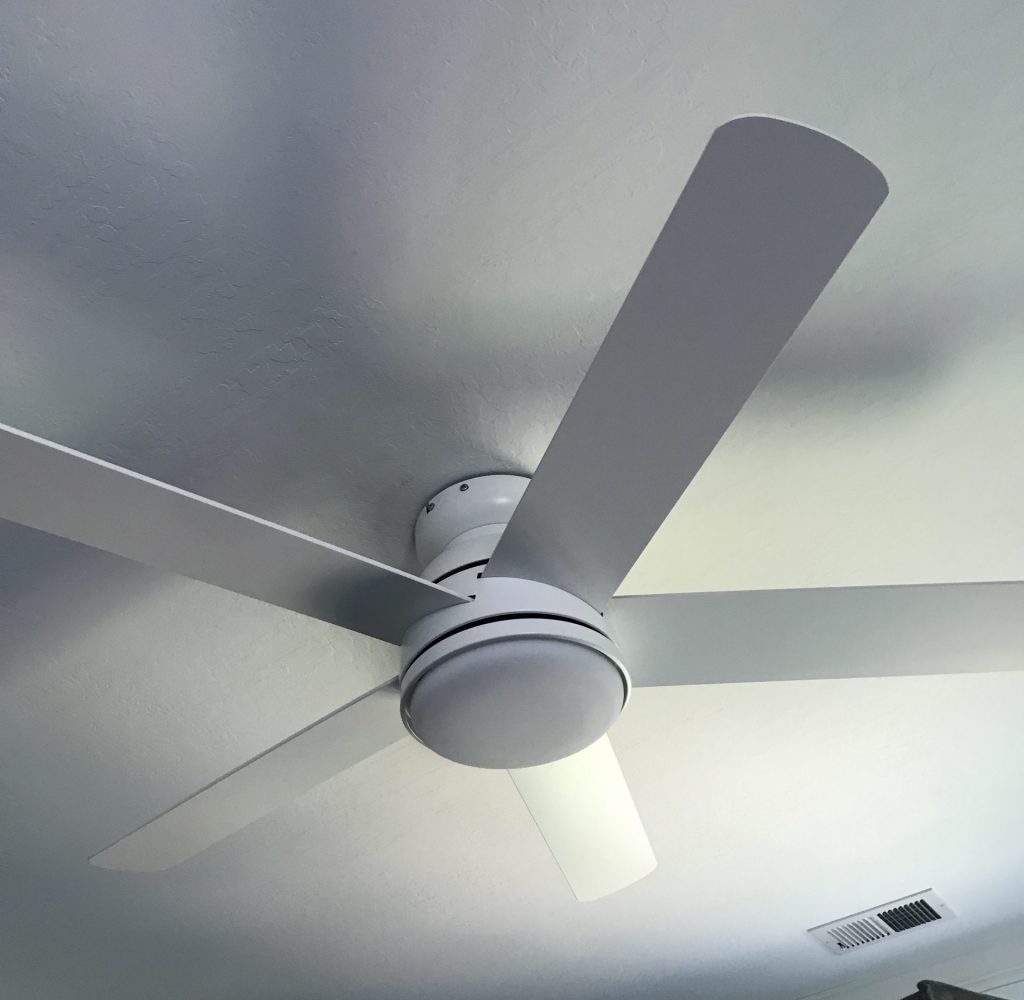
Step 3: Connect the wiring, mount the central unit. It’s heavy, and plan on two people just to get it onto the posts. Everything else is a one-person job. Mounting the blades is a bit fussy, because the alignment is tricky to see when you’re working above your head. Mount the light brackets, light (LED) and glass cover. Total time: 1 hour. Turn on the circuit breaker, turn on the switch, and viola! New fan works like a dream.
Step 4: Setup the app. SIMPLEconnect is not simple. Apparently, many items in the Internet of Things (IOT) only work with 2.4GHz wifi networks. Your phone (or tablet) needs to be using that network for the setup to be completed. Of course, most of our phones nowadays use the 5GHz networks, so the two won’t talk so you can do the setup. You will get an error saying it’s Unable to Pair, and you have “Inadequate Permission” — which of course doesn’t actually tell you what’s wrong.
We had to rename most of our household network to isolate one device that we could force to stay on 2.4GHz, then “forget” the normal network and then rejoin the network, and then we could set up the app. Once it’s setup, however, you can shift everything back to normal.
See also this article: https://pocketables.com/2018/05/how-to-set-up-that-2-4ghz-device-on-your-dual-ghz-network.html
*See also this post: https://www.monty-doyle.com/?p=1240